DIY A Supersized Rolling Tote Storage Unit To Keep Your Garage Organized

We may receive a commission on purchases made from links.
While we've seen countless innovations arise to maximize storage space in the garage, one of the most prevalent DIY solutions today is the tote bin storage rack — and it isn't hard to see why! Totes offer sensible, space-saving organization for all kinds of keepsakes, seasonal items, and odds and ends, and a dedicated slotted storage unit provides optimal accessibility. Rather than removing piled up totes to get to the bin at the bottom, you can easily get to the one you want no matter where it lies in the stack. The storage rack frames are easy to build, and when you know how to source low-priced lumber, they don't have to break the bank.
Adding to the function, Instagram DIYer @homewithhay put a supersized tote storage unit on wheels for easy maneuverability where needed. Smart storage arrangements will save your back by keeping you from lugging the bins around the garage. Say you're going on vacation and have to bring all your beach gear. By keeping the supplies in organized bins on your rolling unit, you can roll it out, load up the car, and get on the road with minimal effort. Benefits like these can extend to virtually any need, from holding sports equipment to managing your array of tools. Whatever your storage situation, this rolling storage unit can bring substantial advantages to any home!
Build a supersized rolling tote rack for smarter portable storage
A tote rack essentially consists of multiple attached ladders with bins hanging between the rungs. Consider the number and size of your totes, and design a storage unit to fit your space. To visualize the setup, check out this simple tutorial from YouTube channel Build It Make It. Measure and cut the vertical supports for each ladder section to accommodate your totes. Add an inch or two for each tote to create space between them as they hang. For instance, if you are stacking three 20-inch-tall totes in each column, you can make the supports roughly 66 inches.
Create each ladder by running 2x4 or 1x4 strips between the front and back vertical supports. Put them on the supports' outside faces to create lips for the totes to hang on. The rungs should be roughly the length of the storage totes. Space the rungs evenly on the supports, leaving extra space for the totes to easily slide in and out without hitting the surrounding bins. With the ladders built, line them up to create the slotted columns. Use an empty tote to help you find the perfect spacing, leaving a little bit of wiggle room for the tote to move without getting wedged. Once they are in place where desired, connect the ladders with headers and footers, screwing them into the ends of the vertical supports to create a single unit. With the frame built, you only have to install your casters for mobility and customize the looks and utility.
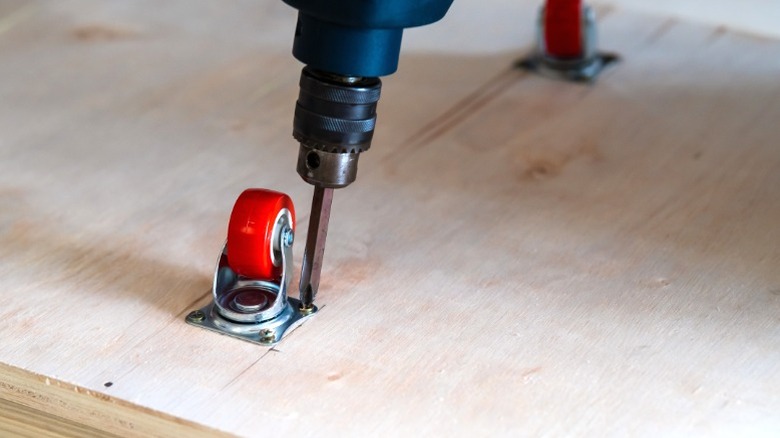
Customize your DIY rolling tote storage unit
A tote storage unit may look simple, but you can tweak your rolling design in several ways to improve its function. Start by adding extra ladder rungs to accommodate different tote sizes. For instance, a tote collection may feature two different sized totes (e.g., 27 gallon and 14 gallon sizes) with similar widths but different heights. By adding extra rungs on your supports, you can increase the flexibility for arranging the various sizes and mix and match different bins without wasting space.
The casters you choose can further impact how you can use your rolling storage unit. For full maneuverability, opt for swivel casters, like these YUPEZOP 4-inch caster wheels. Get a heavy-duty set, such as plate casters, with a high weight rating to handle your supersized storage unit, ensuring they have a locking mechanism. By being able to lock some or all of the wheels, you'll have an easier time removing and replacing the totes on the rack. Alternatively, you can opt for fixed caster wheels. Though they won't give you the versatile movement of swivel casters, they will let you stack shelving units in front of each other to truly maximize your storage space and make the area feel bigger. With one rack on fixed casters directly in front of another, you can easily move it to the side whenever you need to access the rack behind it. You'll save loads of space and create more sensible layouts for a beautifully organized garage.