The DIY That Turns Cheap Cardboard Into An Expensive-Looking End Table
We may receive a commission on purchases made from links.
Seasoned DIYers could likely list off a hundred ways to make a one-of-a-kind side table, but even some of the most experienced may not appreciate just how easy this project can become with the right materials. In fact, it doesn't have to take much more than a few pieces of cardboard! Many of us stay on the lookout for more eco-friendly routes to ditch old materials. Though it's hardly the first option that might come to mind, making cardboard furniture offers yet another way to repurpose boxes after a move or take care of appliance and TV boxes after upgrading. You skip a trip to the recycling center, and your reward is a functional benefit to the space. Perhaps the neatest part, though, is how approachable this unique end table construction is for any DIYer.
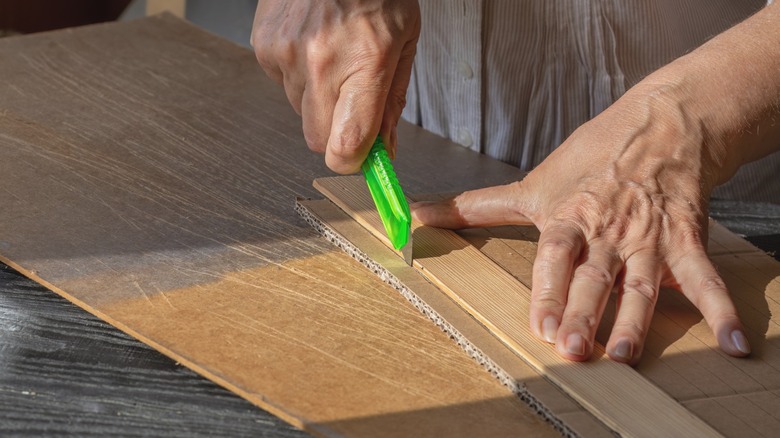
By using cardboard instead of wood boards, you'll trade in the power tools for a simple box cutter and tape. Add in some low-cost contact paper, and you can customize an end table with a look as high-end as you desire. The build is cheap, and minor errors and miscuts are easy to overcome. It's so stress-free that even your kids can try their hand at it! Using thick cuts of cardboard, glue, and some contact paper, you can fashion a sleek, tiered side table in minutes for an elegant elevation to the room's aesthetic.
Tools and materials needed to make a DIY cardboard end table
The only tools you'll need to make this cardboard end table are a tape measure, a utility knife, a pencil, a straight edge (such as a metal square), and a piece of styrofoam or cutting mat. The basic materials include cardboard panels, glue, tape, and a wrap, like contact paper, to give it texture, color, and character. Corrugated cardboard pieces of any kind can work well as long as they are uncreased and undamaged. The more walls (i.e., single-, double-, and triple-walled), the better the stability. But you can also combine pieces to increase their strength. Apply glue to the back of one piece from end to end. Then, firmly hold it in place against another panel until the glue dries, joining them into a thicker panel.
As far as the glue goes, standard white PVA glue like Titebond Original Wood Glue is perfect for combining your cardboard pieces in this DIY. It's cheap, effective, and easy to use and clean up. You can also use a hot glue gun, giving you the benefit of a fast set time to move your project along. Beyond that, your design will determine any extras. Contact paper with wood, stone, and other attractive textures will create that high-end look you want. If you need legs, cut a cardboard tube into equal lengths. Alternatively, you could bend a flat piece of cardboard three times to create rectangular tubes to use as legs.
Crafting a cardboard end table with unique flair
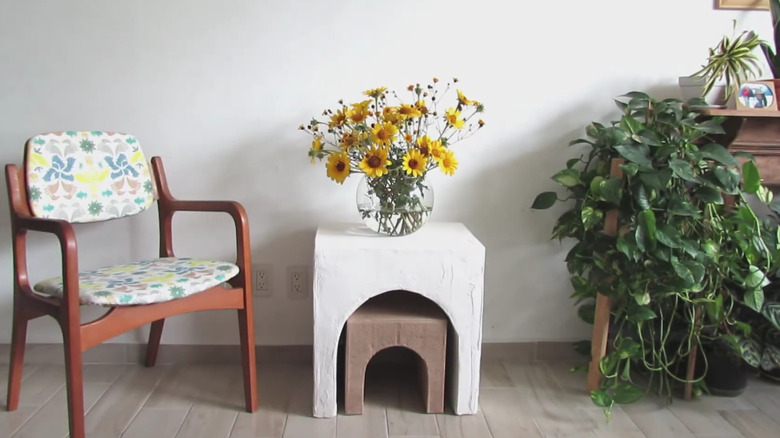
Creating a beautiful storage system using separate flat cardboard panels lets you design the shelving any way you want, but it's not the only way to create cardboard DIYs to add style and decor to your home. Following some approaches, you won't even have to break down your box! A tall, undamaged, and uncollapsed box makes a ready-made base for a sturdy top, letting you assemble a table in only a few easy steps. To increase the base's rigidity and stability and prevent the walls from collapsing, you can put cross-lapped cardboard cross braces and assorted fill, like foam pieces and wads of cardboard, on the inside. Another simpler option would be to flip an open assembled cardboard box upside down. The box's bottom becomes the top, and you can cut different designs on the sides to define the legs. The box will need extra cardboard reinforcement on the inside, but this allows several design possibilities for an eye-catching end table.
The open design can also work when you turn the box on its side, much as you would when making a DIY cardboard box shoe rack stand, for an attractive minimalist build. Thicken the sides, top, and bottom by gluing additional cardboard to them to reinforce the stability for holding books and small decorations. After a covering of contact paper, the look is complete. With so much potential in an ultra-user-friendly medium, this DIY will definitely make you think twice before throwing your old boxes in the recycling.