The 7 Best Ways To Fix Dents On Wood Furniture, Doors, And Floors
We may receive a commission on purchases made from links.
Discovering a dent on a piece of wooden furniture, a wooden door, or your hardwood floors can be frustrating. Wood may be damaged by dropping something heavy onto it or bumping something against it. For wood floors, specifically, high-traffic areas are also more prone to dents. Regardless of the cause, these dents are more than unsightly — they also have the potential to cause other issues. For example, a dent on a table or dresser can prevent items from lying flat, and you could inadvertently trip on a dent on your floor and hurt yourself.
Unfortunately, repairing a dent on hardwood isn't always easy — especially if it is deep. However, there are a few things you may find successful if you work carefully and consider the depth of the dent, the finish on the wood, and what you'll be doing after making the repair (such as leaving the surface alone, or staining or painting over it). Let's dive in.
Use an iron with a damp cloth to fix dents that didn't completely damage the wood's fibers
There is a relatively simple trick that will help get dents out of wood doors, floors, or furniture. All you'll need is an iron, a few drops of water, and a damp cloth. Using these materials, you can steam the imperfection out of the wood. The reason this trick works is because of what happens to the fibers of the wood. When wood is dented, its fibers are crushed. Steaming can help bring these crushed fibers back to the surface, leveling the wood and removing (or significantly decreasing) the dent.
To steam out the dent, add a few drops of water to the well. Then, lay the damp cloth directly over the area and place a hot iron on top of the cloth. Move the iron back and forth over the affected area for several seconds. As it heats the water in the well and on the cloth, steam will form. This hot steam will cause the grain in the wood to rise back towards the surface. Depending on the depth of the dent, you may need to repeat the process or re-dampen the cloth a few times to produce enough steam.
It is important to note that while this approach can help level out a dent, you won't find similar success if you try it on a gouge. While dents are the result of crushed wood fibers, gouges have torn or missing fibers. When these fibers are torn, they won't be able to return into place, even with the hot steam. Because these two blemishes may be difficult to tell apart, if you're having trouble identifying the type of mark on your floor, furniture, or door, it won't hurt to start with this iron method. If it doesn't result in any change to the mark, then you'll likely be dealing with a gouge and will need to try another approach.
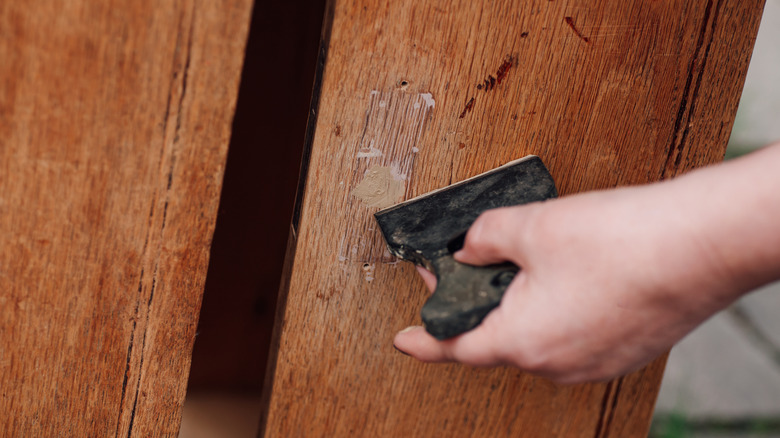
Use wood filler to fill in dents
If steaming didn't release the dent in the floor, another option is to use wood filler. As its name suggests, wood filler is a product that is designed to fill imperfections of wood. Unlike putty, which is made from plastics and other chemical compounds, wood filler is made using real wood particles, along with a binder. Products like the Gorilla All Purpose Wood Filler are relatively quick and easy to work with and can help you re-level the surface of your floor, door, or piece of furniture. Soon that floor, door, or IKEA furniture will be repaired so it's as good as new.
While using wood filler is not overly complex, there are a few important steps to follow if you want to ensure a smooth finished product. Starting with a clean surface, put some filler on your finger and use your finger to fill the area. Spread the compound in different directions to ensure there are no air holes. You should also overfill the well, so that some of the filler rises past the surface. Use a plastic putty knife, such as the Red Devil Plastic Knife Set, to smooth out the filler as much as possible. Once dry, you can further smooth out the surface with some fine-grit sandpaper and a mini sander, if needed.(Here are some of the cheapest mini sanders at Home Depot.)
One potential issue with filler is that it could be difficult to color match, so it may be better suited for wood that you plan to repaint or refinish, such as furniture or a door. (And we have tons of tips for repainting your furniture like a pro.) If you're using it where repainting isn't on the agenda, like with flooring, you can also experiment with color matching by mixing a bit of stain into the filler before applying it to the dent.
Use a heat gun if you want to work faster
As mentioned earlier, you can use an iron, water, and a damp cloth to release the crushed fibers in a dent, causing them to return to the surface for a much less-noticeable imperfection. The only problem is that the process can be a bit time-consuming. Before the iron and the damp cloth will be able to start producing any steam, you'll have to wait some time for the moistened fabric to get hot enough. If you want to complete the repair a bit faster, consider using a heat gun instead. While the maximum temperature setting on an iron is generally in the 400 degrees Fahrenheit range, heat guns can get as hot as 1,000 degrees Fahrenheit.
If you have a heat gun, or purchase one like the BLACK+DECKER Heat Gun, you'll still want to moisten the wood before starting. Moisture is key to releasing the fibers in the dent in order to re-level it. However, with a heat gun, you won't want to place a damp cloth over the affected area. Instead, point the heat gun at the wood — far enough away to avoid accidentally burning the surface — and wait for the dents to level back out. As the heat starts drying the moistened wood, it is important that you add more water to ensure it stays wet. With the higher heat from the heat gun, you should see the dents rise to the surface more quickly than with the iron method.
Fill the dent with wood putty
Wood putty, like the Minwax Wood Putty, can also be used to help you fill certain types of dents. While many assume that wood putty and wood filler are the same, they are actually distinct materials. As mentioned earlier, wood filler is made with real wood fibers and a binding agent. Wood putty, on the other hand, is a mixture of oil-based ingredients and plastics. The properties of wood putty can make it a better choice for filing certain types of dents. First, if the dented item is exposed to temperature fluctuations, wood putty will be the better choice. Unlike wood filler, wood putty remains pliable even when dry. This means that as the wood expands or contracts with temperature changes, the putty will simply expand or contract with it. Wood filler, on the other hand, hardens fully, so if the wood changes due to the temperature fluctuations, it can crack. Though, do note that wood putty is often not waterproof, so ensure the formula you use is suited for your specific needs.
Wood putty is also easier to tint before applying it to a surface (and is often available in a range of color options). This can make it a more suitable choice if the wood you are repairing is already finished, as you'll be better able to match the color. However, if the dent is in a piece of unfinished wood, you're better off using wood filler. Wood putty doesn't always bond with unfinished wood.
The process of filling a dent with wood putty will be similar to that of using wood filler. Apply the putty to the dent, smooth it out using a putty knife, and wait for it to dry. While you can attempt to paint over the putty, the paint may not stick as well as it would to wood filler. Sanding is also not recommended with putty.
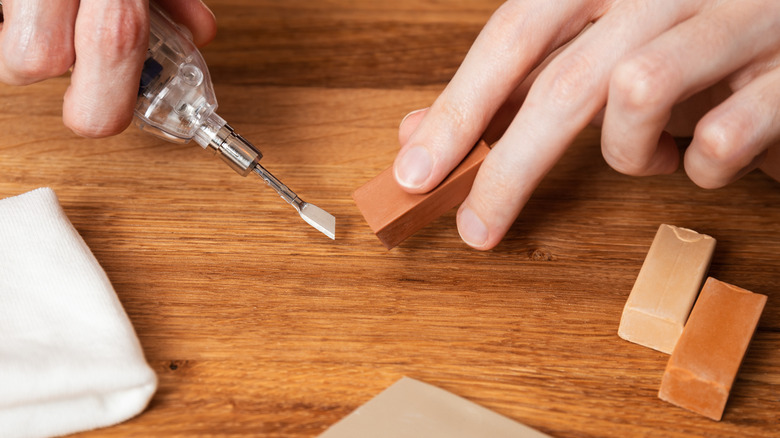
Try hard wax and a soldering kit to fill in dents
Hard wax fill sticks can help you fill in dents in your wood floors, doors, or furniture pieces. Heating up the wax makes it malleable, allowing you to fill in the dents. As it cools, the wax hardens, creating a solid repair. The material is even hard enough if you want to paint or stain the area. When filling dents with hard wax sticks — also called burn-in sticks — you can either try to match the color of the wood or opt for a clear option. Clear wax may be best for shallow dents, while one that more closely matches the color of the wood could better conceal deeper dents.
Hard wax fill sticks are not overly complicated to work with. However, you need to have the right materials and be careful to avoid accidentally burning yourself. You'll need a burn-in knife (such as the Mohawk Finishing Products Burn-In Knife) or a soldering kit (like the Q-MING Soldering Iron Kit) to melt the wax and fill the dent. Heat up the knife or soldering iron, and use the hot tip to remove enough wax from the stick to fill in the dent. Run the wax across the dent to fill it in entirely and level it out. Be sure to let the wax dry fully before using a scraper to level the surface. If the wax isn't dry, you could inadvertently remove some from the space you filled.
Burn denatured alcohol to raise dents on wood surfaces
If you have denatured alcohol on hand, you can use it, along with a flame, to raise minor dents on wooden surfaces. Burning the denatured alcohol will heat and "steam" the wood, slowly cause the indentation to lift towards the surface, eventually leveling things back out. Before we get into the steps for this method, a word of caution: Denatured alcohol is flammable. As you're going to be using a flame with this method, be sure to work carefully and only attempt to do so if you're comfortable.
Using denatured alcohol is a relatively simple process. You'll only need to add one drop at a time to the affected area of the wood. Then, use a lighter to set it on fire. The flame should disappear quickly — and may not even be visible. This process will lift the wood up ever so slightly. You'll need to repeat the steps of adding a drop of denatured alcohol to the dent and lighting it on fire until it is level with the surface. The location of the imperfection can also impact how quick the process will take. For example, dents on the end grain may take longer to raise. Because of this, this isn't the most convenient (or quickest) solution, but can work in a pinch if you don't have an iron, heat gun, or filler handy.
Replace the affected flooring boards for deep dents that don't respond to other approaches
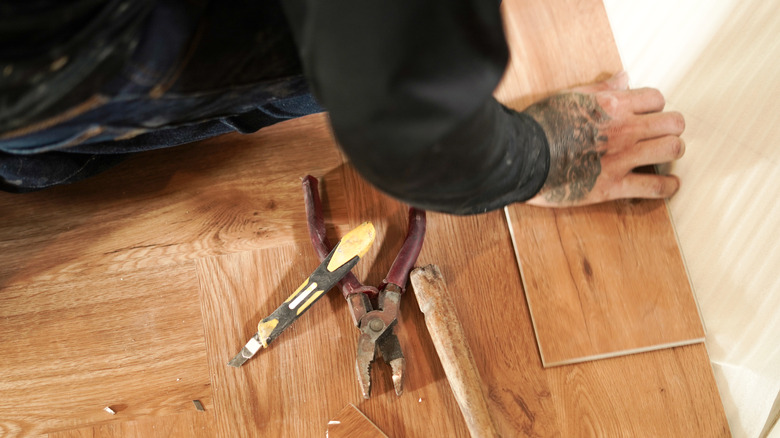
Despite your best efforts, you may not be able to fix every dent, particularly if it is very deep. If the dent is on your hardwood floors, you could consider replacing only the affected floor boards to eliminate the problem. While still suitable for a DIYer, this is a more involved project. So, depending on your comfort and skill level, you might want to consider hiring a professional to complete the job.
If you're going to replace the board on your own, make sure you have the right material. If you don't have extra wood left over from your existing floor, choose a piece that has an identical width. Stain or paint it to match the rest of the floor, if necessary. Next, use a track saw, such as the WEN 7.25-inch Variable Speed Track Saw, to cut out the affected board. Before cutting, adjust the depth setting to match the replacement board. Cut the tongue side of the board first. Then, cut the opposite side of the board before making a diagonal cut between the two corners. Use a chisel and a mallet to loosen the corners and remove all the pieces of the affected plank.
Before adding the replacement board, make sure the subfloor is cleaned and remove any of the old underlayment. You'll then need to cut the new board to match the size of the opening and ensure that it fits perfectly and lays flush with the rest of the floor. Finally, glue and/or nail the wood into place.