Turn A Dollar Tree Plunger Into A Cute Rustic Shelf To Display Your Coffee Mugs
We may receive a commission on purchases made from links.
When you enter your kitchen in the morning, one of the first things you're probably grabbing is a mug for your coffee or tea. Since you're likely using these cups on a daily basis, it's nice to have them in a convenient, easily-accessible location. However, keeping them on the countertop will only create clutter and make your cook space smaller. Instead of leaving your mugs out near the coffee machine or tucked away in a crowded cabinet, you might want to consider building them a brand new home that's up on the wall. As it just so happens, you can put together a neat coffee mug shelf with just a block of wood, a couple shelf brackets, and a plunger from Dollar Tree. Yes, you read that right — a plunger. This fixture is simple, budget-friendly, and surprisingly chic. Plus, it's a great foundation for a creative home coffee bar, which could also be a fantastic addition to your space.
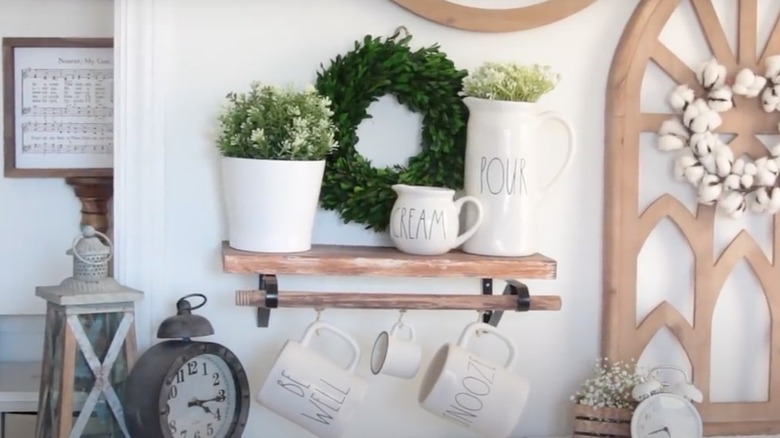
Interested in taking a closer look at how you can create this coffee mug shelf for your kitchen? Well, the setup is quite simple. The wooden handle of a Dollar Tree Thermoplastic Toilet Plunger sits right below the main shelf and is anchored in place by the loops of the shelf brackets. BargainBethany on YouTube twisted her mug hooks directly into the handle after painting it to match the wooden shelf above. The end result of her work is a fixture with a rustic yet modern farmhouse style.
How to build a budget-friendly coffee mug shelf
To begin this project, you'll need a sturdy wood block that can serve as the main shelf, a pair of brackets with loops, and a dowel rod or the wooden handle of a Dollar Tree plunger. You'll also need a small container of wood stain in order to make the rod and the shelf match, plus a pack of gold metal hooks. Ensure the hooks are big enough to hold your mug's handles. A half-pint of Varathane Dark Walnut Wood Stain is a great choice if you like the rustic vibes of BargainBethany's project. Alternatively, you can paint the handle piece to match the shelf's color. Don't forget to find your wall studs when you're selecting a location for this fixture, since attaching the shelf to them will guarantee a more secure attachment and help you avoid drilling into your plumbing.
The first step in assembling your shelf is to pre-drill holes into your wooden dowel rod or plunger handle where you're going to add the hooks. Then, gently sand down your primary shelf piece and add a layer of stain to both the rod and the shelf. While you're waiting for everything to dry, you can put the brackets up on your wall with the help of a level and stud finder. Next, twist the hooks into your dowel rod or plunger handle. Finally, affix the shelf to the brackets, and slot the rod or handle into place along the bottom loops of the brackets.
Upgrading your new DIY mug shelf
Some creative decorations for your new coffee mug shelf are a sure way to make it more eye-catching. Add a touch of green with house plants, as BargainBethany on YouTube did, or spruce things up with some candles or a framed art piece. Alternatively, you could use the open shelf space for small cookbooks. If you're interested in turning the installation into a full coffee bar, put transparent containers on the top for things like sugar or Keurig cups. Chef's Path Airtight Storage Boxes are an excellent choice since they look neat and come with reusable labels. A small coffee press would also add a luxurious yet practical touch.
If you're concerned about the rod not staying in a centered position, try applying a thin layer of Gorilla Original Glue or a similar product from a different brand where it meets the bracket. Don't like the look of the threads on one end of the plunger handle? You could shorten the handle enough to cut them away. Consider using a miter box to ensure that the cut edge stays perfectly straight. Another option for getting rid of the handle's threads is to fill them in with wood putty, sand them down thoroughly, and repaint them. One end will look slightly more narrow than the other, but it should be less obvious that the rod was originally a plunger handle.