Helpful Tips And Tricks For Painting Solid Wood Cabinets
We may receive a commission on purchases made from links.
Installing new cabinets is expensive. So, if you're renovating on a budget, you may be able to update your current ones instead. While there are plenty of hacks to completely transform cabinets, one of the tried-and-true ways to revamp them is with a coat of quality paint. A new hue can completely change up the look of a room, and it's a relatively easy DIY project to take on.
Painting your cabinets is a time-consuming task, so you want to do it properly the first time. Whether in the kitchen or bathroom, a good paint job will set you up with a finish that looks nice, is easy to clean, and resists chips and scuffing. We've included tricks for various steps of the painting process, from prepping your kitchen cabinets before painting to creating a smooth finish. So, use these helpful tips to give your wood cabinets an impressive makeover.
Lay your cabinet doors flat when spray painting if you're worried about drips and runs
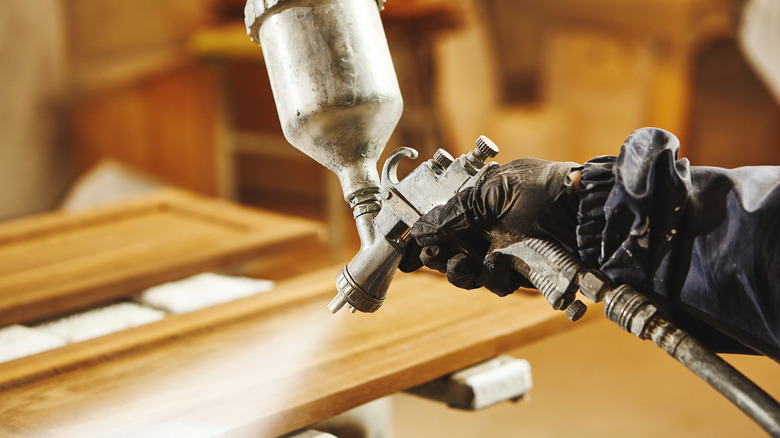
It's easy to find directions for painting cabinets with a brush or roller, but have you considered spray painting instead? It's a faster way to do the job and can also provide a nicer, professional-looking finish, though it does require a paint sprayer. A model like the MaXpray M1 Airless Paint Sprayer is a versatile choice that comes with attachments for different uses. So, it can be worth the cost, especially if you'll also use it for other projects. While a paint sprayer is easy to use, prep and technique really matter, and you'll want to avoid some common mistakes when spray painting kitchen cabinets.
While some DIYers like to hang the doors to spray paint them (and we explain this method ahead), there are also a few reasons to lay them flat instead. If you accidentally spray on a little too much paint or if you're using paint that doesn't tolerate hanging well, laying the doors flat can help prevent drips and running paint. Some painters also find it easier to paint a horizontal surface.
Ultimately, whether you choose to paint flat or hang the doors up, it comes down to personal preference. Before committing, you can give both methods a try using a scrap piece of wood. To get an even coat, use an overlapping method. To do this properly, spray in a consistent and even motion in one direction (either horizontally or vertically), overlapping the spray coverage by about 50% on each pass.
Create a dedicated work area

Repainting cabinets is a big job. You'll need to take down all the doors and drawers and find a safe place to put them while they dry. It can take days (even up to a month!) for your painted cabinets to completely dry and cure. Plus, you'll need to apply multiple layers with drying time in between. It's very important to have an out-of-the-way spot to keep the doors and drawers before you can reinstall them.
Ideally, the painting and drying spot should be low-traffic. You don't want to bump into the doors while they're sitting. A covered location is ideal since you don't want to risk rain damage on freshly painted surfaces. A garage, basement, or even a covered porch are good options, as long as they are well-ventilated.
You also need to protect the areas around where you are painting. This can involve covering surfaces like tabletops, counters, and the floor with painter's tape and plastic sheets. You'll tend to have more control over the paint with a brush or roller than with a paint sprayer. So if you're using the latter, cover all potential spray-off areas. An overspray tent, like the Wagner Studio Spray Tent, can help to keep splatters contained.
Etch numbers into each door to keep track of where it goes
Once cabinet doors, drawers, and hardware are taken down, it can be very difficult to keep track of what goes where. That's why it's important to label everything before or during the disassembly process. A common tip is to label each door with painter's tape. However, you'll need to remove the painter's tape to paint the door, leaving you without a label.
Instead, use a numerical system and etch each number on a hidden spot in the cabinet doors with a tool like Ryobi's 1.2 Amp Rotary Tool. This DIYer created a key and etched the corresponding number into each door in a spot that's covered by the hinge. Once painted, you should still be able to make out the number, but it won't be noticeable when the hardware is installed. Instead of writing the guide on a separate sheet, you could also use painter's tape to label the corresponding number inside the cabinet frames. Or, if you do write your key on a piece of paper, make sure to take a picture with your phone in case it goes missing during your project.
Use a coat hanger to hold cabinet doors while spray painting them
Some DIYers prefer to spray paint their cabinet doors while they're hanging. This space-saving setup allows you to rotate the door or walk around it to paint the entire thing at once, without needing to wait for one side to dry. However, you do run the risk of the paint dripping, so if you're new to using a sprayer, you might want to practice on an upright piece of wood first. Then, use small cup hooks, like the Goiio 1/2 inch Ceiling Hooks, and screw them into one side of the door. Find a spot that's not easily visible (like along the top edge of upper cabinets or the bottom edge of lower cabinets). Then, hang them from the hooks on a sturdy coat hanger.
When creating this setup, you need to make sure the hooks and hangers are sturdy enough to support the weight of the cabinet door for hours or even days as it dries. If the doors fall, you risk ruining the paint job, or worse, cracking the wood. For a damage-free alternative, you can use a product like the Sure-Hook 360 Universal Painting Rack Tools. These hooks fit into the hinge opening of some doors, so you can hang them without drilling into the wood.
Just as important as making sure the drying doors don't fall is making sure they don't bump into each other. It can save a lot of space to dry cabinet doors on a rack since they're hanging vertically. However, to create a buffer between them, use this pool noodle hack for spray painting cabinet doors. Cut and place small sections of pool noodles between the hanging doors so they can't slide along the rail and hit each other.
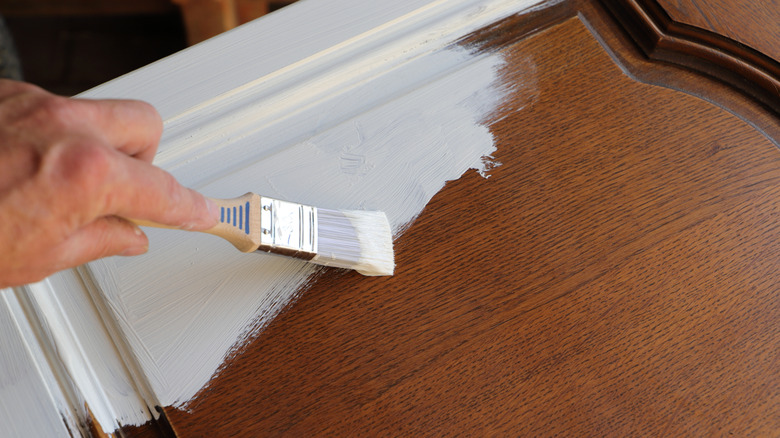
Brush and roll for a spray paint-like finish
Spray painting just isn't possible for some DIYers. But you can still get a smooth finish with this tip. It's helpful to have both a high-quality brush and roller on deck for hand-painting cabinets. Generally, a brush can help you get into nooks and fill in details, while a roller can help you cover larger surfaces quickly. Plus, the two can combine for a finish that compares to spray painting, which is known for its very smooth look.
Brushes and rollers can leave marks behind, and with either, it's possible to lay down too much paint. So, after you've covered the surface with a brush, use a dry foam roller to do a once-over. It can smooth over marks, pick up any excess paint, and spread out drips or runs. Use light pressure so you aren't moving the paint around, just creating a smoother finish.
Strain your paint
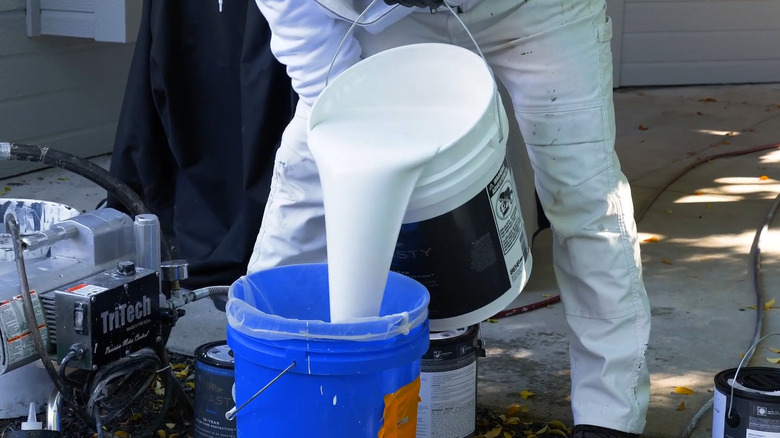
Straining your paint is important to avoid a clogged paint sprayer. It's a prudent step prior to painting cabinets, too. Straining ensures that any debris, whether it's bits from manufacturing or any dried paint, is removed before you start painting. Even a small particle can ruin a cabinet's smooth finish.
You can buy paint strainers that have a very fine mesh. One example is the HDX 5-gallon Elastic Top Strainer, which has an elastic top that fits over a bucket. This is a good option for straining large volumes of paint. Another option is the TCP Global Nylon Mesh Paint Strainer, which is more compact and suitable for smaller amounts of paint. If you plan to do a lot of painting and want a more eco-friendly reusable alternative, the Fine Mesh Paint Strainer is made of stainless steel and is reusable.
Use a cake turntable to easily reach each side of cabinet doors
This DIY uses a cake turntable as the base of a contraption for painting cabinet doors. A cake turntable is inexpensive — for example, you can grab the Kootek Rotating Cake Stand for under $15. If you use one you already have on hand, just keep in mind that you won't want to use it for baking after since there will likely be paint residue. You can also use an old lazy Susan or turntable organizer.
Attach a long wooden paint stick (or any stick long enough) so you can turn the turntable while your cabinet door is on top. This hack allows you to hit all sides of the door while painting without needing to walk around it. While this video recommends the turntable for spray painting, you can use it for brush or roller painting, too. It just allows you to do the job more efficiently without moving around the work surface.
Use liquid sandpaper for less mess or to get into finicky spots
Using sandpaper is the traditional and professional-recommended way to rough up a cabinet's surface before painting. However, it is possible to paint cabinets without sanding with the help of liquid sandpaper. Also called deglosser, this chemical removes the shiny layer from cabinet surfaces and creates a rougher texture that allows the paint to stick. It's possible to get a good paint result using only liquid sandpaper in some cases, particularly on cabinets that are in good condition. In fact, some DIYers have good experience using a product like Klean-Strip Easy Liquid Sander to prep cabinets.
You can also combine both regular and liquid sandpaper. During an exclusive interview with House Digest on ways you can approach kitchen cabinet refinishing, our expert, Paige NeJame, explains, "I'm not a big fan of using liquid sandpaper because it can be tricky to use. However, it can supplement regular sanding in situations where sandpaper can't reach, such as nooks and crannies, ornate pieces or cabinets with a lot of molding, and hard-to-reach corners." In short, regular sandpaper requires more elbow grease but is the tried-and-true, effective method. However, the liquid version has its own specific applications.
Use pre-taped painter's plastic sheeting to speed up prep work
Part of prep work is to cover any surfaces that you don't want to accidentally get paint on. If you're spray painting, this step is all the more important, and you'll essentially want to cover every surface except the cabinets. Working with plastic sheets and tape can be a hassle though. Instead, a combination product like 3M ScotchBlue Pre-Taped Painter's Plastic Sheeting, can help streamline the process.
This type of product already has the tape attached to the sheeting and comes with a dispenser too. So, you can stick the tape on your surface and then spread the attached plastic sheet over the area that you're protecting. Just pay attention to the measurements. Premade products may not be the right size to cover certain areas. For example, the 3M ScotchBlue Pre-Taped Plastic Sheeting measures 30 yards but only 24 inches wide. It's easy to cut to size, so it's great for smaller areas, like countertops and inside cabinets before spray painting. But, you'll likely need to use regular plastic sheeting or drop cloths for larger areas. A product like the Ecotez Extra Large Painter's Plastic Drop Cloth, which measures 12 feet by 9 feet is better-suited for covering things like floors and appliances.
Leaving your cabinet doors on isn't off-limits if you're doing a temporary refresh
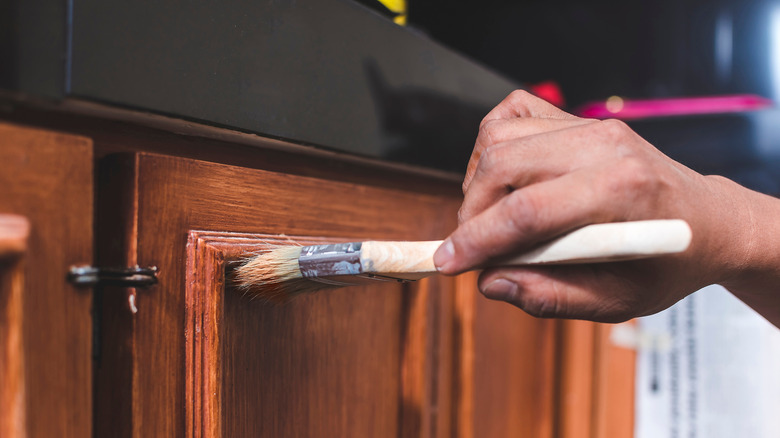
If you want the best results, you should remove your cabinet doors before painting as it allows for better coverage and fewer mistakes. However, it's technically possible to paint your cabinets without removing the doors. This shortcut way will work just fine for some DIYers that don't have a dedicated area to get the project done, or who would like to do a short-term color update while planning a full kitchen reno.
To paint cabinets as-is, good protection prep and a steady hand are needed to prevent you from getting paint where you don't want it. You'll want to carefully tape off and cover any possible surface that you don't want to accidentally drip or spray on. Remove handles and knobs (it's an easy step that is well worth it) and cover hinges with painter's tape.
One major benefit of leaving cabinet doors on is that you don't need to set aside an area for all the pieces to dry. But you do need to be very, very careful in the kitchen while the paint cures. Keep in mind that doors may feel dry to the touch after a few hours, but may take days or weeks to fully cure and become damage-resistant. So, you'll want to touch the doors as sparingly as possible during this time.