The Slim Decorative Vase You Can Make Using Dollar Tree Trays And Hot Glue

We may receive a commission on purchases made from links.
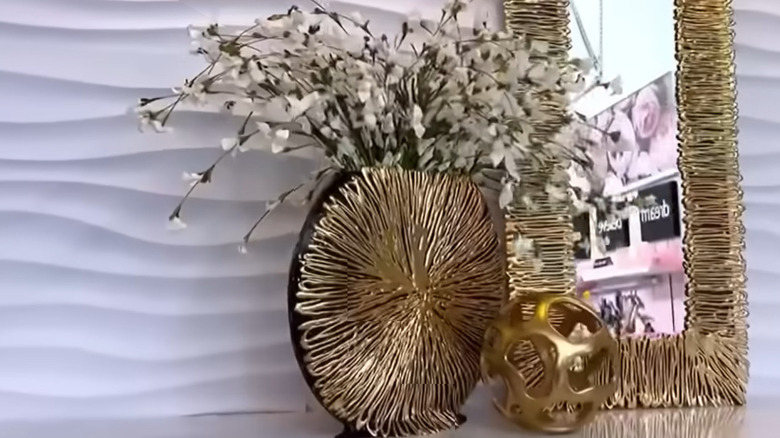
If you love glam DIY decor, you may have heard about creator Yoduvh Essentials on YouTube, the queen of making blingy decorations with Dollar Tree items. One of her creations is a tall, disc-shaped vase made from two large plastic trays. She saves some bucks on a decorative accent by crafting starbursts with hot glue, covered with her signature gold paint. Her final product is a statuesque vase adorned with her gilded glue designs that set her back a mere $2.50. Make your own decor piece by copying her plans to the letter, or use this idea as a starting point for your unique vision.
The two trays have raised edges that, when attached with their tops facing each other, leave a hollow vase-like vessel. Cutting away two parts of each tray makes both a top opening and a flat space to glue the cut pieces on as a base.
To make this thin vase, purchase two Large Round Crystal-Cut Plastic Trays, parchment paper, and a pack of floral stones from Dollar Tree; the stones will add necessary weight to the base of the vase to help it stay upright. From your favorite DIY outlet, pick up some plastic-friendly spray paint, plenty of glue sticks, and a heavy duty adhesive like E6000, a glue that you should keep in your home. As for tools, gather up a soldering iron, a marker, a ruler, hot glue gun, and a popsicle stick to help scoop away excess glue.
Prep your pieces
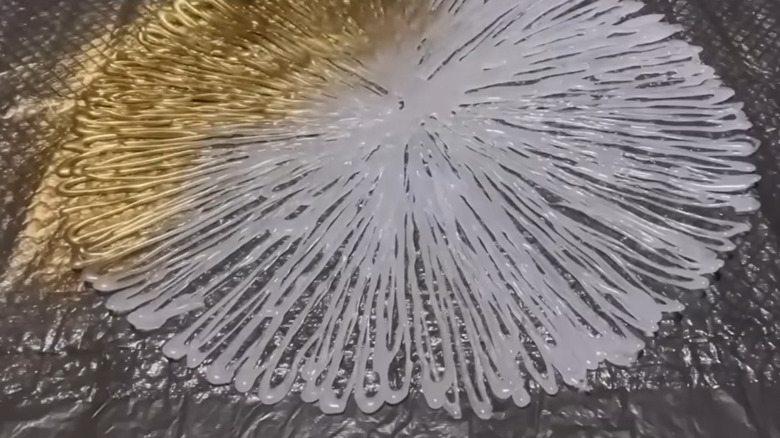
Unroll some parchment paper and tape the edges to your work surface. Trace the tray's circumference onto the paper, and draw two lines across the circle dividing the shape into even quadrants. Starting at the very center, make lines of hot glue that reach the circle's edge. Use the quadrants to help create even concentrations of glue. Make the lines thick and close enough together so that all of the pieces will fuse into one form. You'll make two of these. If your hand is cramping just thinking of this task, purchase some inexpensive round placemats instead like these Cididu Gold Round Placemats. Their thin vinyl will make it easy to cut away excess material.
To create the opening for the vase, on each tray, draw a straight line along the edge between two points on their lip that leaves about a 1-inch gap between the lip and the line at the widest point. At the exact opposite point on the tray's lip, draw a similar line that leaves a gap about twice the thickness of the first line at the widest point. This will act as the base.
YouTuber Yoduvh Essentials avoids chipping or cracking her trays by "cutting" them with the soldering iron. Along the two lines you made on each tray, melt the plastic from one edge to the other. Once your two trays have both thick and thin pieces removed, place the two trays so that the raised edges touch each other and the cut openings match up. Melt away more plastic with the soldering iron if the openings on your two pieces are uneven.
Assemble and accessorize
With E6000, bind the edges of the two trays together. Top it with a couple of dots of hot glue to hold them in place while the heavier glue dries. While the glue does its magic, spray paint your hot glue designs. Metallic gold looks ultra luxe, but other colors work as well. Go for earth tones like 2025's Pantone color of the year, Mocha Mousse, if your space has more of a rustic vibe. For fans of bright and bold color trends, top your decoration with an eye-catching color. Add an extra level of awesome to your project by painting the vase itself.
Once you're confident that the two trays have bonded (E6000's bond is strongest after 24 to 72 hours), use the soldering iron to melt together the two larger of the cut pieces from the trays. Place them with their pointed edges touching to make an oval shape. Touch the soldering iron to the two pieces' contact points until the edges of the two pieces are fused. Using both heavy-duty and hot glue, attach the base to the larger opening on the vase.
At this point, either spray paint the vase itself before adhering the decoration or leave it clear. Glue the decorations to each side of the vase, and trim the bit that overhangs the vase's opening. Use some extra glue to attach the overlapping bit of the hot glue decoration to the base. Continue gluing the loose ends of the glue design or placemat around the curved edges of the vase. Finally, place some floral stones in the vase before adding flowers.