How To Transform Dollar Tree Toys Into Expensive-Looking Bookends On A Budget

We may receive a commission on purchases made from links.
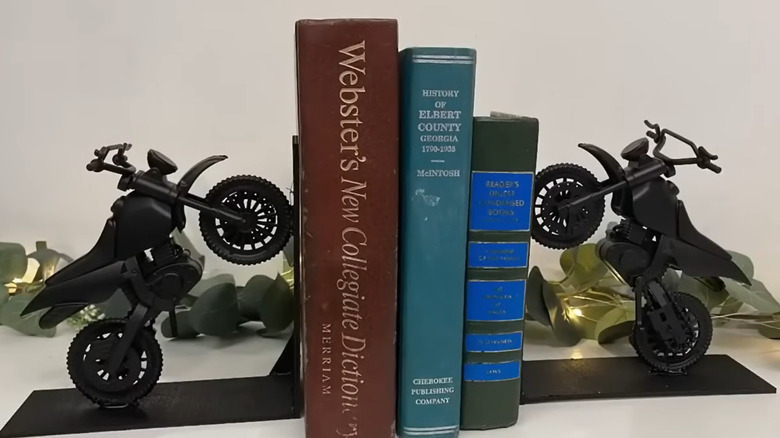
Come on, admit it; toys are fun, even as adults. Maybe they're less fun if you're constantly stepping over them. Still, incorporating playthings into your oh-so-grown-up decor can give you a little thrill every time you see them. YouTuber the TheCraftyDIYGuy used toy motorcycles and craft wood from Dollar Tree to make a pair of impressive bookends. Topped with black paint, the effect is a surefire attention grabber. This highly customizable idea is a no-brainer for kids' rooms, as nearly any toy will look adorable holding up a shelf full of books. However, it would add some fun to an adult space as well.
Unfortunately, the functionality of this design as-is may leave you with doubts; the lightweight wood glued together, braced with a popsicle stick, and adorned with a plastic toy doesn't provide much weight to hold books upright. We can do one better and still keep this a budget-friendly DIY. Instead, also pick up a pair of metal bookends you know will do the job; the highly-rated Optomni Bookends from Amazon will set you back a mere $9 for two pairs. At the Dollar Tree, fill your basket with a couple of large plastic toys, like the Turbo Wheels Action Construction Vehicles or Plastic Sea Creatures. You'll also need four wooden planks that are at least as long as the sides of your metal bookend. A saw, sandpaper, and some spray paint in your color of choice are required, too. To hold your creations together, grab a heavy-duty glue like E6000, a glue you should keep in your home.
Build a bookend or two
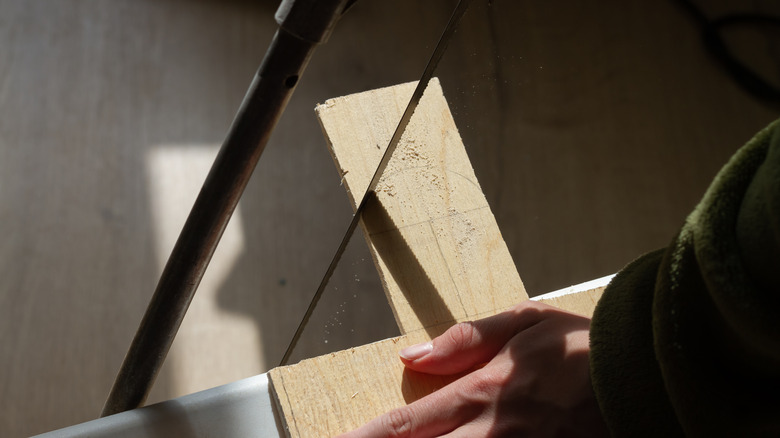
For this project, you'll be using two wood planks per bookend. The size of your cuts will depend on the height of your metal bookends and the size of your toys. Measure the height of the metal bookends' vertical support, add about .5 inch to this, and mark it on all four wood pieces. Cut them with a saw, and sand the cut edges. Save the sawdust to make this DIY wood filler to hide the gaps in your completed product. Next, mock up the wood's arrangement on the bookends. Make sure that, of the two flat portions of your bookends, you're leaving the longer of the two empty to sit under your books for extra support.
To help the glue dry in the right position, set aside some clamps. If you don't have any, hot glue can bond pieces together temporarily while the heavier glue sets. Apply a liberal amount of glue to the bookends' vertical supports and horizontal feet, and place the wood in the arrangement you mocked up. Stand the bookends, and clamp the vertical pieces to the metal support. Weigh down the wood base as the glue dries. If you don't have clamps, trace the edges of the metal bookends with hot glue before adhering the wood. Once the glue has set, hide the gaps between the boards on each bookend with wood filler.
Finishing touches
Decide how you want your toys to sit on the wooden bases. Take advantage of the amount of space on the vertical face by situating the toy diagonally against it, with one end glued to the base and the other to the face. If you've opted for a large toy vehicle, you can make it look like it's climbing a hill by facing the front of the toy upward. Smaller toys stacked or pyramided can come together for a catchy look. For a less fanciful effect, one or two of these Twist-E-Beads Puzzle Chains arranged in an abstract form or formed into a rectangle would dress up the bookends nicely. Once you have your toys arranged how you'd like them, you have the choice of gluing them first and painting the entire piece, or just painting the wood and metal to let the toys' colors stand out.
Whichever route you choose, use generous amounts of heavy-duty glue to bond all contact points between the toy and the bookend. Scrape away excess glue with a popsicle stick or another fuzz-free disposable item. Let the glue dry for a few hours before applying the paint so that your bonds don't shift. E6000 cures in about 24 hours, but for the best possible bond, let it set for up to 72 hours before manipulating your bookends.
Spray paint your pieces with several coats of paint. Simplify the task with these time-saving tips that make spray paint projects a breeze. Once the paint is no longer tacky, put your custom bookends to work.