Build A Corner Shelf In Any Closet For A Budget-Friendly DIY Upgrade
We may receive a commission on purchases made from links.
Extra closet space can solve so many issues for almost any homeowner, which might explain why remodels can get pricey. Even at the low end, closet updates can cost a few hundred dollars, giving many of us pause when planning our project. You need to solve your storage situation, but can you justify the cost? Well, if you go the DIY route, you likely won't have to. Like many novice-friendly upgrades, expanding your closet shelving with corner pieces will only set you back a few hours and the cost of materials. And it can be pretty cheap if you know how to get lumber at rock-bottom prices. The hardest part may be planning and deciding which approach is preferable for your project.
However you work out the details, the overall cost of supplies can be relatively low. Even if you can't repurpose old wood from around the house, you may get away with new lumber for under $100. Hardwoods like oak and cherry add natural appeal, but to save money, you can find many plywood varieties that make practical closet shelves. Using ½-inch cabinet-grade plywood, like these PureBond Birch Plywood Project 2-foot by 8-foot Panels, you can enjoy a light-duty closet shelf offering attractive looks with or without paint. If you're storing heavier equipment, you can upgrade to ¾-inch plywood. To support the shelves, you could choose cheap and easy-to-install metal brackets or get a cleaner look with wood support frames from 2x2 or 2x1 lumber sections.
How to DIY an attractive, affordable corner shelf in the closet
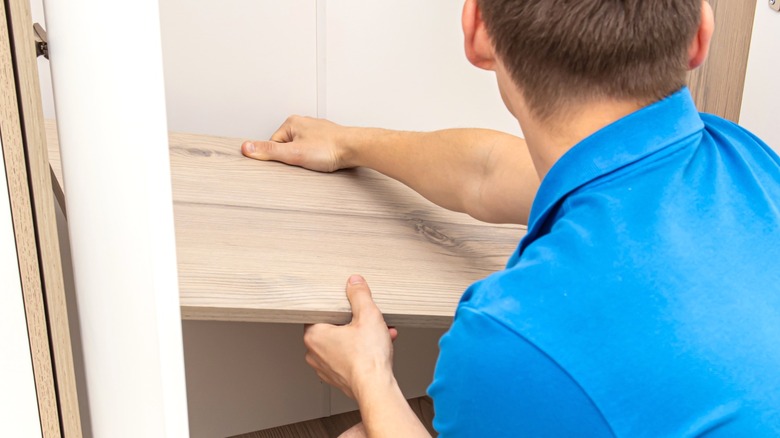
A corner shelf typically consists of two wood sheets sitting atop a wood frame that wraps around to form an L, maximizing the closet's storage space. To build the frame, measure the space between the walls to determine the shelf length. Cut wood pieces, such as 2x2 boards, to make a rectangular frame that will span the space, making it the desired shelf depth. Since the outer rectangular pieces will screw into the wall, you can also use repurposed plywood strips for these pieces to save money. Meanwhile, you can use thicker 2x2 boards for the spanners that connect the outer side pieces, creating a rigid support system for the shelf from end to end.
Make a rectangular frame for the long wall shelf and another small frame for the piece that branches off at the corner. Mark stud locations on the wall, and screw the frames into them, using a level to ensure they are straight. Screw the short and long frames together where they meet at the corner as well. You can build the frames and install them in one piece or put each part in place in the closet.With the shelf supports in place on the wall, you can cut your shelving to fit, making a long piece and a short piece to form the L. Lay the boards in place and secure them with brad nails.
Customizations to consider for your closet shelves
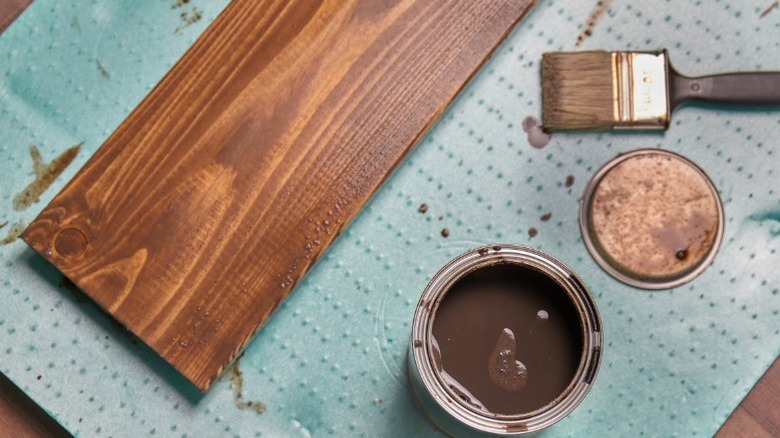
As you build your corner shelf, you'll have several ways to customize it to your liking. Consider stunning wood paint and color combos to beautify the frame and shelves. Do this before installing the components in the closet to make it easier to cover every section. To clean up the appearance even further, add covers to the front of the shelf support edges and panels to the undersides to hide the framing. This can create a neat floating look, especially when placing high shelves that will have exposed undersides.
If you are stacking several corner closet shelves, plan which items you plan to store so you'll know the shelf height you'll need. For instance, shelves for storing clothes are often around a foot apart. Meanwhile, shoe shelves may only need about 6–7 inches of space between each other. You can also attach garment rods under your L-shaped shelves, positioning them high up to hold clothes, belts, and other hanging items. You can tweak the design in several simple, inexpensive ways, so measure your closet to see how these shelves could work with other budget-friendly ideas for organizing your closet to maximize your storage space.