Turn Inexpensive Rakes Into A Beautiful DIY Room Divider In No Time

We may receive a commission on purchases made from links.
Sometimes the most creative home projects come from simply observing shapes and patterns in all of their infinite possibilities. Using things in new ways presents an opportunity for getting stunning décor with a bespoke touch. While Dollar Tree plastic rake heads may not seem like the building blocks of a beautiful fan-motif room divider, YouTube DIYer Yoduvh Essentials shows how you can turn these plastic pieces, some wood planks, and other decorative accents into a stunning screen that you can customize to fit your décor.
While the $1 budget-friendly rakes that the tutorial uses may or may not be in current stock at your local Dollar Tree, you can also purchase individual rake heads in various sizes on Amazon, like the SUPVOX Garden Leaf Rake Heads, priced in the $8-$10 range, for this fun project. You may also find similar ones while thrifting or by asking your neighbors if they have old plastic rakes heads that they are thinking of tossing. It makes a stunning innovative room divider to create zones in your space and block views. With a protective acrylic coat, the most basic non-embellished version would also make a great screen for your porch or balcony to create some privacy in your outdoor space.
Making a screen from plastic rakes
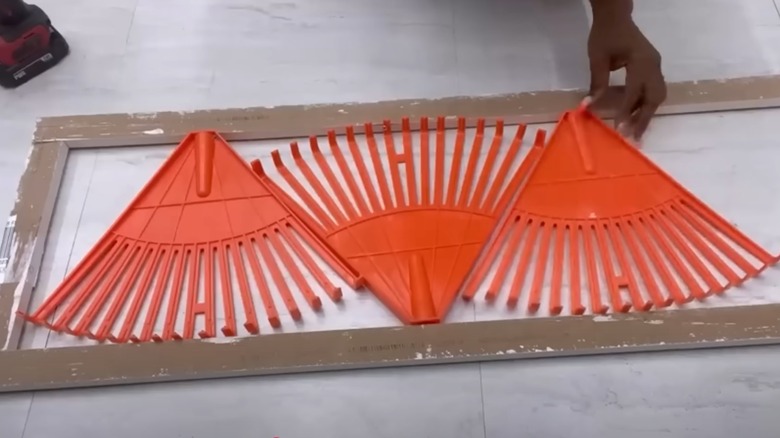
To create your own room divider, you will need measurements exactly sized to the span of several rake heads laid together in alternating directions (this may vary by the type of rake head, as well as how high you want your screen to be.) Create a simple rectangle frame from 1x2-inch or 1x3-inch boards using wood glue and staples or brad nails to secure it together (if you plan to move it around a lot and want extra stability, you could also use a pocket hole jig and screws to attach your pieces together). Inside the frame, screw the base and topmost tines of the rake to the opposite side of the frame in an alternating orientation, pushing them close together for full coverage. Continue up the length of the frame, adding additional rake heads until it's all covered.
Build additional frame panels and use hinges, like the Stainless Steel Folding Hinges, to hold them together as a room divider. You could also retain a single panel and hang it as a long and narrow art piece that adds interest and texture to a blank wall. Since it's very lightweight, you could even use hooks and O-rings to hang it from the ceiling for a room divider that doesn't take up valuable floor space.
Customizing your divider

Tools and approaches for customizing and embellishing this project are many. While you can simply paint your frame and the rake heads for a minimalist look that has a Far East feel, great ideas to customize the look include using glue to add some millwork details, like the Vicenpal Wood Appliques, along the corners, top, and sides (these can be ideal for covering up the staple and nail holes). You could also add molding or trim along the sides for a more elevated effect.
While the DIYer adds additional elements, like Dollar Tree trays over the rake heads, as well as extra bling via crystals and mirrored tiles to create a glam look, you can also make a more rustic version. To do this, leave the wood natural and wrap your fans in jute twine before placing them in the frame. Or cover them in your favorite fabric affixed with spray adhesive, then cut away the excess between the tines for a luxurious patterned look.