How To Get Shoes Off The Floor And Organized On A Tight Budget

We may receive a commission on purchases made from links.
Sneakers, sandals, boots, loafers, ballet flats — no matter what you choose to wear on your feet, you need a place in your home to store them. While there are many beautiful mudroom ideas that will help you transform your space, not all options are inexpensive and easily created. If you are looking for a simple, budget-friendly DIY way to get shoes off the floor and organized, this project using just a dowel and closet pole socket may be exactly what you are looking for.
Start the shoe storage project by measuring your space. You will want to know the distance between two walls, such as in a mudroom or closet. You will also want to count how many shoes your family owns and uses on a regular basis. This will help determine if you want to make multiple rows of shoes or just one. Remember that you can always keep seasonal shoes in a separate space in your home.
Then, head to the hardware store to pick up some wood pole sockets (these ones allow you to easily paint over them to match your mudroom décor). You'll also want to grab a wood closet rod like this natural oak heavy-duty wood stainable closet rod. One downside of this project is shoe scuffs on your wall. To help make it easy to clean these blemishes off, consider choosing a wall paint that can easily be cleaned. An eggshell, pearl, or satin finish will allow you to easily clean without leaving the paint overly shiny. And, if your walls already have some marks on them, there are easy ways to clean your interior walls.
How to add this DIY shoe storage rack to your home
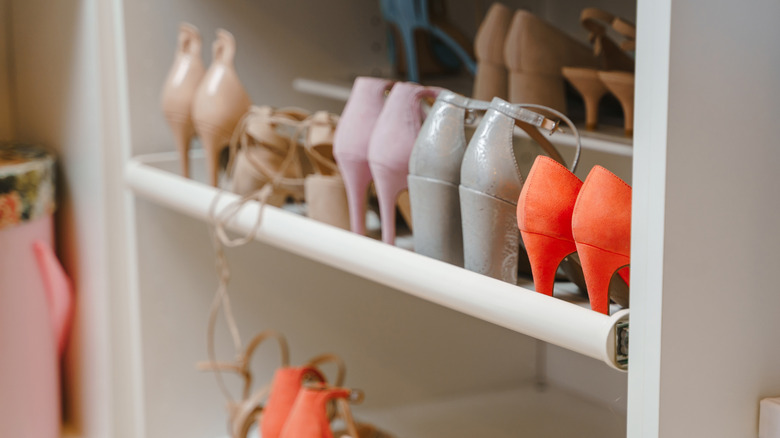
This DIY can be done quickly and simply. Start by drilling the wood pole sockets into the wall. Measure and ensure that they are evenly placed before drilling them in the wall otherwise your final project will be slanted. If you need to adjust afterwards, you can; however, it's better to measure twice so you only have to drill once. And if you need to, these ingredients will help you easily fill small holes in your wall in a pinch.
Then, take the closet rod and cut it to the length of your wall minus the amount added to each side with the pole socket. Sand the edges, and if you want to paint or stain the rod, do so before attaching it to make it easier on yourself. Finally, once dry, slide the closet rod into place. Now, you will be ready to add all of your shoes to the top of the rack. If you have lots of shoes, you can repeat this project a few inches above the first rack. This will give you another space for you to store your shoes. However, this isn't the only way to make this design.
Create this same DIY using a tension rod instead
Another easy way to make this DIY project is to use a tension rod. Something like this Zenna Home Tension Shower Curtain Rod would look great if your home leans into a more modern look. To create this DIY using the tension rod, simply unscrew the rod until it is the length between your walls, and then fit it into place. You could use this exactly like the other DIY and just use one tension rod. However, if you are worried about your shoes scuffing your wall, you could also use two tension rods and create a shelf for your shoes instead. Just note that the tension rod may leave its own scuff marks on either side of your wall, which may need to be repainted if you ever decide to remove them.
No matter how you choose to create this DIY shoe organizer, you will be one step closer to having the mudroom of your dreams. And, hopefully, you won't be falling over shoes lying all over your floor anymore. For more mudroom organization inspiration, check out this IKEA trick that can help you easily create the perfect mudroom.