Ranking The Best Flooring Options By Their Ease Of Installation
With modern technology and manufacturing, there's no shortage of textures, colors, and designs to choose between when it comes to flooring. If you have the right tools and materials on hand, many of these floors are possible to install yourself. DIY floor renovation projects can help you save money and expand your skillsets. However, not all remodeling projects are the same. Flooring installations can vary greatly, ranging from simple and straightforward to complex and strenuous based on the type of material and style of flooring chosen.
Below are ten of the most popular flooring types, ranked from easiest to most difficult to install. Although many floor installations can be done by a non-professional with the right mindset and preparation, some factors can make them impractical for people without professional experience. We considered the many factors that go into a flooring project to determine our ranking, including what tools and materials are needed, the physical work required, how long the work could take, and more. Read on to explore the best flooring material options based on ease of installation.
Carpet tile floors are lightweight and easy to assemble
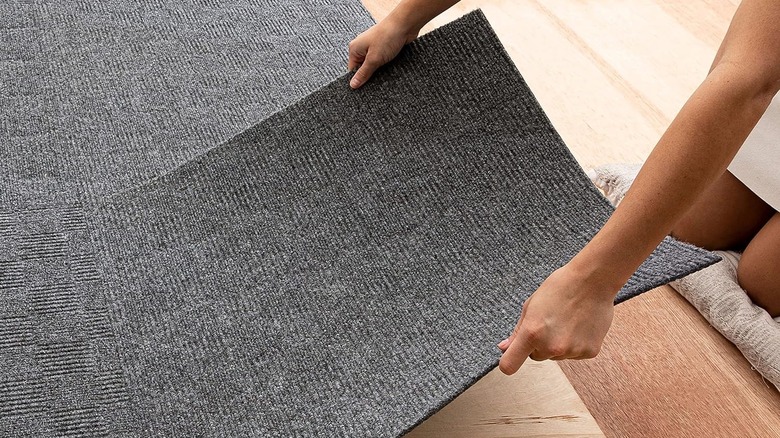
Carpet squares or tiles are among the most budget-friendly and easily DIY-ed floor options out there. The material itself is lightweight, usually only a pound or two per square foot, and can be done without any heavy-duty or specialized tools (as long as you're not removing existing carpet). All it takes is a pack of carpet squares, adhesive or double-sided tape, and a utility knife. Unless a room is exceptionally large or you're laying carpet in multiple rooms, installation shouldn't take you more than a few hours to a day to finish. Plus, carpet is durable, pleasant to walk on, and insulating, making it one of the best flooring types for basements.
Laying carpet squares should be a fairly stress-free process. Most mistakes are fixable: If a tile is misplaced, just lift up the fabric and reset it. Even if the adhesive is already dry, you can pry up the square with a utility knife and tuck a new one in its place. Some carpet tiles manufactured these days don't even need to be glued down. The hardest part is keeping the pattern straight and all the tiles aligned as you go, though this is possible with patience and careful placement throughout the installation.
Lastly, don't assume carpet tiles have to be boring or builder-grade. You can make them into quite the statement floor by buying two boxes of two contrasting colors and laying the squares out in a checkerboard pattern, as shown in the product images for these Lowemin Plush Foam Interlocking Carpet Tiles (which are perfect for a playroom). Alternatively, you can look for something with a chic pattern, such as these Purefull Removable Carpet Squares. Both of these options don't require adhesives and are renter-friendly.
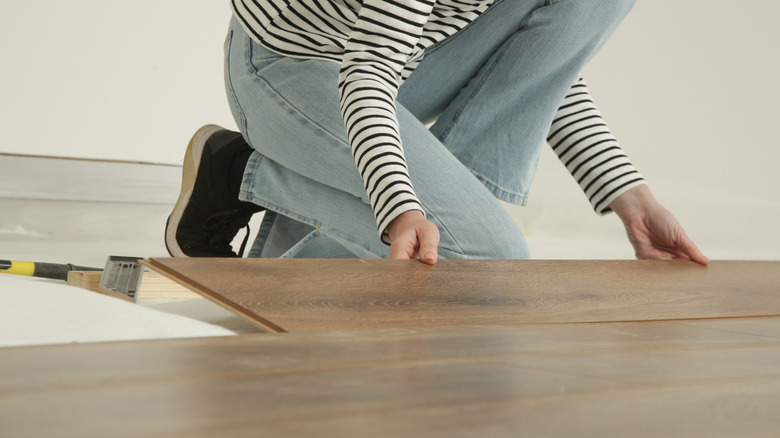
Luxury vinyl flooring is a beginner project, and there are multiple ways to install it
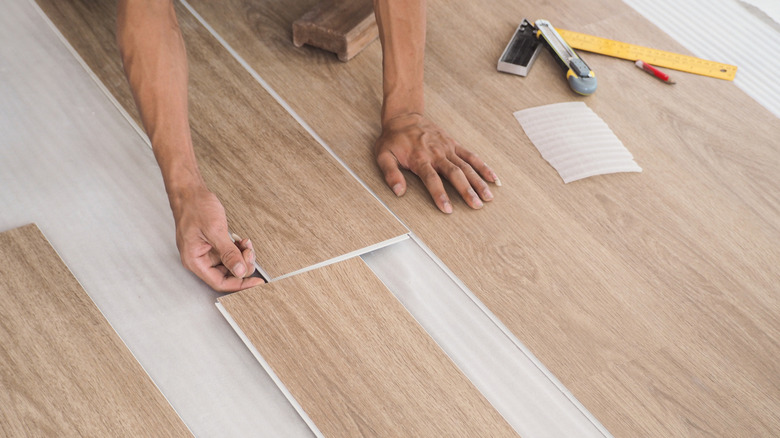
Provided you avoid the most common luxury vinyl installation mistakes, laying LVP (luxury vinyl plank) flooring is a breeze. There are three main ways to install it: the click-and-lock, glue-down, or GripStrip method. If you use the click-and-lock plank approach, all you'll need is a tape measure, hand saw and sawing surface (like a sawhorse), pull bar, mallet, spacers, and tapping block to resize and place certain pieces. Some luxury vinyl planks can also be cut using a utility knife. For a professional-looking installation, you may also opt to use a straight edge, chalk line, level, and some type of under-flooring. The boards are light, easy to handle, and snap into place. Luxury vinyl boards usually weigh about 2 pounds per square foot, and most people could easily get a small to medium-sized room done in a day. Another pro to LVP is that it can mimic the look of hardwood without requiring any dusty, disruptive, and time-consuming sanding or finishing work.
One of the best tips for a flawless luxury vinyl flooring installation is to plan the layout ahead of time. Planks should be laid in an alternating pattern so identical pieces aren't placed directly next to one another. Accidentally putting two together doesn't affect the functionality of the floor, but it does ruin the aesthetic.
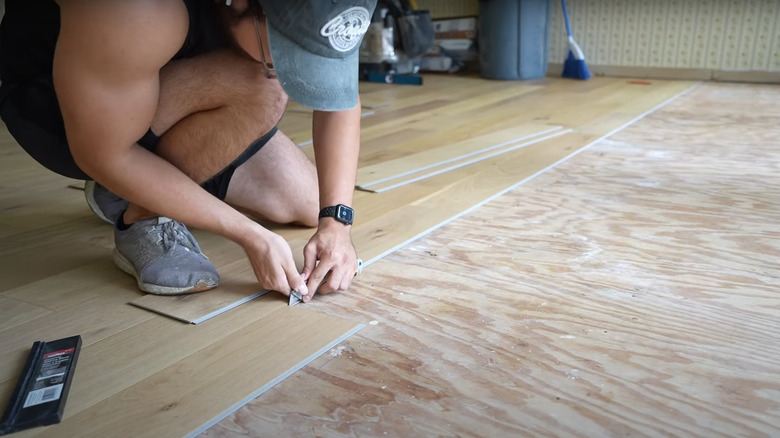
Linoleum planks and tiles are installed using basic tools, but might be hard to find
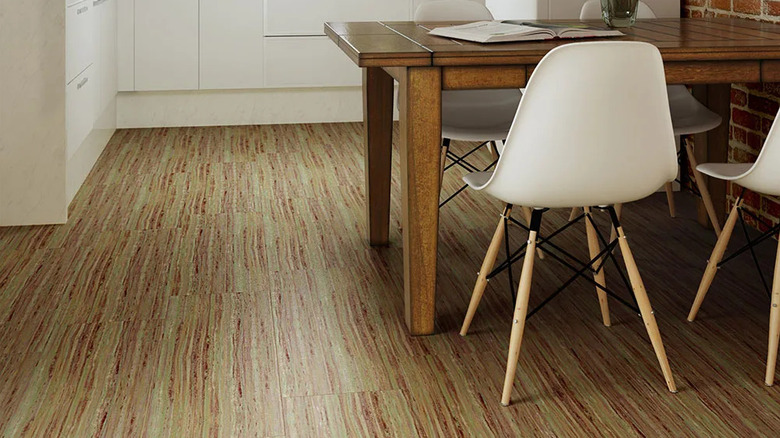
Linoleum comes in both planks, tiles, and sheeting, and the planks are pretty easy to install — just like LVP. The most straightforward way to place your linoleum planks or tile squares is to use the click-and-lock design. This method is easy to assemble and doesn't need adhesive or glue. The primary difference between linoleum and vinyl plank is that linoleum plank has less plastic and is made from wood blends. Despite its wood component, linoleum flooring is different from engineered or natural wood since it's also extremely lightweight.
The biggest gripe people have with linoleum is that it's harder to source nowadays. Other synthetic flooring options have taken over the market for plank-style flooring and imitation tile flooring, leaving true linoleum somewhat forgotten by larger retailers. Online home improvement enthusiasts struggle to find it since the United States' main linoleum manufacturer markets the material under their brand name, "marmoleum". Some vinyl floors have similar qualities to linoleum, such as ones with cork backings, but ultimately aren't the same as this niche but sought-after product. If you're interested in installing this retro (and surprisingly sustainable product), Amazon stocks Forbo's Marmoleum Click Cinch LOC Seal Linoleum Tiles. One reviewer revealed how easy they are to lay, saying, "I installed 650 square feet of this product and except for not having a straight wall in my house, it was really not that hard at all."
Laminate can be laid over pre-existing floors, but they have to be flat
Many people love the way wood looks but worry about the cost and installation process. Laminate is a popular look-alike alternative that is cheap and easy to install. Laminate plank flooring is a plastic blend like luxury vinyl, but it's manufactured with a wood fiber layer between its foam bottom and decorative print top. The wood fiber keeps the planks lightweight and easy to lift at around 1.5 to 2 pounds per square foot. Laminate's bottom foam layer is one of its greatest perks, as it enables laminate to overlay other floors, such as tiles, hardwood, and cement. This can eliminate prep work before the installation begins, saving time, and allowing you to complete the installation in a few hours to a day. However, there is one caveat: the floor surface over which you lay laminate has to be entirely smooth and flat and you might also need to insert a layer of padding. As far as downsides go, laminate tends to be less durable than hardwood and less water-resistant than LVP. As a result, there are pros and cons to installing laminate flooring in kitchens, bathrooms, and high-traffic rooms.
Installing laminate also requires an extra tool than the aforementioned flooring types. You may need to buy, borrow, or rent a jigsaw to make clean cuts in the synthetic blend wood boards. Alternatively, if you've got a lot of area to cover or additional projects planned, you could invest in a flooring cutter like the Marshalltown Ultra-Lite Flooring Cutter. You'll also want to have other flooring tools on hand, such as a measuring tape, rubber mallet, combination square, and maybe even a tapping block.
Linoleum sheets are stiffer than they look but don't need many tools
Linoleum planks are easier to lay, but if you're renovating a large room, true linoleum sheeting (not vinyl sheeting that is often confused for linoleum) may take less time to roll out and cut to size. Sheet or rolled linoleum creates a seamless floor across vast spaces. The material is laid out all at once, making it a less nitpicky process than installing individual planks. Aside from typical flooring supplies like adhesive, there are some additional tools needed for this project, primarily a floor roller, pry bar, trowel, and utility knives.
However, overall, linoleum sheets still tend to be tougher to install than planks. The downside of linoleum sheeting is that it's less flexible than you'd think. Don't let the rolled-up flooring deceive you – it's very stiff and takes extra effort to lay down. Also, consider that it isn't as light as it looks. Depending on the material thickness, linoleum sheeting is around a half-pound per square foot. However, it's manufactured in giant rolls that can weigh hundreds of pounds. Even a person with considerable arm strength will need assistance transporting and laying it in a visually appealing fashion.
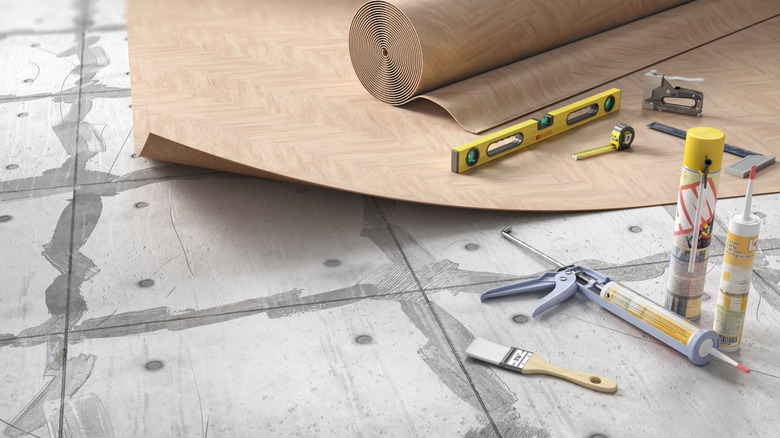
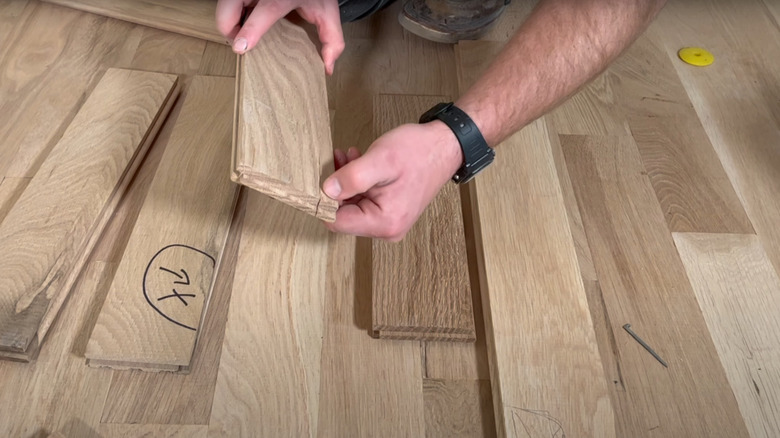
Engineered wood flooring is lighter than solid hardwood and comes in click-and-lock form
If you choose to install engineered hardwood, you get a luxurious surface that is also more water-resistant than genuine hardwood. Engineered hardwood can be installed using a click-and-lock method (sometimes with glue in the joints) to create a floating floor, or glued down. Whether you use click-and-lock or glue down engineered hardwood planks, installing this hardwood alternative is typically easier than with solid planks, which are heavier, more susceptible to warping, might need nailing down, and may require sanding and finishing. Engineered hardwood boards come prefinished, which can save you a ton of time and allow for a much less disruptive installation process. You won't have to generate dust from sanding, fumes from sealants, or wait for the finish to cure before walking on the floor and using the space. Finally, engineered hardwood flooring doesn't need as precise of a subfloor as nailed-down hardwood.
What makes engineered hardwood a little more complicated to install compared to other materials? The boards must be acclimated, plank placement should be planned out ahead of time, and boards must be cut with a circular, hand, miter, or table saw. Although engineered hardwood can be installed over a concrete subfloor, you'll still need to prepare the surface and ensure it's mostly even. You'll also need to install a moisture barrier and underlayment. This will help protect the recycled and natural wood in engineered flooring from moisture. These extra steps can extend a flooring project for a couple of days but make a DIY job look and feel more professional.
Glue-down and cut-to-fit carpet rolls are heavy and difficult to lay precisely
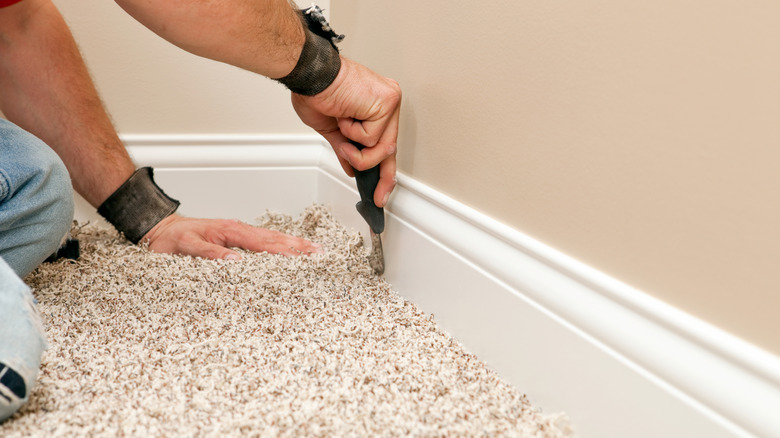
Laying carpet tiles may be the easiest flooring installation, but glue-down and stretch-in carpeting is a completely different story. Prep work is minimal as long as there are no imperfections in the subfloor, and most rugs can lay directly over the previous flooring, though you can add rug pads for more comfort and insulation. However, that's where the ease of install stops. To cope with the cumbersome weight of the carpet and successfully get it stretched and fitted, you will need two or more people, especially if the fabric is medium or high-pile, which can make it much heavier than a thinner carpet.
Before beginning, it's essential to have all the right tools on hand; a carpet stretcher, chisels, a knee kicker, seam roller, seaming iron, specialized knives, and staple guns are necessary. The most difficult aspect of installing rolled carpeting is maneuvering the giant textile into position. It's very wide and heavy, and having help is key to a superb DIY finish. The carpeting must also be precisely cut to ensure it lines up smoothly against archways, doors, transition strips, and walls. When rooms are very large or unconventionally shaped, carpets need more cutting and trimming than in other situations. Standard rooms only require roughly one day for installation, but like all flooring installations, it can take longer depending on how much ground you have to (literally) cover.
Solid hardwood flooring is a two-person job (minimum) that takes time and effort to nail down
All of the most popular woods for hardwood floors have at least one thing in common: They require a careful and thorough installation. Prep work isn't usually necessary with other flooring types, but never skip this step with hardwood flooring. Setting up an even and dry subfloor ensures expensive and natural wood planks look great and maintain their condition long-term. Installing the boards themselves comes with its own set of challenges. You need some specialized equipment in addition to standard DIY tools and various saws, such as a multitool, table saw or circular saw, and a jigsaw. A tapping block and rubber mallet will help you click the boards into place. You'll also want a nail gun and a finish nailer, a sander, and a good shop vac. Finally, you may need to hire an air compressor if working with pneumatic tools.
Natural wood boards aren't as heavy as rolled carpeting or large stone slabs, but they do weigh around 3 pounds per square foot, depending on the thickness and tree species. It can be strenuous to lift, cut, and lay each board, and this project is far more practical with two or more people. On average, it takes a day or more to complete a hardwood floor, especially if the room is larger than 1,000 square feet. However, if you choose unfinished boards, you can extend this timeline out a few days as you will also need to stain and seal the installed floor. Opting for prefinished boards can help you save time, labor, and uncertainty over how the stain will look when fully cured, but will limit your choices and can make touch-ups trickier.
Ceramic and porcelain tile is straightforward but tedious to install
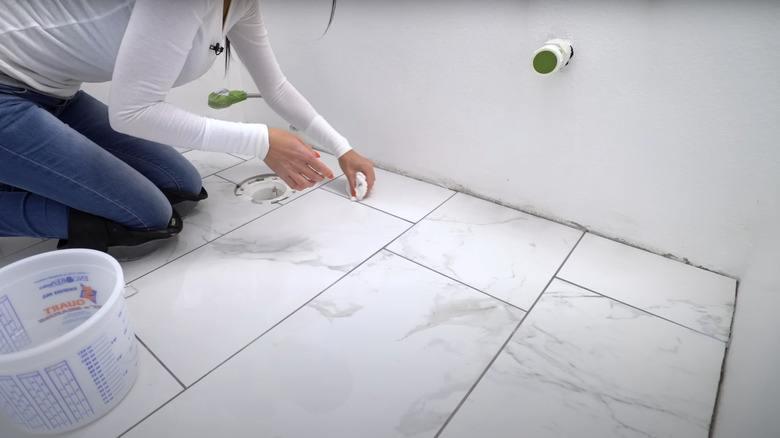
Ceramic and porcelain tile floors are a go-to for bathrooms, kitchens, and transitionary areas. Although they're a popular choice, they are challenging to install perfectly. It takes a whole repertoire of tools in addition to the tiles themselves, including a bucket of grout, grout float, drill, mixing paddle, trowel, putty knives, and more. You'll also need a tile cutter to shape and adjust the tiles as you go and possibly a pair of tile snips (this set of Goldblatt Glass Tile Nippers should be adequate). Getting to grips with these tools might be tricky for a novice, but also makes this a forgiving flooring type when it comes to mistakes. If you realize a piece won't fit, you can simply cut it to size.
Tiling a floor can take hours to days, depending on the size of the room and the tiles themselves. Smaller tiles take longer to lay, requiring more patience and precision. Larger tiles may make the job easier, but they weigh considerably more than their smaller counterparts. Most tiles weigh between 3 to 5 pounds per square foot, making it a tedious job, especially for someone who lacks sufficient upper body strength. Ceramic is a fragile material, making it susceptible to cracks and breaks if not properly handled. Tile also has no "give" and thus needs to be laid level, which may not be possible if your subfloor surface isn't level — bringing larger structural problems into the equation. Speaking of the subfloor, if you're retiling an area, you should first pry off the old tiles and thinset. This demo stage can add significantly to the labor and time required to tile a floor.
Natural stone floors are incredibly heavy and require professional knowledge to avoid mishaps

Natural stone flooring is closely related to ceramic or porcelain floor tiles, which usually range between 1- to 12-inch squares. Natural stone tiles can be the same size, and in these cases, they are easier to install. However, we're referring to stone tiles that are 16 inches by 16 inches and up, which are a whole other ballgame. Single tiles or slabs often weigh up to 10 pounds per square foot, making extra large pieces nearly impossible to lift and maneuver without assistance. Accidentally dropping one could damage the stone or foundation. In fact, many subfloors cannot support natural stone, and many handbooks recommend double plywood support for stone tile installations.
Of all flooring types, this is the hardest to install. It's the stone's composition that makes so many aspects of this more difficult than other floors. Cutting it requires special tools, but is also dangerous if you don't know the professional approach. For example, cutting stone with a dry saw could release harmful silica dust into the air. Overall, this installation takes multiple days to complete and is best left to the professionals.