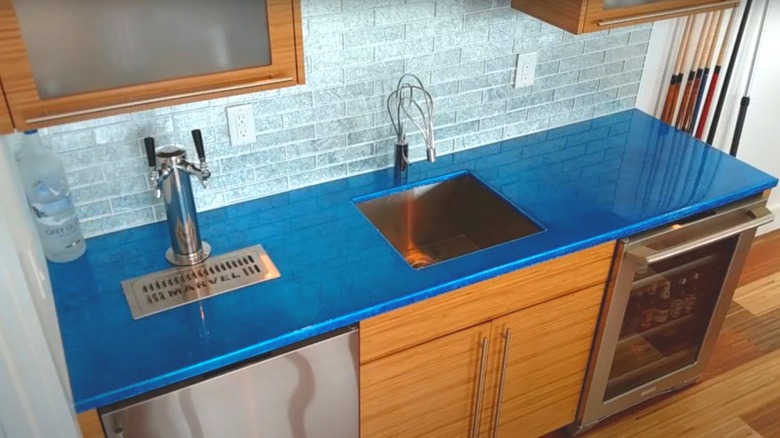
Texturize Your Countertops With One Simple DIY
Unique design elements are part of what makes our homes our own, and thinking outside the box of highly-polished countertops is just one of many ways to embrace a unique look. While the idea of textured countertops might conjure images of itty-bitty crumbs in itty-bitty crevices, they do have an unexpected appeal. Perhaps the best part of this DIY project is that tinfoil gives the effect of texturing, but it is cleverly hidden under a smooth (and genuinely easy to clean) epoxy surface. Since the texture itself tends to camouflage water spots and fingerprints that glossy surfaces so quickly show, a textured epoxy countertop makes it easy to maintain a clean appearance.
Adding tinfoil to epoxy projects to create texture opens a world of creative possibilities, and it's one of the coolest chic bathroom countertop ideas that won't break the bank. Maybe a faux copper countertop in your bathroom would really set off some dark blue hues, or perhaps you'd like a sparkling ocean scape on your bedside table, made possible with a product like Miraclekoo's epoxy resin dye colorant. For this DIY, all you need is glue, tin foil, and epoxy mix like this Bond Crafter epoxy resin kit.
This project is a relatively intuitive process. Apply a layer of adhesive to your countertop or other surface, then cover it with sheets of tinfoil. The depth of the texture effect will vary depending on how you manage your foil; a smooth sheet will give a light veining effect, while balling up your foil then spreading it flat will create a more robust, crumpled texture. Use your hands or a roller to press it out as flat as possible before mixing and pouring the epoxy.
Tips for creating a quality finish
Bubbles are the bane of working with epoxy, creating a cloudy or distorted final product. Managing bubbles can be troublesome, but there are a few tricks that can help. When mixing your pigment into the epoxy, stir slowly and let it rest a few minutes before you pour. Whipping your stirrer around will only add air bubbles. Heat is useful too, expanding any trapped air and bursting bubbles at the surface, so work in a warm environment, preferably between 75 and 80 degrees Fahrenheit.
To make your resin, mix part A of the kit with a few drops of paint or resin dye, adding more until you get exactly the shade you're looking for. Next, add part B and spread the mixture over your surface. This is where you can get creative with gorgeous epoxy countertop ideas for every design style. For example, trickle additional colors over your first resin layer, using a heat gun to push the colors into and away from each other. You can also work with varying hues of the same color to create a sense of depth. When you've got your resin where you want it, make a couple quick passes with a heat gun, blow dryer, or bubble busting spray to eliminate any persistent bubbles. Let your project dry overnight and enjoy the beautifully textured results of this DIY that'll turn your countertops into a unique home feature.

