Remember One Tip For Quickly Installing Big Cabinet Handles Accurately
We may receive a commission on purchases made from links.
You installed the hinges, aligned the panels, and tested the fit before placing your hardware. Your cabinet doors are now ready for their finishing touches, ending your budget-friendly DIY project that not only saved you money but also gave you a reason to feel extra-proud of your kitchen's updated design. The only step left is to install the handles. While it may seem like the most straightforward part of the process, consistency between your door and drawer handles is critical to install your cabinets like a pro. Details like this can stick out like a sore thumb. After going through the trouble and effort of making and setting up beautiful custom cabinet doors, you certainly don't want to make it go to waste by botching the landing with misaligned handles.
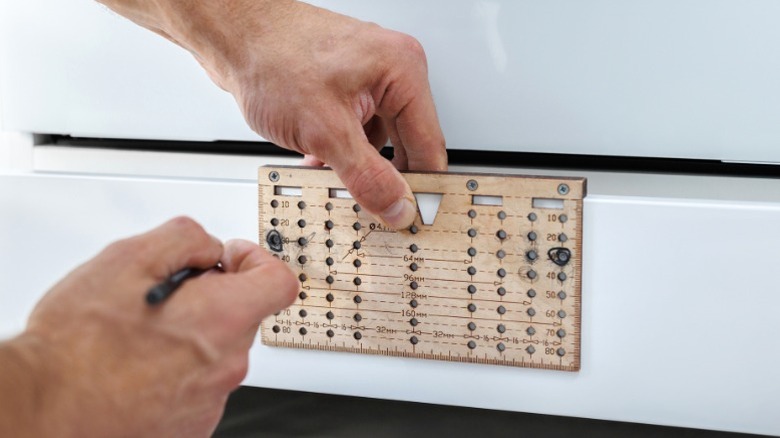
Accurately adding cabinet handles depends on square installations, identical placement on each door, and straight pilot holes to keep the handles in position. In other words, you need a jig. A jig sporting pre-drilled holes offers consistent handle positioning on each door without any guesswork. You only have to set it to work for your situation, and you're ready to install as many handles as needed. Mounting templates and jigs like the King & Charles Cabinet Hardware Jig are available online to make life easy. But, if you need a quick fix now, you can whip up a perfectly suitable jig with a piece of scrap wood.
Steps to make a custom cabinet handle jig
To make your jig, you'll need a drill and a scrap piece of wood. If you have shaker-style cabinet doors, a spare piece of wood used for the stiles will work perfectly. The board must be rectangular with squared edges, so clean up the angles with a miter saw as needed. Ideally, the jig will be sized to line up your holes on the cabinet no matter which way it's facing. For instance, if you want your holes an inch from the cabinet door edge, center the hole on the jig one inch from each side. Likewise, if you want the handle an inch from the top of the cabinet door, make the bottom and top handle holes an inch from their respective edges on the jig. By doing this, the jig will work in any position, letting you put handles on the left, right, top, or bottom corners.
Drilling straight holes in the jig is crucial. If the holes are angled, the cabinet handle holes will deviate from the contact point on the door and leave your handles askew. You can either use another jig to guide your bit or try a simple hack, such as using a CD to keep your drill bit straight. Making your own jig in this way is a great way to fit large handles that don't have a template to match. It also gives you the flexibility to find the preferred placement, whether your cabinets have shaker, slab, or any other door style.
Using your jig to install big cabinet handles accurately and cleanly
Making the cabinet handle jig takes accurate measurements and drilling. But, once you have it, you can install dozens of door handles in no time. Plus, you can use a few tweaks to improve results. For greater stability, add a lip to the jig. The edge attachment will lock into the side of the cabinet door and hold it in place as you screw to ensure proper alignment and prevent slips. If you center the screw holes so the jig will work in any orientation, a lip along one edge will work fine for handles on either door side. The pros at YouTube channel Fine Homebuilding show how this lip works to align with the door edges. Following their lead, you can also make a multi-purpose template to line up different cabinet drawer and door pulls, letting you complete the entire kitchen with one tool.
With your jig ready to go, you can further improve your results with a hand clamp and a scrap block of wood. When drilling holes, your jig will create perfect holes on the front. But, you'll still have to consider tearout on the back of the cabinet. By placing a block of wood against the hole's exit point, though, you can cleanly drill holes for new hardware. Since you'll have the jig in front and the block on the back of the door, using a clamp to keep it all together will prevent irritating slips and ensure the best possible results.

