The Carvera Air Desktop CNC Is A Hobbyist's Dream Machine
We may receive a commission on purchases made from links.
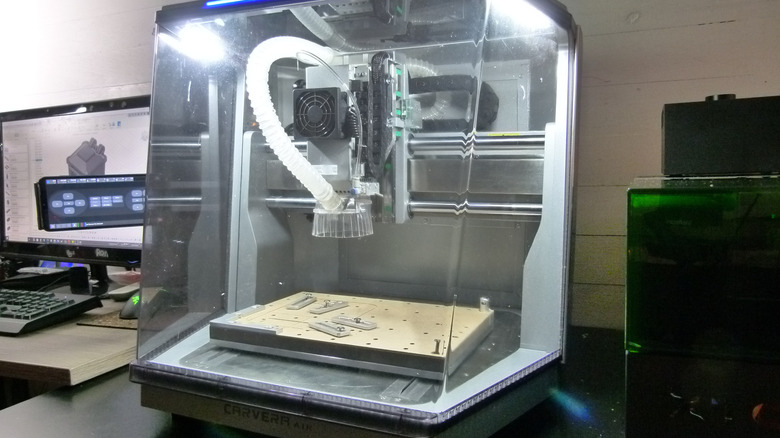
The Carvera Air by Makera looks a little threatening sitting on your desk. At a glance, you might mistake it for a machine that automates medical lab tests or perhaps handles biological materials that human hands can't be trusted with. But it's actually a CNC (Computer Numerical Control) machine, a little factory that can produce anything from pictures of your kids carved into coasters to finely-milled aluminum spur gears to printed circuit boards. Before testing out the Carvera Air, my experience with CNC was limited to big, improbable-looking machines that use trim routers, the sort of thing you include when you're building a home workshop. But the Carvera Air is a desktop CNC that saves space and contains features that virtually erase most other limitations of old-school CNC routers.
In principle, CNC isn't limited to routing, and neither is the Carvera Air. It's a control system that can guide drills, lathes, laser cutters and engravers like the xTool S1, mills, and more. The Carvera Air is the little and more budget-friendly sibling to Makera's flagship Carvera; it swaps the original machine's automatic tool changes for a quick-change mechanism and reduces the build platform size slightly. However, lots of the key features are still there. Optional rotary/lathe and laser engraving modules turn it into a fully 3D creation powerhouse. Automatic probing creates a digital model of your workpiece's surface for more accurate tooling. It can be controlled by a desktop application or a mobile app via Wi-Fi or USB. And it's all packaged in a solid machine with a die-cast frame that feels bomb-proof. Here's what happened when I tested out the Carvera Air for myself.
Setting up the Carvera Air
If you've ever set up a desktop 3D printer or any other affordable CNC, you are probably expecting to read about my hours cursing at hex wrenches and extruded aluminum rails. However, this isn't the experience I had with the Carvera Air. After unboxing it, I wrestled it onto a desk, installed some software on my computer, and turned it on. Well, actually, when I tried to power on the machine, the power switch lit up and nothing else happened. This was because I discovered that it had to be set to 115 volts for my American mains power. The Wi-Fi setup, often the Achilles heel of many sorts of connected devices, was connected without a hitch.
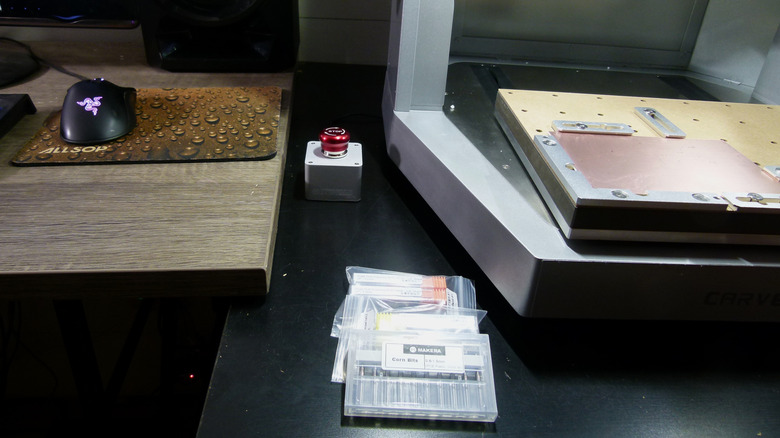
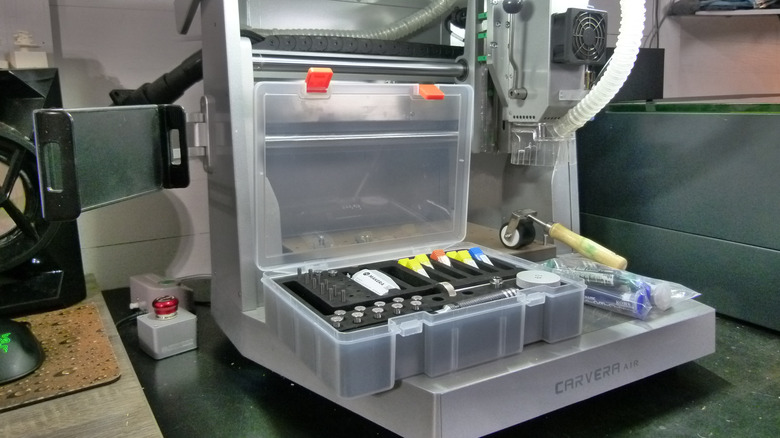
Sorting through all the accessories — bits, bolts, clamps, saws, sanding blocks, and yes, hex wrenches — is always far more fun that it has any right to be. Everything is packaged well, but you must find homes for the things that don't fit into the basic toolkit's plastic box. That includes a surfeit of ⅛-inch bits housed in either individual plastic vials or flip-open plastic cases for holding multiple cutters. The individual vials mostly have orange caps for metal-milling bits and yellow caps for everything else, but when trying to categorize and store the milling bits, I noticed that a couple of the spiral single-flute bits for metal didn't have the expected orange cap. Nothing an orange Sharpie couldn't fix. Once everything was set up and organized, I was ready to test out this enticing machine.
Software for the Carvera Air
The Carvera Air is controlled by the aptly-named Carvera Air Controller, which is available for Windows, Mac, Linux, and Android, with an iOS version coming soon. If you plan on doing much besides making things you find on Thingiverse, you'll also need vector creation and editing software like Inkscape and 3D modeling software. For building 3D models, Makera recommends Autodesk Fusion (previously Fusion 360), VCarve Desktop, and LightBurn. These programs can also be used for computer-aided manufacturing (CAM) processes like translating 3D models into toolpaths for CNC, for which Makera also recommends a free and open-source browser-based tool called Kiri:Moto and its own Makera CAM program.
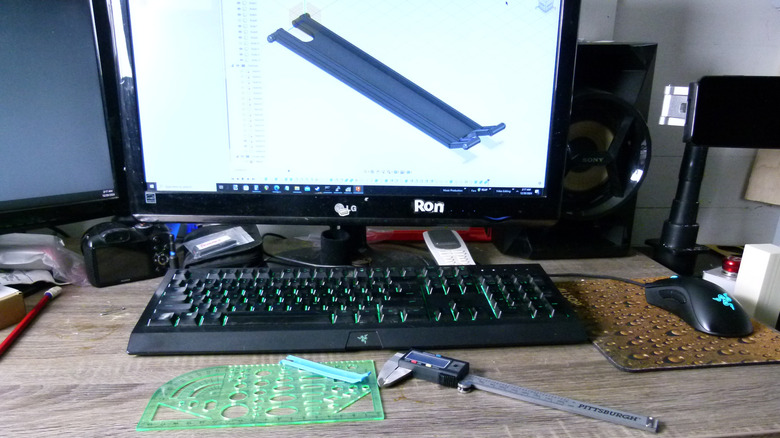
If this all seems confusing, that's because it can be. Your workflow might see you use three to five fully-featured, professional-level software applications to get to a finished project. Starting with the CAM and controller software, these programs are going to need to know some things about your CNC and the bits you have for it. As a Fusion user, I was anxious to get my hands on a Carvera Air machine profile for Fusion. While I found profiles for the Carvera, there didn't appear to be any CAM profiles for the Air online at all at time of writing. Because of this, I installed the Carvera profiles and toolset descriptions, figuring I could replace or modify them later as necessary for the Air.
Creating an LED light
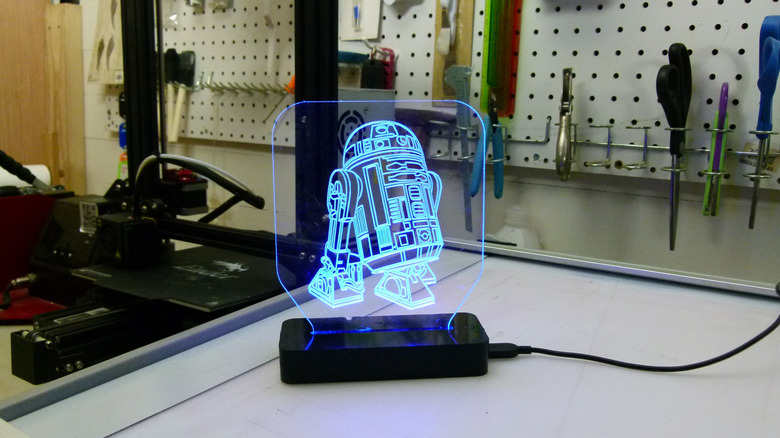
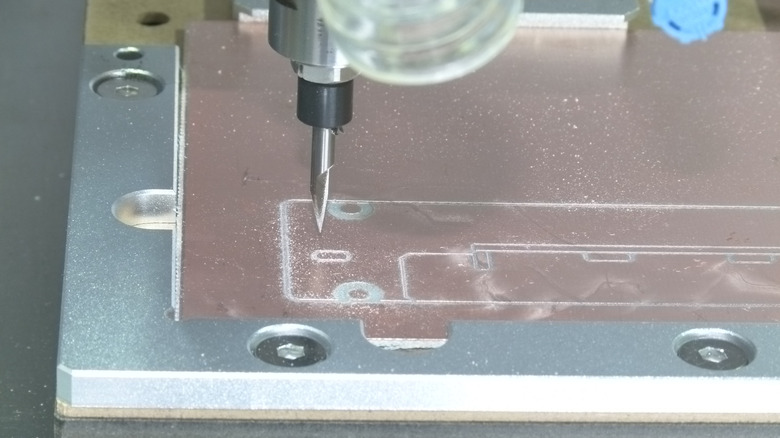
The first of the well-executed example projects included with the machine is a desktop LED light with a touch switch that illuminates a carving in clear acrylic. It's a fairly complex project that shows off the Carvera Air's ability to work with various materials and to produce precision-milled parts and printed circuit boards (if you're averse to soldering, a fully-populated circuit board is also supplied). This PCB facility is one of the more attractive uses of a desktop CNC mill for me, and the project includes everything you need to produce many single- and double-sided solder-masked PCBs.
Inconsistent use of terminology reared its head pretty quickly in this project. Vague instructions like "you can move the machine to the clearance position" without any prior indication of what the clearance position is or how to achieve it can bring a project to a grinding halt. And the naming of bits is almost always a puzzle. The same milling bit is described in various places as a "30°0.2mm V-bit," a "⅛”30degree 0.2mm V-Bit," and a "Single Flute Engraving Bit for Metal – ⅛” Shank 30° *0.2mm."
The instructions are also a bit light on, well, instruction. The first machining step you take has you setting options in the controller software like working coordinate X offset, Y offset, autodetection points, detection height, and scan margin without any explanation. If you're experienced with CNC milling, this won't be much trouble, but it might frustrate newbies. Still, if you can follow the instructions, you will get a really cool little device that will probably mitigate any frustration, to some degree.
Making a three-axis relief
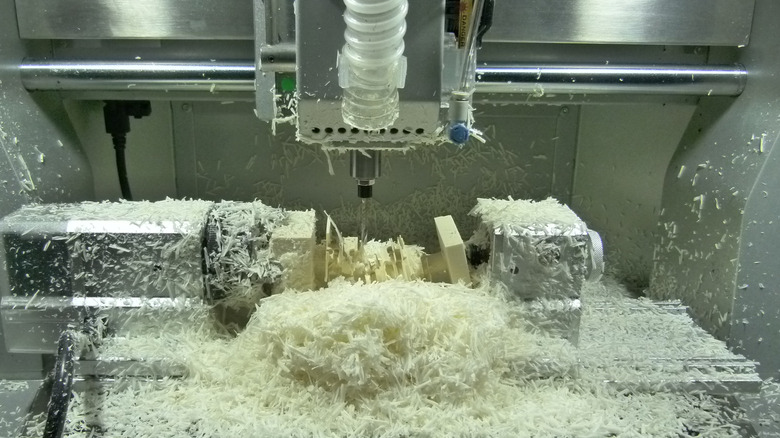
While machining the parts of the first example project, I hadn't yet worked out which vacuum to use or how to connect it, so I proceeded without dust collection. That was a mistake. The ABS plastic clung to every surface inside the machine. Since the second project, carving a 3D image into a board, promised to also be messy, I resolved to hook up a vacuum right away. I used an old Shop Vac I had in my woodshop, to which I attached a hose salvaged from another vacuum, a Shop Vac universal tool adapter, and a dishwasher drain boot to adapt the standard vacuum sizes down to the unique 20-millimeter port in the Carvera Air. It works fine but looks ridiculous. There's now a 3D printable adapter available from Makera. The cheapest shop vacuum you can find should work; the quietest would work even better.
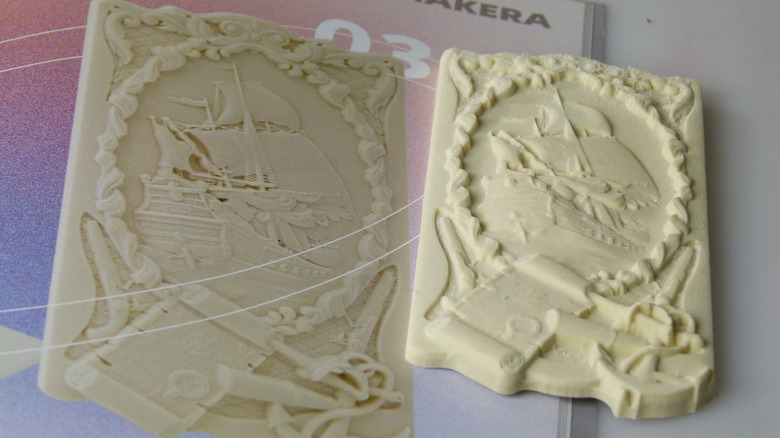
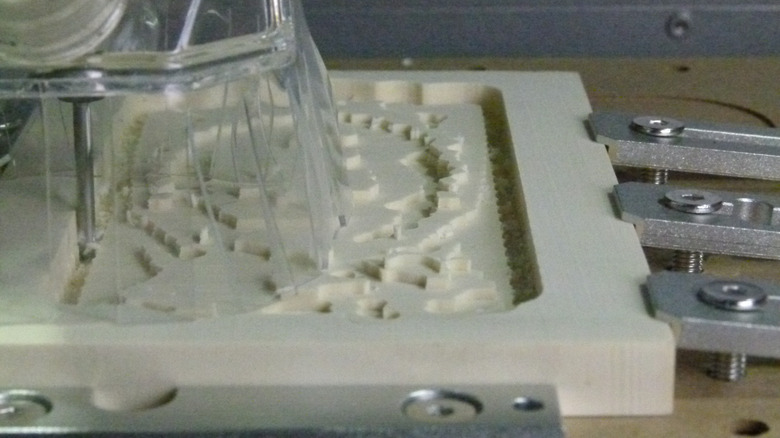
The second project involves using the CNC to carve a pirate scene into epoxy resin tooling board. Producing the example was simple: clamp the material down to the build plate, load the CAM file into the controller software, locate the correct bits, and start milling. At first, I was a little concerned about the quality of the output. Even after vacuuming off the finished surface, little bits of epoxy appeared to still be attached, giving the piece a fuzzy look in some areas. It appeared to have slightly-less detail than a photo of the project in the Examples booklet and significantly less than one YouTuber showed. But once the waste material was swept away with a silicone brush, the detail was comparable to the examples.
Setting up the rotary attachment for the 4th-axis relief
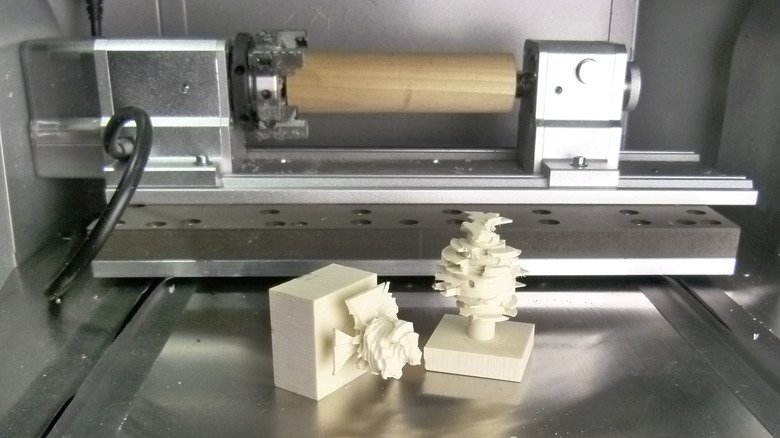
For owners of older desktop CNC machines without a 4th-axis module, the rotary attachment is likely the most exciting project illustrating the machine's most promising capability. It's the sort of thing that's generally not possible with a laser cutter or practical with a consumer-grade 3D printer. The Carvera Air's rotary attachment can be used for indexed positioning (think flipping the workpiece over). But it's also possible to do simultaneous 4th-axis machining with it, in which it basically functions as a lathe, allowing the workpiece to rotate while the milling bit approaches on X, Y, and Z axes. The setup of the 4th-axis module is perhaps the most daunting part of the sample projects, but the precision of the machining and the genius of the bolt pattern on the bed show up here, and securing the little lathe will bewilder no one. The entire setup process took under 20 minutes, including chucking the tooling board into the module.
The 4th-axis module is heavy and feels substantial, like pretty much everything else on the Carvera Air. The translucent housing covering the module's stepper motor is an odd choice, but there are probably reasons for it that I'm not grasping. When setting up the sample project, the instructions call for 35 by 35-millimeter epoxy tooling board, 100 millimeters in length. But the provided samples were 35.01 by 36.76-millimeters and 34.90 by 36.18-millimeters. This size difference resulted in a gap between the workpiece and one jaw. The material is soft enough that I just clamped the jaws down until they bit into the epoxy and closed all gaps.
Producing a 4th-axis relief
The Carvera Air Controller's estimations of time remaining in a job seem to be inaccurate, at least during the early stages of the instructions. The rough cut execution had the time remaining jumping between 7.5 and 4.5 hours within a minute or two. The first attempt to carve this piece ended catastrophically at about the 47-minute mark, when the workpiece broke and I hit the emergency stop button. The work up to that moment looked like a chaotic mess, and it seemed like something was amiss. At times, the spindle would just appear to hover nearly stationary. While the A indicator in the controller software indicated some slight movement, none was visible. Meanwhile, the actual carving did not appear to be taking shape, but rather to be losing it. The spiral bit appeared to be cutting nearly random holes and channels in the epoxy, and the result was a bunch of stacked ring fragments that look something like a quantum visualization of one of those Powerpoint sunburst charts.
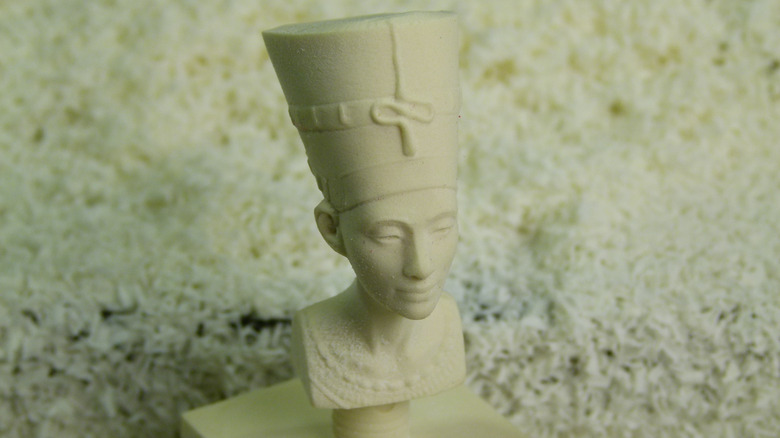
One YouTuber seemed to experience a similar problem, which he corrected by adjusting a kinematics setting in the Carvera machine definition. I took the simpler route of updating the Carvera Air Controller software and the Air's firmware. I loaded and ran the Nefertiti sample project again, and it went perfectly. In fact, I was impressed with the quality of the output.
Other optional/external modules
There are a few optional components (like the laser and rotary modules) or which require you to connect external devices (a vacuum or air pump) to optimize the Carvera Air's functionality. One of the example projects that ships with the Air uses the laser module, but since I didn't have a handy way to adapt an air filter to the machine and the laser project seemed fairly simple, I focused my attention on the milling functionality. However, the 5W diode laser is a nifty add-on and a steal at $149. This module attaches to the CNC spindle just like milling bits do, except for the addition of a short communications cable.
Makera says you can't use air assist and vacuum functionality at the same time. But a laser engraver can create noxious fumes with certain materials, so I will probably try adapting the dust collection port to either an xTool smoke purifier or a MELONFARM 4-inch Carbon Air Filter.
Since the instruction manual indicates that a "normal small air pump is more than enough" for the air assist feature to remove chips, cool the CNC, and prevent burning during laser engraving, I set it up to use both a sturdy mid-'90s Qubit Systems aquarium pump and the more powerful and adjustable xTool Air Assist pump. In spite of having air and water lines in a ridiculous combination of outer diameters, I didn't have anything to fit the machine's 8-millimeter air assist port. I was able to adapt standard pneumatic 6 millimeter air line tubing (used in small aquariums and the xTool Air Assist module) to the port with some spongy tennis racket-saver tape.
Makera CAM and alternatives
Makera CAM (the company's software for generating tool paths, equivalent to a slicer in the 3D printing world) doesn't seem to be, strictly speaking, part of the Carvera Air package. At the time of writing, the software doesn't yet have 3D and rotary path capabilities and so only supports 2D, PCB, and laser paths. With no machine definitions yet available for the Carvera Air, this puts the user in the position of using third-party CAM software and either waiting for a machine definition to become available or creating their own.
One of the challenges of setting up third-party CAM software is that tool definitions for the Carvera Air are not yet available — or so I thought. I used the example set provided with Makera CAM and manually entered them into free and open-source Kiri:Moto, a browser-based CAM tool. This worked reasonably well for the flat-end mills, V-bits, and ball-end bits but left out corn bits and specialized bits for solder mask removal, thread-cutting, and others. I then found the Kiri:Moto tool definitions for the Carvera. Unfortunately, the offsets were wrong on my first attempt at using Kiri:Moto's output, and the second attempt tried to mill far too deeply. There was clearly something about Kiri:Moto I didn't grasp. Without Makera CAM as an option, and since Carvera Air machine definitions aren't yet available, I basically back-burnered further testing until I learn enough to bypass these limitations.
What's a beginner to do?
Like most 3D printer owners, anyone with a desktop CNC mill is likely to be something of a tinkerer. With careful experimentation, you should eventually be able to produce machine definitions and toolset descriptions for software like Fusion and Kiri:Moto. But since Makera hasn't been able to produce definitions it finds suitable yet, it might be reasonable to have some misgivings about rolling your own. Unlike a 3D printer, a misconfigured GCODE file can cause a CNC router to cut straight into the jaws of your $499 4th-axis module. So, given the scant documentation available for the Carvera Air and the sparse explanations in the examples guide, how would a novice go about piecing together a satisfying CNC experience with the machine?
I'm not sure they would, as things stand today. But, as I experienced with the 4th-axis project, it's likely that many of these issues have to do with the newness of the product and will be quickly addressed in software and firmware updates. A few weeks or months in the marketplace will likely lead Makera to address all of the problems that will confound beginners. Until then, the Carvera Air probably works best as a desktop machine for a user who has some CNC or 3D printing experience and probably has a larger CNC machine around somewhere.
A great CNC for tinkerers and experienced users
For experienced CNC users, the Carvera Air is a dream come true. While thinking about what I'd do with a desktop CNC, I took a tour through years of my Fusion projects to see exactly what I've been modeling for 3D printing. It's a wild array of things: toys (and parts for broken toys), tool accessories, circuit board mounts, electronic project enclosures, hydroponics components, and hundreds of others. Like all of my projects related to microphones, cameras, and studio lighting, CNC milling (rather than consumer-level 3D printing) is really the ideal process for almost all of these projects. I also have needs for parts I wouldn't brother with 3D printing, like hobbyist-class RC car upgrades and replacement parts for my personal menagerie of retro tech and appliances. The available materials are more suitable and durable, and the subtractive CNC manufacturing process is a bit less like a chemistry experiment than getting new materials to work on my FDM printer.
Insert the Carvera Air and a lot of uncertainty and unreliability goes away. Everything about the machine is well-considered, mostly adaptations of or improvements on the features of the older Carvera. The capabilities are impressive, and the engineering and build quality are stellar. (I can't even really complain about its flimsy-feeling lid, which flexes but shows no sign of failing.) I've always had the vague feeling that CNC is just a little too fragile to be reliable on typical spindly consumer-grade machines, but nothing about the Carvera Air feels consumer-grade, cheap, or toy-like. It feels like you're about to make something real, because you are.
