The DIY Garage Storage Solution You Need For Your Skiing Equipment
Sports enthusiasts of all stripes know how important it is to keep your gear in top shape, and skiers are no exception. However, storing skis often means resting them against the wall or in a corner where they are almost guaranteed to come tumbling down, causing a racket and damaging those finely tuned edges. Delightfully, this is a clever DIY project that will maximize the storage space in your garage and get your skis out of the corner and off the ground with just a few pieces of scrap wood. The solution is a simple one: Hang them on the wall.
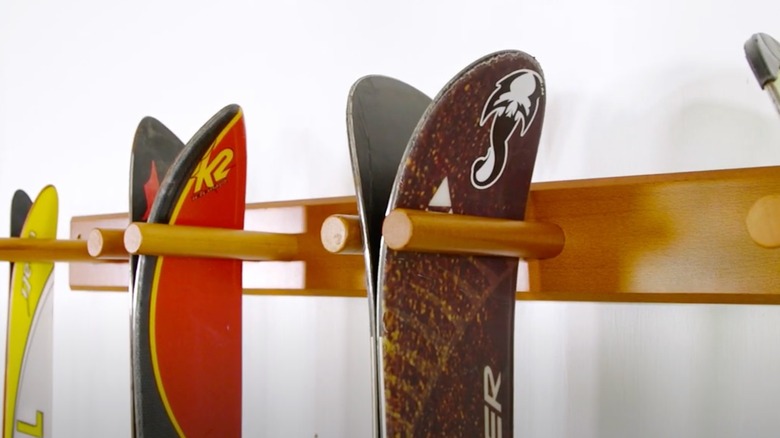
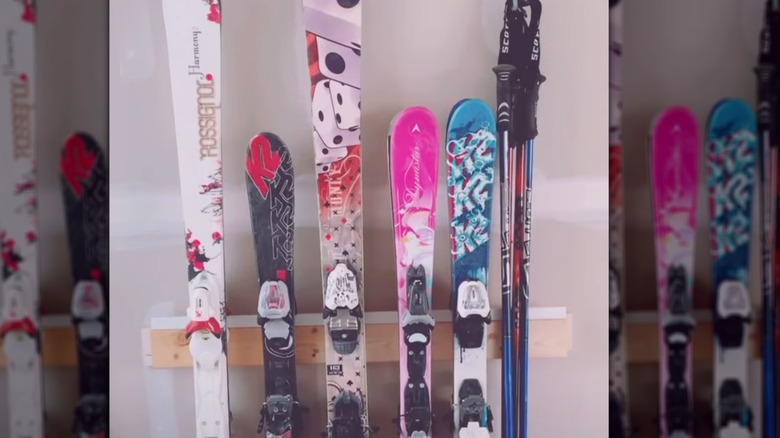
Ski equipment is not known for its bargain pricing, so when you've made that kind of investment to participate in a sport you love, it better be for the long haul. And they're definitely less likely to hold up when they're thrown in a closet or corner after the season ends. Maintaining sharp edges is essential to keeping your skis in tip-top shape, so the last thing you want is for them to slide down the wall and collapse in a heap on the floor. There are several easy hanging ski rack styles; one involves creating a slot in which the skis will hang by their tips, and the second will suspend your skis by their bindings. Once you've decided which style works best for you and your space, it's time to start cutting.
How to build a ski rack
The first method to maximize garage space with easy and affordable storage requires a 2x4 backer board and ⅝ inch dowels. If you've only got a pair or two of skis to hang, you can probably get away with a single length of dowel. More skis, obviously, will equal more dowels.
Begin by making a line down the center of your 2x4 to be your dowel line. Next, cut your dowels to length — slightly longer than the widest set of skis, plus the depth of the 2x4 (2 inches). Lay out dowel pairs with ¾ inch of space between them for each set of skis along that center line. Bear in mind that when hanging, each set of skis will consume about 4 inches of space at the thickest part — the bindings — so place your dowel pairs appropriately.
Then, drill ⅝ inch holes fully through the 2x4 backer board to accommodate each dowel. You'll also want to drill a small pilot hole through the top of your 2x4, down into the hole where your dowel will be seated. This is where you will add a support nail once you have your dowels in place. Apply wood glue to both the ⅝ inch hole and the end of the dowel, then pound them into place with a rubber mallet so you don't damage or split the dowels. Once they're all fully seated into the 2x4, you can hammer your support nails through the top of the board and into the end of the dowel. Mount your new rack on the wall into the studs, and you're ready for the season.
Easy scrap wood alternative to make a hanging ski rack
Another option that requires much less measuring and cutting is to simply mount a piece of corner or L-shaped trim along the top of a block of wood. You could also use a 2x4 backer board here to affix your ski rack to the wall, but since your skis will be hung facing you with one binding facing the wall, you may want to create some additional space by mounting two 2x4s together. Then, add the corner trim along the top.
In both cases, you can sand and finish your project with stain. Paint is an option, of course, but it will likely chip away over time. All that's left is to hang your skis. You may find that using some hook and loop fabric tape to wrap around your skis will keep them more secure while they're hung, and reduce the likelihood that they slip away from each other and slide off the rack. Of course, if you've already got a pair of ancient or damaged skis that will no longer serve their purpose on the slopes, don't despair. You can always repurpose them as décor elements to make your home look like a ski lodge.


