Illuminate Your Outdoor Space With Nautical DIY Planter Lighthouses
We may receive a commission on purchases made from links.
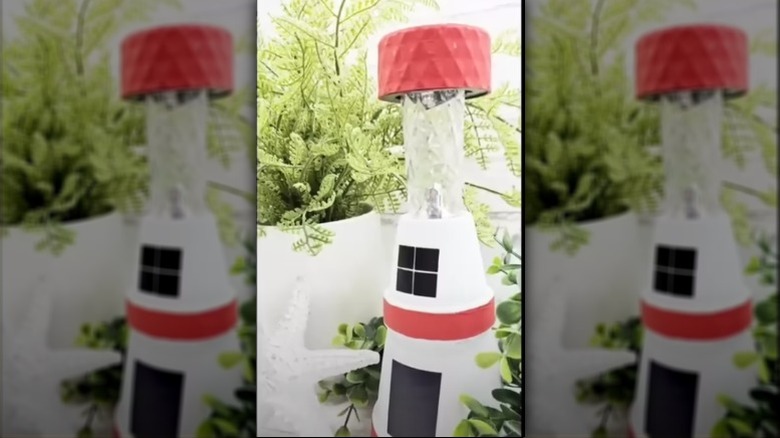
It seems that solar lights are one of the greatest inventions when it comes to adding illumination to your outdoor spaces. There are so many varied designs available these days that homeowners are spoilt for choice. But for DIY enthusiasts, there are plenty of creative ways to repurpose solar lights into beautiful home and garden decor. A cute project that you might like to recreate is this nautical lighthouse, as shown by YouTuber DIY Beauty On Purpose, which you can make using just terracotta pots and a solar light. This clever project can add a beachy theme to your outdoor decor and is sure to be a talking point when visitors drop by.
All you need for this creation is two terracotta pots in slightly varied sizes, a solar light, some chalk paint, and a few basic tools. You'll also need a hot glue gun to put it all together. You'll want the upturned smaller pot to just fit over the base of the larger one, so make sure they're not too different in size. You can buy these from Dollar Tree or Michael's, or you can find them online. This D'vine variety pack of four different-sized pots would be ideal because you can use them to make two lighthouses.
How to craft your nautical lighthouse
The first thing you'll want to do is make the drainage hole in the smaller pot large enough that the solar light base can fit inside it. You can do this in a variety of ways, but take care, so you don't accidentally break the pot. If you have access to a rotary tool, this would work best. Or you could just use a screwdriver and gently tap at the edges of the hole to make it bigger. If you're considering purchasing a rotary tool, you'll find that there plenty of genius ways you can be using a Dremel tool around your home.
The next step is to paint your pots with some white chalk paint. You might be interested to learn that lighthouses were typically painted white with red stripes to make them more visible during the day so they wouldn't just blend into the surrounding countryside. With your own creation, you can just paint the rims of each pot in red to denote the stripes. You'll also find that if you have three or four of the same-size pots and stack them one on top of the other, you'll only have to paint the rims in red and white stripes.
While you could use black vinyl and a Cricut machine to cut the windows and door, it's much easier if you just paint these on, either with black chalk paint or a permanent black marker. You could even consider using these water-based Posca markers.
Assembling your solar lighthouse
Once your pots are painted, it's time to assemble your lighthouse. Place the smaller upturned pot over the base of the larger pot, and secure it with your hot glue gun. Use the glue gun once again to fasten the solar light to the top by placing the base inside the hole that you've enlarged. Now, all you have to do is place the lighthouse out in the sun and watch it light up as evening approaches. This would look amazing out on your patio table as a centerpiece surrounded by a few small succulents or even in the center of a large bird bath. If you do intend to leave your lighthouse outside, it would be a good idea to cover the painted sections with some waterproof Mod Podge to seal them.
Do you have a few extra terracotta pots lying around? If so, why not get super creative and make other whimsical solar light holders by painting different designs using your chalk paints? For example, you could color your pot to resemble a cute bee or ladybug or just paint pretty sunflowers or daisies all over it. You could also vary the types of solar lights you use and switch out plain ones for pretty flower ones or ones that look like fireworks. These are just a few more cheap and clever ways to perk up your patio on a budget.

