The Dollar Tree DIY For A Unique Decorative Side Table
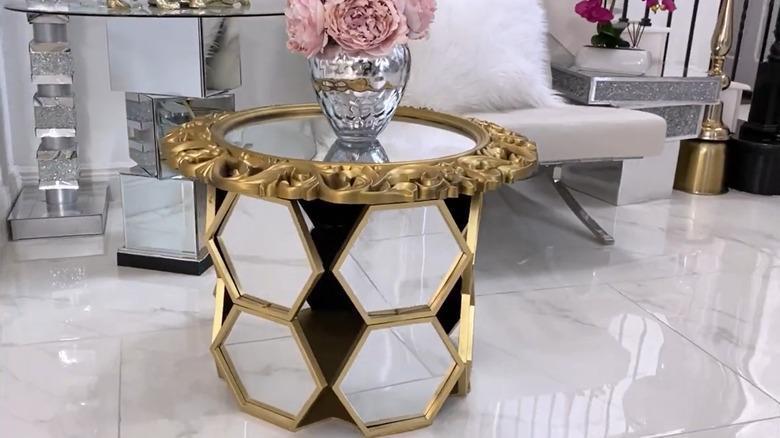
If you have creativity — and penny-pinching — in your blood, Dollar Tree products get your gears turning like no other shop or website. With prices from $1.25 to $5, the shelves are stocked with materials with uses far beyond what they were intended for. The imaginative Yvonne Sama from Yoduvh Essentials is a champion of luxe-look DIYs on the cheap. One of her blingy builds that caught our attention: a side table made from Dollar Tree mirrors and sheets of plywood. She had two circular wall mirrors that she could trade out for the tabletop. Topped with gilded paint, the end results belie its budget origins. Copy Sama's sophisticated home decor piece to a T, or tweak it more toward your taste with these steps and suggestions here.
To make this clever mirror-based side table, pick up 14 Hexagon Mirrors and a sheet of foam board from your local Dollar Tree; at first, you'll use just the frames for the build. During the final steps, you'll replace the mirrors and backing to give the table extra support.. You'll also need two sheets of 2-foot by 2-foot plywood, a round wall mirror about 2 feet in diameter, metallic gold spray paint, a staple gun, construction adhesive, a utility knife, and a jigsaw. If you'd like a different effect, trade the gold spray paint for your color of choice; just be sure to buy a formula that adheres well to plastic. You can also try this dryer sheet hack to make painting plastic easier.
Prepare to make the cuts
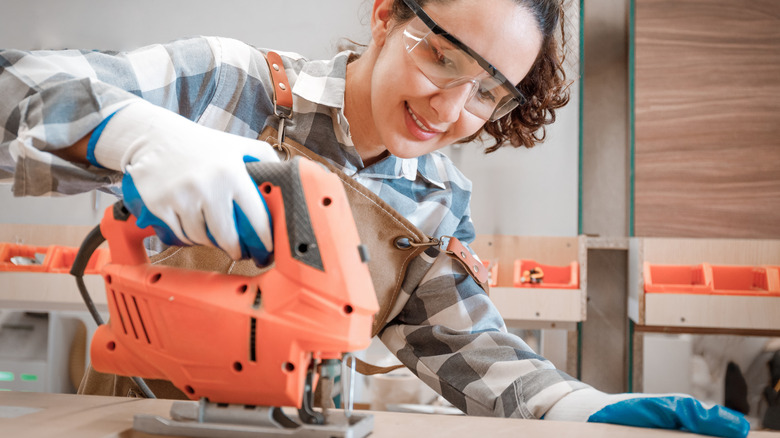
You'll be cutting two pieces of plywood with your jigsaw, one for the table's base and the other for the top. The hexagon mirrors make up two rings of support around the perimeter of the wood pieces. You'll attach the mirrors to the wood with both construction adhesive and staples. The support consists of two rings of seven mirrors each, one stacked on the other and both glued and screwed together. Attach one ring of mirrors to each piece of plywood separately before adhering the two rings to each other.
Sama used a glass tabletop as a template for the circle of mirrors, and the shape was too small for all the mirrors to fit without overlapping. Avoid this by mocking up a circle in a few steps. Use some masking tape to hold seven mirror frames vertically. Arrange them in a circle so that they each sit on a flat side and touch each other at their central side angle. To even out your shape, use a thumbtack, some string, and a pencil for a makeshift compass. Insert the thumbtack through a knot in the string and into the centerpoint of the shape. Pull the string to the edge of the frames, and tie the string around the pencil. Trace a circle around the inside edges of the frames, making any needed adjustments to the frames as you go.
Fit together your final product
Once you've got an even shape for your frames, mark the full edges of the frames where you've taped them with pencil. Place one of the frames in an open space between two of the lines you drew; two of three corners should touch the ends of the lines with the middle corner pointing toward the shape's center. Trace along those two sides so that there's now a triangular indent between each of the initial lines you drew. This shape will make the wood base and top less visible in your final product. If you choose, you don't have to make the additional cuts for what will be the tabletop, since you'll be covering it with a mirror.
Cut out the template, and use it to create the wood shapes with a jigsaw tool. With construction adhesive and staples, attach seven frames per piece to the "tabs" on each wood cut. Spray paint the structure, focusing on both sides of the frames and what will be the tops of both the base and the tabletop. Once dry, replace the mirrors and backings in the frames; you can leave them out for an airy look, but your table won't be as sturdy. On the base, cover the top edge of each frame with adhesive. Place the top of the table frame-edge-down onto the base so that the frames' edges on both halves sit on top of each other. Ask someone to hold the tabletop as you attach each row of frames together with screws. Finally, top your table with a mirror and a few decor pieces, and enjoy your creation!

