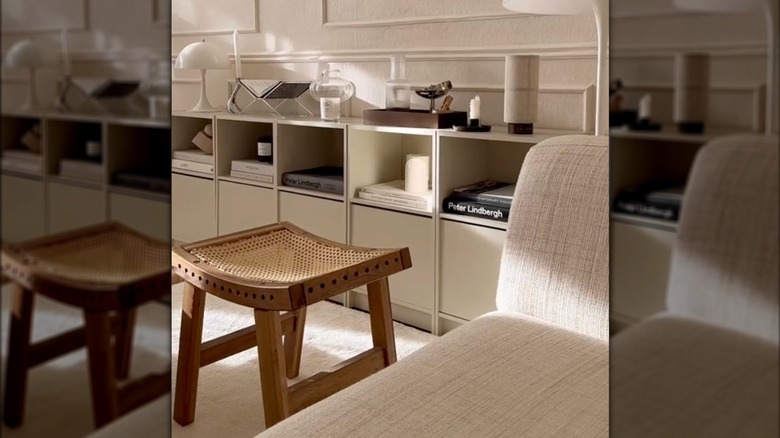
Hack IKEA's Affordable Nightstands For An Elegant Sideboard With Tons Of Storage
There's no reason to go over your budget when it comes to decorating your home these days. With so many crafty and clever DIYs and home hacks, you should be able to find any additions and upgrades you want within a reasonable price range. After all, if you can create a whole kitchen organization system using nothing but IKEA products or turn IKEA's glass domes into flower vases, you can definitely make a luxurious sideboard that gives you more storage and complements any room without overspending. IKEA's GURSKEN ($19.99) are simple bedside tables that provide multiple levels where you can keep everything you need handy, so all you need to do to create a customized sideboard is buy multiple of these and push them together to build a long unit perfect for any room in your home.
While IKEA does sell a popular sideboard, the $450 unit is taller rather than longer, which is why you may prefer to make your own. This hack is so easy, you could just buy three, four, or five of these tables and place them next to one another against a wall, add your items, and call it good. However, if you really want to elevate this DIY and make it seem a little more stylish, there are a variety of upgrades you can make to turn it into the sideboard of your Pinterest or home vision board without the hefty price tag.
Paint and secure your tables together for a long sideboard
You can start by painting the IKEA GURSKEN in different colors. Pick tones that match the room you're decorating for; neutrals are always a good choice for furniture, or you can make this your "pop" of color if you're hoping for something more dramatic and already have your other items. Once you've painted, you can also seal the gaps between each table to make them seem like one unit and overall more cohesive. For this, a silicone sealant or wood glue can adhere the tables, which are made of particle board, and make those cracks smooth so everything becomes one piece. Just ensure you're committed to keeping this unit together — otherwise, it might be tricky down the line to separate them.
It's not just about painting and securing the sideboard together that makes this hack work. It's also about how you decorate. Because you will have so much storage, it can be tempting to load each cubby and cabinet with items. However, intentional design will elevate this piece, so intersperse books and reading materials with lamps, candles, frames, ornaments, and even art work to make it more of a showcase piece than just storage.
Balance decor on the sideboard for functional style
Because the sideboard will be longer than most standard surfaces in the room you set it up in, keep balance in mind. If you plan to add a lamp, you could add this at one end and balance its height with either a pillar candle or two tapered candles, which are both slightly taller and will keep one end from feeling heavier or uneven. Use standard glass jar candles both on top and inside the cubbies, then stack your books (spine out) inside these cubbies as well, alternating larger and smaller editions or even placing magazines in place of books. You can purchase canvas or wicker baskets to place inside the cubbies, too, to help manage visual clutter and keep your smaller items organized.
These are also great for trinkets, then add a jewelry bowl or dish, a diffuser or diffuser reeds, and some glass elements to the top surface. Glass is ideal for decorating because it fills a space without feeling too bulky, thanks to the clear nature that also allows light to flow through. That's why when you're decorating a longer table, glass pieces are useful to keep balance without overloading a certain section.

