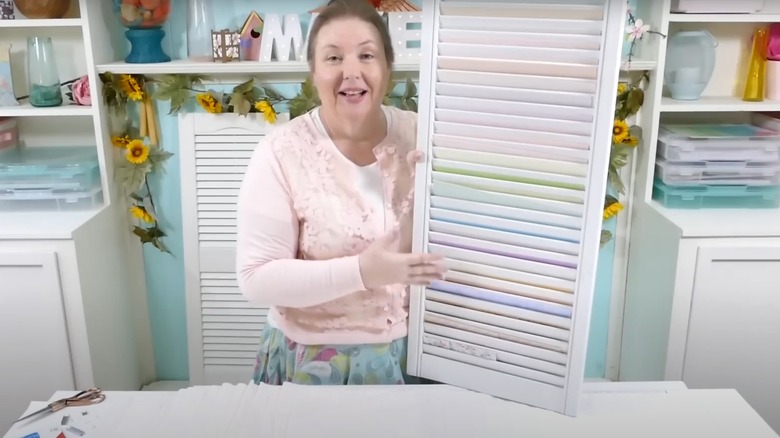
Make A Cute Custom DIY Paper Organizer From A Wooden Shutter
Cute storage ideas for any craft room or studio space can often come at a premium. With so many supplies and crafty elements, it's easy for your space to become cluttered and chaotic. Whether you work best in neatness or chaos, you may be looking for fun and cute ways to store and display your materials or easy craft room organization hacks. Luckily, there's an ingenious hack for turning an ordinary old window shutter into a paper rack. Not only is this DIY far prettier than the metal racks you can buy at craft or home stores, but it holds a large amount of paper, too.
You can often find these old shutters at thrift stores, antique markets, architectural salvage retailers, and places like Craigslist or Facebook Marketplace. They come in a number of sizes, most made of solid wood and sturdy construction. With several yards of fabric, a staple gun, and some paint, you can create the perfect storage solution for paper and cardstock to help keep your craft room spic and span. The resulting rack also gives endless cottage and rustic charm to your space. For a great craft room idea, lean it against the wall or hang it on the door. It also makes an excellent mail sorter in an entryway or file folder holder in a home office.
Making a paper organizer from an old shutter
Begin by cleaning and preparing your window shutter. You can leave it in its rustic chipped paint or distressed finish for a cool farmhouse look, or add a fresh coat of paint or stain to make it look like new. Measure the length of the slats in your shutter to determine the width of your fabric strips. Cut the fabric or rip it along the grain into long strips the same width as the shutter slats. You can create several long strips from a bolt of fabric. You can use either inexpensive fabric for this project, vinyl, or other materials that will hold the paper.
Each pocket for the slats will need to be at least the size of the paper you intend to store there. Try doubling the length of your paper and adding an additional 1 1/2 inch to account for the slat width to mark your measurements on the fabric. Mark three equally spaced marks along the top to help guide where your staples will be placed, affixing the fabric with the gun. Doing so on the bottom of each slat at an angle will make sure they are not visible from the front. Fold each segment up to the next mark and affix it to the next rung down on the shutter to create the pocket. Continue the length of the shutter with the same process, adjusting to shorter pockets at the bottom as you run out of space. To adjust the size of individual pockets without changing your fabric dimensions, use a couple safety pins to pin off the depth of the pockets to hold smaller sheets.

