Tips & Tricks That Make Painting Ceilings & High Walls So Much Easier
Painting a room is a tedious process, especially if your home has high ceilings and walls. Although high ceilings improve home value, the height also makes them hard to reach for cleaning, decorating, and renovation projects. Between the prep work, painting, and waiting, it can take hours to days to finish a paint job. It may take even longer if you don't know how to approach the highest spots or work around doors, windows, and decorative embellishments. Instead of blindly diving into a do-it-yourself paint job, you may want to brush up on some methods to make the project less painstaking.
There are several tips, tricks, and tools that can expedite the painting process without taking away from the finished look. It doesn't matter if you have a small budget or little experience painting ceilings and walls. None of these tips require large purchases or professional skills, making them doable for most households. Read on to learn more about these eight ingenious ideas that ensure your painting project is a breeze.
Use a corner roller so you don't have to cut in walls by hand with a brush
Paint rollers are the primary tool you'll need for painting walls and ceilings. A paint roller features a wire holder and soft fiber roller attachment that quickly and evenly spreads paint over a surface. The only drawback is that a standard design isn't made for painting into corners, which is why many people apply paint to these areas with a brush (which is known as "cutting in"). Fortunately, a corner roller can make painting corners and ceilings a whole lot easier. They don't cost much, for example, a corner roller like the Starke LLC Microfiber Paint Roller Cover from Amazon, which has a closed end that can also be dipped in paint, will run you just over $9. The instructions are simple: Slide it onto the wire holder and paint flush with the wall and ceiling corners.
Using a corner roller has multiple benefits. While being just as budget-friendly as a standard design, they can cover more wall space overall and prevent accidental scuff marks from the roller frame. The more thorough coverage ensures you won't have as much touching up to do after the first coat, and you won't need to paint all the corner edges with a brush.
Attach the paint roller to an extension rod with a tool belt to reduce physical stress
One of the biggest qualms about painting high walls and ceilings is that it's strenuous on your arm, back, and neck muscles. The constant upward motions and weight of the roller puts stress on your body. This can lead to soreness and achiness, especially when working for long periods. Utilizing an extension rod is a common practice for painting high walls and ceilings (you can even use a paint roller plus an extension rod for cleaning gutters), but there's a way to make it even less strenuous. Strap on a tool belt, and rest the extension rod and roller duo in a belt slot. This arrangement enables you to anchor the roller to the lower half of your body and give your arms a break.
This easy tool belt trick for painting ceilings is especially useful if you have a lot of space to cover and not a lot of help. Aside from the standard painting supplies, all that's needed is something like the Mr. Longarm Extension Pole and Toughbuilt Cliptech Framer's Pouch from Home Depot. You don't have to use these specific products, just be sure to choose an adjustable extension pole and a toolbelt with multiple pocket and slot sizes to ensure they work together.
Tape a paint tray or liner to your paint roller to catch drips
Paint drips are a common mishap when rolling walls. When painting a ceiling, the droplets are even more precarious, as they can fall on you, furniture, flooring, and anything else below. A TikTok ceiling painting hack takes care of this problem: All you have to do is tape a plastic tray or liner to the top of a paint roller and extension rod to catch the drips as you go. Use a putty knife to cut a slit at the bottom of the tray, and slide the extension rod through the hole. Make sure the tray is facing upwards beneath the roller, and secure it in place with duct tape.
When the roller slides across the ceiling, any splatters of paint should drip into the tray, rather than on you and your surroundings. This cuts down on messes, making cleanup much easier. Disposable plastic paint trays are only about $1 to $2 each at The Home Depot, Lowe's, and other popular retailers.
Invest in smart ladder accessories
A ladder is a must-have for painting high walls and ceilings. Even with a paint roller and extension rod, you will likely still have to find a way to reach the smallest crevices or touch up small areas that may have been missed during the first coat. Fortunately, there are multiple ladder accessories that can help you access hard-to-reach spaces.
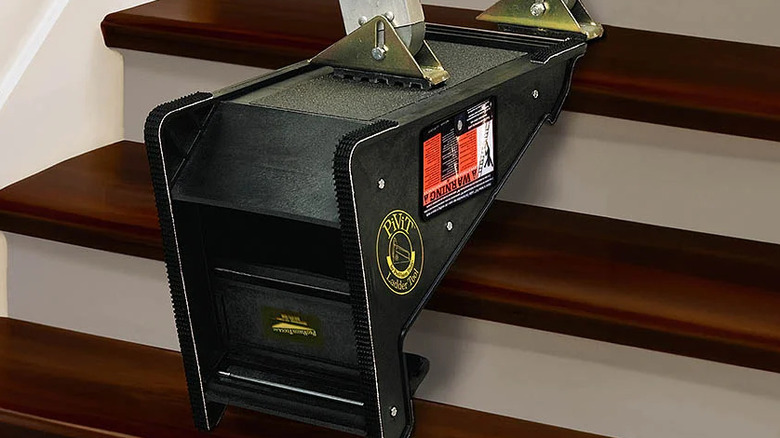
If you're painting over stairs or in the transition space between step-down rooms, the ProVisionTools Multi-Use Ladder Leveling Tool from Amazon anchors in place beneath one ladder leg, making the ladder stand flat on the uneven surface. This allows you to safely climb the ladder in places that would otherwise be very dangerous to balance on. If you're looking for a tool that makes painting less tedious, the Toocust Anti-Slip Ladder Tool Tray Painters Platform is also available on Amazon. This accessory adds about a square foot of temporary shelf space to one side of the ladder. Instead of climbing up and down the rungs to get fresh paint or a new brush, you can keep everything on top of the ladder with you, making the process quicker and more convenient.
Use flat and matte paint for ceilings to hide imperfections
Ultimately, the paint color and finish you choose for your ceiling and walls is up to you. You can play it safe with white, or be adventurous and try out some trendy ceiling paint colors. However, you want to be smart when it comes to paint finishes. The best paint finish for your ceiling will generally be either flat, matte, or eggshell. These duller finishes work great on ceilings, both for practical and aesthetic reasons.
Less glossy finishes are recommended because flat and matte paints don't give off a reflection, which highlights irregularities in surfaces. The flatness renders the color pigment more potent which gives you better coverage and makes it easier to paint a smooth and uniform coat. The non-reflective qualities are great for masking flaws and unwanted texture in the ceilings and walls. As it takes fewer layers to apply, this means less work and less time painting overall. You'll notice most "ceiling paints" come in flat finishes. While you can choose to buy dedicated ceiling paint, you can also opt to purchase flat latex paint that's designed for general use if you're planning to apply it in other areas (like a very low traffic zone or an adult's bedroom.)
Use wider painter's tape to keep paint off casings, moldings, and baseboards
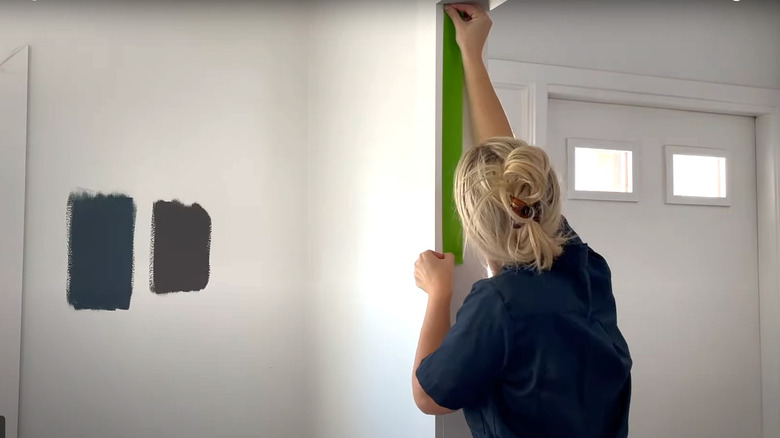
Concluding your DIY painting project with a professional finish requires precise painting. You don't want to splatter paint on unintended surfaces, like door and window casings, crown molding, baseboards, and other interior accents. Fortunately, painter's tape is a reliable barricade to keep paint where it belongs.
The wider the tape, the less precise you have to paint, and the faster you can work. Painter's tape with about a 1.5-inch width is usually suitable for most areas. You also want a tape that won't damage the surfaces it's stuck to. Multipurpose painter's tape is safe for most trims and baseboards, but you may need textured or delicate tape for stone, wood, faux finishes, wallpapers, or other unique surfaces. You can find a good range of types and sizes of painter's tape at most home improvement and big box stores. Duckbrand, Frogtape, IPG, and Scotch are among the most trusted brands. Out of these manufacturers, Scotch's Scotchblue Original Multi-Surface Painter's Tape is one of the most popular choices since it provides extra protection and can be left on surfaces for up to two weeks.
Create an ultra-crisp line in ceiling corners with a paint edger
There's another tool similar to the paint roller cover for corners and edges, but this one allows you to create a crisp line where you want your paint to stop. Paint edgers are handheld devices that paint precisely lines next to straight edges, baseboards, casings, and moldings (which is ideal if you're painting your ceiling or corner molding a different color to your walls). Edgers eliminate the need for painter's tape, and some people prefer using this tool over meticulously applying tape around a room.
You may need a ladder and additional ladder accessories to reach the high points of your wall or to drag the edger around the ceiling border. However, a standard paint edger itself costs less than $10, making this a budget-friendly option. Even the Voomey Paint Edger Tool Kit from Amazon, with multiple edger shapes, extra pads, and touch-up tools is under $30. The only thing to keep in mind is that there is some skill required. You have to apply the right amount of pressure and have a steady hand to avoid making smudges or leaving gaps in the paint, especially if working with an uneven surface.
Pick high-quality paint with a thicker consistency so it splatters less
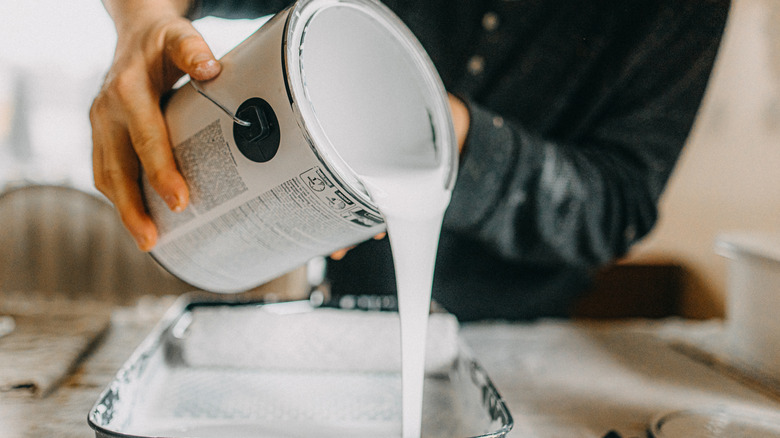
It's no surprise that high-quality paint is key to a top-tier job. The best paint brands focus on four main categories to make superior products: additives, binders, pigments, and the overall liquid ratio. Additives keep the color even and prevent paint from spoiling, and binders make the dried product stick better and longer. Better pigments retain more color, and thicker concoctions are easier to stir and use.
High-quality paints go on smoother and hold up for longer. The solid-to-liquid ratio is especially important, as a thicker formula is less likely to drip and splatter throughout the process. Premium paint brands also tend to have better coverage, meaning you'll have to apply fewer coats (which equals less time and labor trying to paint precisely up in those high corners). According to a 2023 J.D. Power survey, Sherwin-Williams, BEHR, and Benjamin Moore have the highest satisfaction rates of interior paint brands. Aside from these major companies, try looking into exclusive brands carried at select stores, such as Lowe's most popular interior wall paint. Lowe's sells Valspar Signature Latex Interior Paint for slightly less than the aforementioned big-name brands, but it's still considered an "upper-middle" paint. A product along these lines may be better suited if you're on a budget but are still looking for a certain level of quality.
