Here's What Causes Cissing And How To Prevent It During Your Next Paint Job
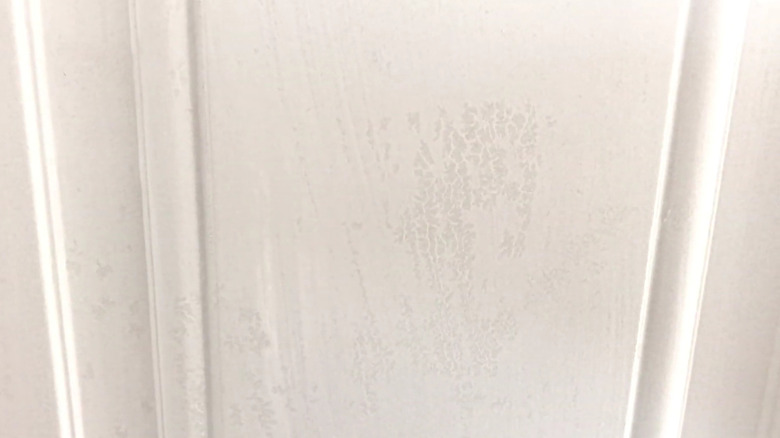
Have you ever noticed that sometimes you get a little dimpling, cratering, or small unpainted streaks on the surfaces of your painting projects? And, for some reason, you can't seem to fill these spots in, no matter how many coats you paint over? Well, this describes the frustrating, yet all too familiar, phenomenon of cissing. Cissing usually occurs when the surface you're painting on or over is contaminated in some way, preventing the paint from adhering properly. A poorly prepped surface with oil or wax residue on it will stop the paint from sticking, resulting in an uneven application.
If you find yourself with this home improvement pickle on your hands, don't be discouraged. You can prevent cissing with proper preparation techniques, though skipping this step is a common mistake everyone makes when painting their home. If cissing has already occurred and you need to find a way to erase evidence of this issue on your freshly painted surfaces, there are methods you can try that will fix the patchiness so your DIY days don't need to be cut short.
How to fix and prevent cissing
If you haven't started your painting project yet, you can prevent cissing by properly prepping your surfaces. This is a key tip for painting your home like a professional that will help to ensure a flawless finish. First, you'll want to make sure that the surface you are about to paint is absolutely free of contaminants, especially anything slippery like oils or silicas. To do this, rub sandpaper over your surface to strip away those contaminants, then apply a white spirit or other cleaning solvent to remove any residues. A mixture of warm water and detergent makes a good alternative to white spirit if you don't have any on hand. Cleaning application brushes and rollers will also help to prevent cissing. Allow your surface to fully dry, then move forward with painting.
Has cissing already plagued your project? Not to worry, it can be fixed. Wait until your paint has completely dried, then take some coarse sandpaper and remove that layer. Once all evidence of the cissing has been taken off, prep your walls for painting as described in the steps above. You'll then have a smooth and clean canvas to work on that shouldn't experience this annoying issue.

