We Made A DIY Pool Noodle Scratching Post, But Is It Worthy Of Kitty Claws?
We may receive a commission on purchases made from links.
I'm a recovering cat bigot. I love all animals, want what's best for them, and don't even eat them. But cats confound me: They purr one moment and claw the next. In a goodwill outreach mission, I decided to work on my strained relationship with my sister-in-law's cat, Yadi. Given a chance to flex my creative muscles with a DIY cat scratching post made from a pool noodle, this seemed to be an ideal olive branch to extend toward Yadi. YouTuber Byromie inspired the project by crafting an enviable cat entertainment center using pool noodles as scratching posts, so I thought I could give this project a try. Plus, I thought I could keep the costs and eco-impact low by repurposing as many materials as possible.
We've tried lots of pool noodle DIYs, but a cat scratching post hasn't been among them so far. With cheap or upcycled materials, even if Yadi turned her tail to her new post, the stakes were low. I planned to slide two different lengths of pool noodle over pieces of a mop handle and mount them on an upholstered wooden base with flanges. Then I'd wrap the padded posts with jute rope held in place with non-toxic glue.
As I pictured my sister-in-law's lacerated upholstery, it gave me the idea to fill the hollow mop handle with catnip. If anything could lure a kitty to a scratcher instead of a sofa, this is the stuff. With two enthusiastic thumbs-up from my sister-in-law, I grabbed a couple of used pool noodles, a mop handle destined for the dump, and my tool collection, and got to work.
Kicking off the build
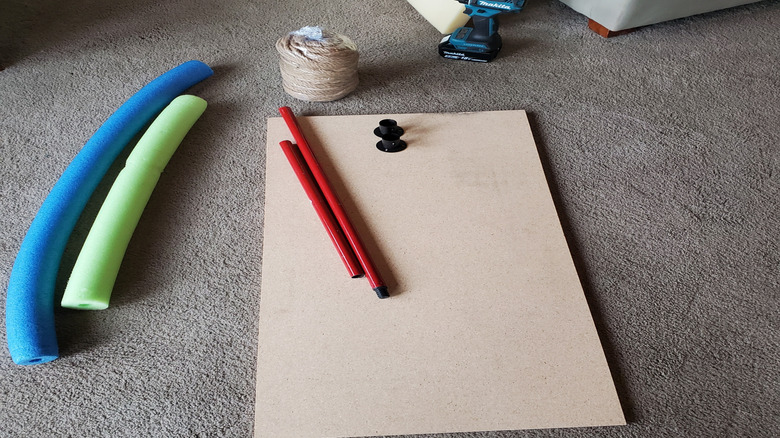
From my own hoard of craft supplies, I set aside two pairs of old jeans and leftover foam padding to upholster the scratcher's base. From my local hardware store, I picked up a 36-inch-by-18-inch piece of ½-inch-thick particle board and heavy-duty glue. From Amazon, I ordered a set of NELXULAS flange pipe holders, a roll of Pxyz jute rope, a bag of From the Field catnip, and self-drilling ½-inch screws, which did not turn out to be the right screw for my DIY project.
I raided the tool shelf for a jab saw, a drill with a Phillips head screwdriver bit and a very fine drill bit, and a loaded staple gun. For the denim upholstery on the base, I needed to sew together three cut-open legs of jeans, so I dusted off my sewing machine as well. Despite my efforts at frugality, the final cost just for materials added up to nearly $100. For this price, Yadi could've had a professionally built deluxe kitty jungle gym.
To start, I cut the foam padding and denim to fit around the particle board base with a good margin for stapling, and I sewed the denim pieces together. To mount the poles to the base, I centered the two flanges on the width of the board and screwed them each 10 inches in from the ends. That left 13 inches between the flanges. I cut holes in both the foam and the denim for the flanges to poke through and secured both to the base by stapling the fabric to the underside of the particle board.
Piecing together the posts
With my jab saw, I cut the mop handle into two pieces measuring 18 inches and 24 inches. I found that the best tool to use when cutting the pool noodles to match the length of the two handle pieces was a small serrated knife. Before sliding the pool noodles onto the mop handle cuts, I drilled six very small holes at different points on each piece so that the scent of catnip would permeate the posts.
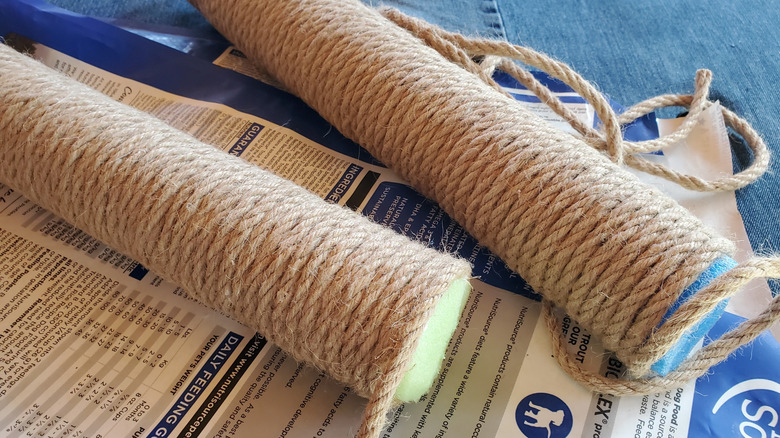
I slipped the handles through the pool noodles, tied an end of the jute rope around the mop handle end that fit through the flange, and secured it with heavy-duty glue. I glued and wrapped the rope around the noodle until I'd covered the entire length of both noodles. To finish the ends of the posts, I coiled the rope over the cut faces of the noodles, tucked the rope ends into the hollow tube, and glued it.
Once the glue on the rope dried, I slid the posts into the flanges. I knew they'd be a bit loose, and I'd hoped that the screw on the side of the flange would tighten enough to hold the posts firmly. Alas, the screws that came in the flanges were too short to reach the post. Luckily, among my DIY supplies, I found a couple of longer screws that fit perfectly. Even tightened to their limit and reinforced with lots of glue, the posts still wobbled. I gave up and ordered flanges with narrower shafts; they turned out to be too narrow, so it was time to get creative.
Troubleshooting and finishing touches
In addition to the flange troubles, I noticed that the screws I'd used to attach the flanges to the particle board were coming loose already. I'd ordered shorter screws for the flanges so that they wouldn't poke through the other side of the board when they were screwed in fully. I decided that a longer screw would do a better job holding the posts in place for the long term. I also reinforced the holes with wood glue. My handy bolt cutters took care of the poke-through, and I covered the rough cut edges with hot glue so that they wouldn't snag carpet or scratch floors.
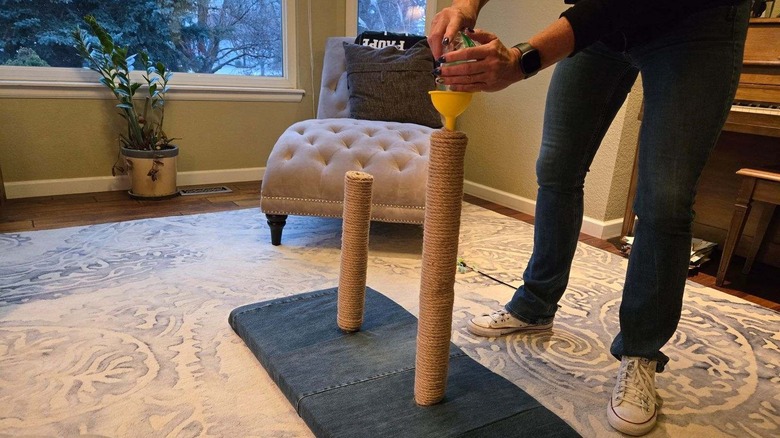
The pièce de résistance for this build was filling the hollow posts with catnip. I'd initially planned for the posts to come out of the base for easy refilling, but it ended up being more important to secure them tightly to the base so that they didn't wobble. However, the wobble factor was threatening to sabotage the entire project. Wrapping the ends of the mop handle in duct tape before sliding them into the flanges helped a bit, but not enough to solve the problem fully. After sharing a video of the current wobble level, my sister-in-law responded that it might not be a problem.
And the final results are...
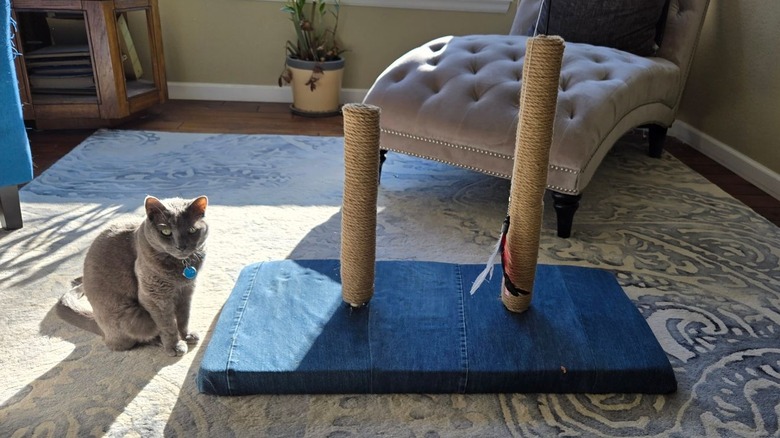
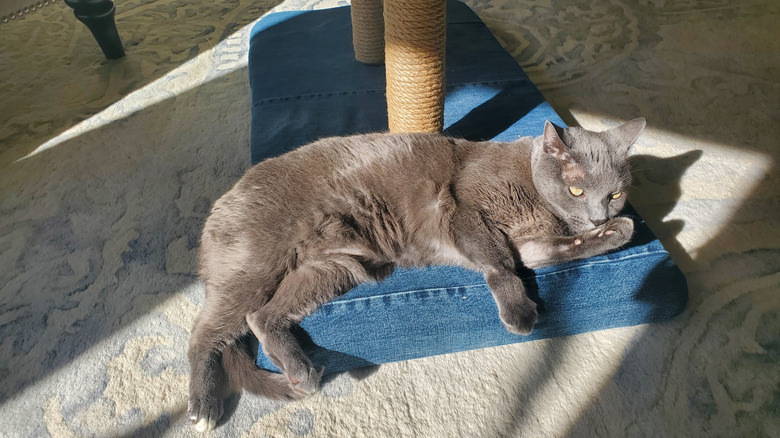
I felt little confidence in the quality of the build and whether the cat would like her new pool noodle scratcher when we arrived. But Yadi appeared within minutes of us walking through the door (perhaps lured by my huge bag of catnip). She immediately began kneading the cushy denim base with her claws and rubbing against the posts. While I didn't see her actively using the posts themselves, my sister-in-law marveled that this was the most Yadi had ever interacted with a new toy.
Needless to say, I immediately felt better about the whole project. It wasn't cheaper than purchasing a professionally made cat scratcher, and it was tricky to build, but there were enough positive factors that made me feel it was worth the trouble and expense. Using upcycled items was important to me, and so was making sure that all my supplies were non-toxic. The biggest positive was, of course, how happy this beautiful cat was with her gift.
If I were to try this DIY again, plywood would possibly be a better choice, even though it is a lot more expensive. I think the fibers in the particle board weren't strong enough to hold the posts well. Also, YouTuber Byromie had used a threaded pipe and flange to support the pool noodle. Rather than opting for an upcycled mop handle, copying their exact design would've saved a lot of headache. However, that would've pushed the cost of this project way beyond budget. Despite the bumps and hurdles, it was 100% worth the time, effort, cost, and frustration to see Yadi enjoying her new plaything.
