The DIY French Oak Countertops That Bring Affordable Luxury To Your Kitchen
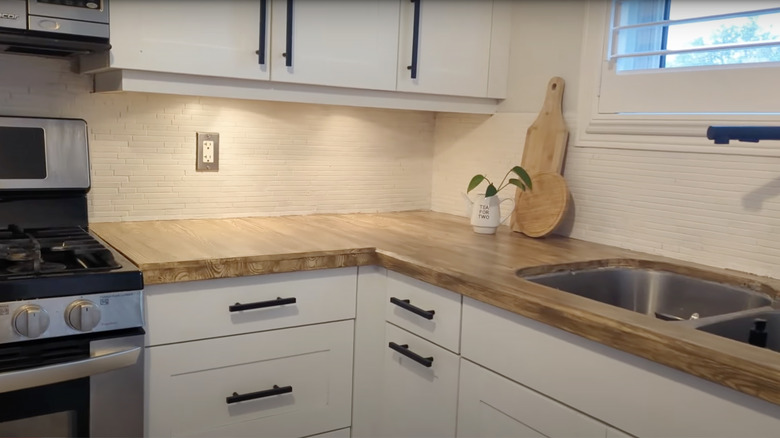
Outdated counters can really bring down the entire aesthetic of your kitchen. Replacing them is always an option, but with the average price of countertop installation hovering around $3,150, that's not always feasible. If you're looking for a budget-friendly solution to update your countertops and you love the classic look of wood counters, you may want to consider a product called Retique It. It's a liquid wood coating that can be applied to many different hard surfaces, including kitchen counters, and it creates the appearance and feel of real-deal wood. Not only is it an easy DIY project you can tackle in a weekend, but you can use it to give dated counters the look of high-end French oak countertops for less than $300.
Made with 60% recycled wood fibers, Retique It comes in several wood tones, doesn't require any sanding or stripping before application, and dries to a waterproof, scratch-resistant finish. The French oak kitchen countertop kit comes in either a 16-ounce version for $169.99, which can cover 50 square feet, or a 32-ounce version for $299.99, which can cover 100 square feet (enough for a full kitchen). Both kits include a brush, wood-graining tools, light wood primer, barnwood wood stain, whitewash gel stain, and a topcoat. It's a fairly easy process to apply the products, but there are a few tips and tricks that can make the process go more smoothly. Keep reading if you're ready to tackle this kitchen upgrade that is definitely worth the price.
Painting your kitchen counters with liquid wood
Start by cleaning your counters with a mixture of equal parts water and either denatured alcohol or rubbing alcohol to remove all traces of dirt and grease. Apply painter's tape along the edges of the backsplash, sink, faucet, and appliances to protect them. Shake or stir the primer, and apply a coat of it to the counter with a paintbrush using long, even strokes in the direction you'd like the wood grain to go. Wait two hours for it to dry, or speed up the process with a hair dryer, until applying a second coat. Some DIYers even said a third coat of primer was necessary to get full coverage.
Once the final coat of primer is dry, apply a thin coat of barnwood stain with a brush, working in small sections at a time. Immediately drag one of the wood-graining tools across the stain, gently rocking it to create a wood grain pattern. Let dry, and apply a second coat of barnwood stain over the wood grain. Once that dries, apply a coat of the whitewash gel stain with a brush and wipe off the excess with a paper towel. The whitewash is what gives the wood a French oak look. Let dry, and apply three coats of clear topcoat with a clean brush, allowing it to dry two hours between coats (don't use a hair dryer on the topcoat). Now you have beautiful wooden counters that'll never go out of style!

