This Stunning DIY Clay Lampshade Looks Like It Could Be Designer-Made
We may receive a commission on purchases made from links.
The best thing about DIY projects is their ability to turn the ordinary into extraordinary. If you want a simple project to give your light fixture some pizazz or you're just on the lookout for the next craft to feel proud of, then you will love this DIY shared on Instagram by @uamaika. A little clay here, a little paint there, and you can give your simple pendant light a customized one-of-a-kind statement light. All you need for this project are air-dry clay, a rolling pin, baking sheets, a small knife, paint, and sandpaper.
While the brand of clay used by @uamaika might be difficult to find in the U.S., you can get a 2.2-lb pack of DAS Air-Hardening Modeling Clay at Michael's craft stores for $11.99. Other creators like @ginaladeco have used the DAS brand to recreate this lampshade with amazing results.
How to make your chic clay lampshade
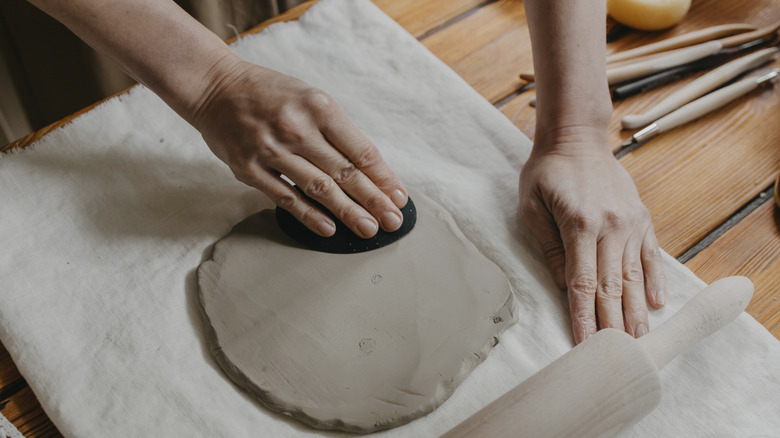
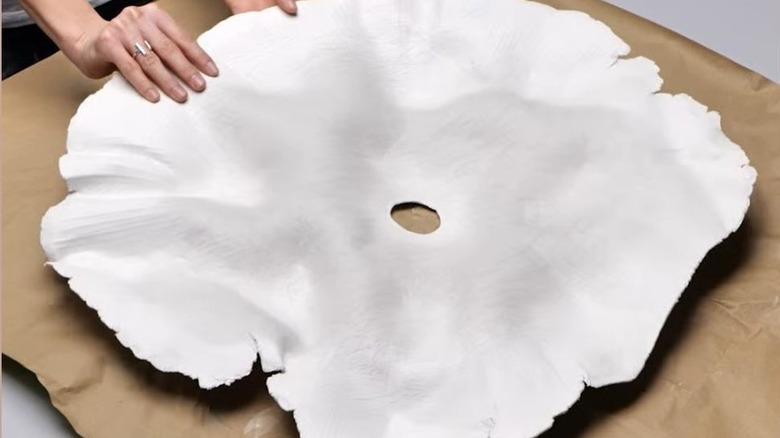
Before starting, you should first spread baking sheets on the surface you're working on to prevent staining. Combine the clay into a ball, place it on the sheets, and knead thoroughly for some minutes. Now, use a rolling pin to roll out the clay in any shape you want, aiming for an overall thickness of about 0.1 inches. You shouldn't use any rolling pin that comes in contact with food for this. Instead, work with an old pin or even a wine bottle. After rolling, use your light's socket as a reference to cut a hole in the middle of the clay.
Next, create any design of your choice on the clay. You can use a knife or skewer to draw lines or a stiff brush to make a sweeping pattern, whatever you want as long as you don't make a hole in your mold. Crumple paper of different sizes and place them under your clay in the shape you desire. Now it's time to leave your project to air-dry. DAS clay typically takes 24 hours to dry, but you might need to give your DIY two to three days. When the top of your lampshade is significantly dry, turn it over to expose the underside to air as that part will most likely be drying slower because of lower airflow. Cracks can form if you try to speed up the process with a hair dryer or by placing your lampshade under direct sunlight, so it's better to be patient.
Final touches to your lampshade DIY
After the shade is completely dried, it's time to paint. You can go with white paint for that modern, minimal vibe or metallic gold for a more Art Deco aesthetic. Whatever your choice, just make sure you're handling the project with care as it would be a shame if it shattered after all your efforts. Then again, you can always revive the pieces by soaking them in water to make the dried clay malleable once more (but it's better to be safe than sorry).
After painting, use the sandpaper to smooth out any rough edges you notice, and wipe the dust with a light cloth. Now insert the socket of your pendant light into the hole in the lampshade, and screw in the bulb on the other end. Your chic lampshade is ready to go! Aside from using it with pendant lights, you can also make this lampshade for your floor lamp or craft a smaller version for desk lamps. It's a versatile design that will give your home that designer look while giving your physical and mental health a boost. And the best part is, even if you decide to go for a different lampshade style after some time, you can simply soak the clay in water and use it for another DIY project like leaf-shaped clay trinket dishes.

