Keep The Heat In During Winter By Properly Insulating Your Attic Hatch Or Door
We may receive a commission on purchases made from links.
It's always gratifying when knowledge from our K-12 education comes in handy. Heat rises, and this one isn't too hard to forget. Chilly lower floors remind us of this in the winter. Even if your home insulation is performing at its best in other parts of the home, a poorly- or uninsulated attic door can be a gaping heat suck. Attack your attic door with just three supplies to seal in your bought air. You'll keep some money in your bank account, reduce your carbon footprint, and live more comfortably in your home.
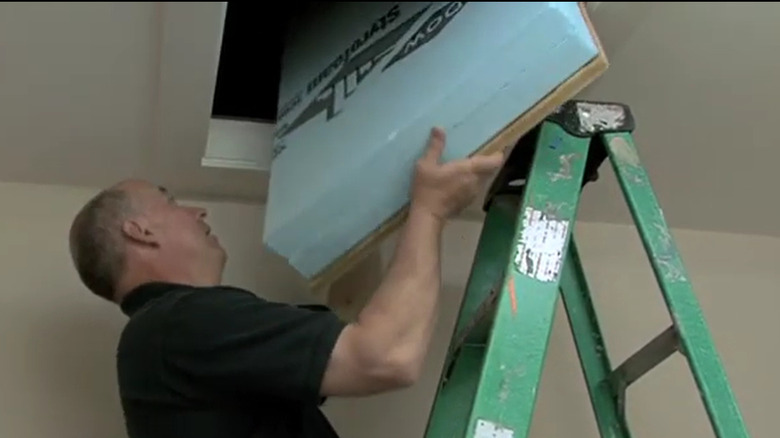
Double up thick styrofoam insulation boards, attach them to the inside of your attic door, and seal the edges with weather stripping. You'll need a piece of 2-inch foam board that's twice the size of your door and adhesive weather stripping, a utility knife, and double-sided duct tape. If you live in an area that gets sub-freezing temperatures in winter, swap the duct tape for an adhesive like Red Devil extreme temperature silicone sealant.
Your environmental conscience might cringe at the word "styrofoam." Yet, insulation made from polystyrene is actually considered eco-friendly, because it holds in heat extremely well. However, if you'd like to steer clear of petroleum byproducts, there are renewable and recycled options that provide great insulation. Sheets of cork- or wool-based insulation insulate beautifully and are made of renewable materials. For extra green factor, look into insulation that's made from recycled material like paper/cellulose and denim. Denim insulation can be costly, but the price of paper or cellulose insulation is comparable to conventional insulation like foam or fiberglass.
Steps to seal in the heat
The most common type of attic access door is a hatch covered with a board that you lift away from the frame of the opening. However, two other types of attic doors that you might have in your home are vertical knee-wall access doors or spring-loaded hatches with attached ladders. You can insulate all of them with the same materials, but the technique will vary for doors with ladders.
For hatch and knee-wall doors, measure the inside face of the door, mark the dimensions on the foam board, and cut it out with your utility knife. Use the cut piece to trace and cut a second piece of foam board. Use strips of double-sided duct tape to hold the two pieces of foam board together.
Wipe off the interior surface of the door with a damp cloth, and affix the two connected boards to the door with double-sided duct tape. Before replacing the door, line the edges of the opening with weather stripping. Our guide can help you choose and install the right weather stripping to keep the cold out. Set the door back in place, and enjoy a toastier, cozier home.
Insulate a tricky pull-down door
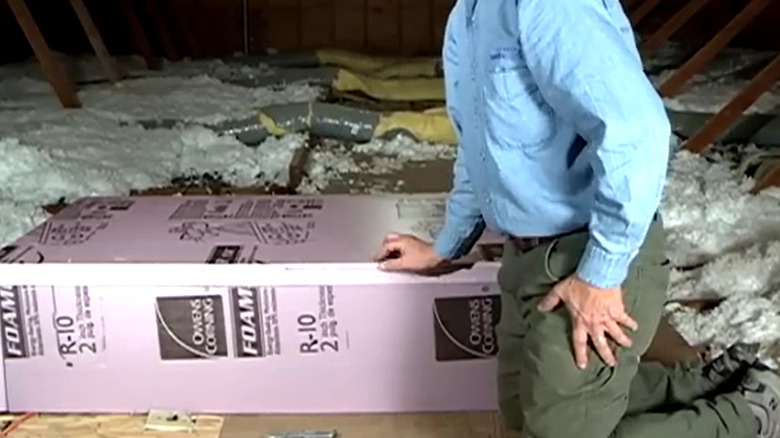
For attic hatches with drop-down ladders, take a different approach by building an insulation box that rests over the compact ladder and door once it's closed. To do this, buy sheets of foam board, weather stripping, and a tube of silicone caulk. For extra insulative value, you can build this structure with two layers of foam on each side and top. With a helper, climb into the attic space and have them close the ladder hatch. Measure both the door beneath the ladder and how tall the closed ladder unit is.
Cut a piece of foam board that's just slightly larger than the door. Also, cut four side pieces that are as long as the width and length of the large foam piece. Make them a bit wider than the height of the closed ladder unit. Once these pieces are assembled into a box shape, you'll want them to sit over the door and ladder without conflicting with any part of the door or ladder.
Glue the pieces together with silicone caulk. Place the unit over the opening while the ladder is down. When you need to access the space, the lightweight box is easy to lift out of the way. While you're inside the attic with the door closed, check to see what kinds of gaps there are between the attic floor and the edge of the box. Trim away any uneven edges and attach weather stripping so that the box makes the surest contact with the floor. While you're at it, don't forget to seal the door gaps with weather stripping.


