A DIY Backyard Awning Is Exactly What's Missing From Your Outdoor Space
We may receive a commission on purchases made from links.
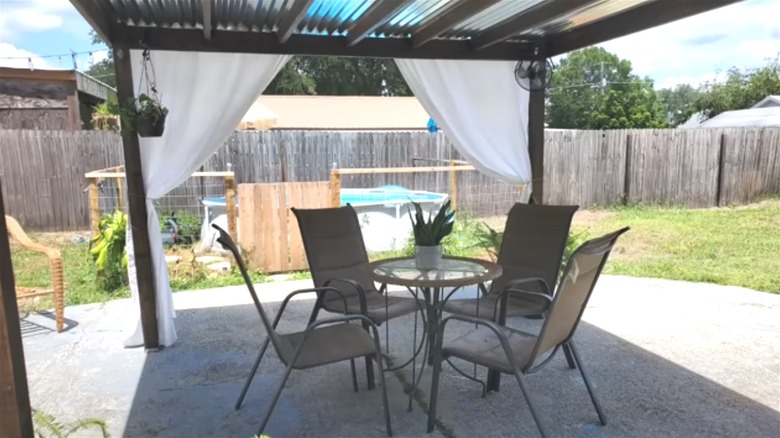
Having an awning in your outdoor space is not only an easy way to make your backyard more relaxing, but it's also a necessity if you live in a hot, sunny climate and still want to be able to spend time outdoors comfortably. According to Lawnstarter, the cost to have a backyard awning professionally installed will run you anywhere from $1,345 to over $4,000, with an average price of $2,705. With the costs of owning or even renting a home being so high, this is certainly not an insignificant amount of money. The good news is, Youtuber @Karrie Lynn has demonstrated that you can DIY your own beautiful and functional backyard awning without breaking the bank. In fact, the total cost of the materials she used in the video was just about $400, which is significantly less money than the cost of having one professionally installed.
If you're really wanting to add some shade to your backyard patio but you're not overly confident in your construction skills, you shouldn't fret too much. While you'll definitely need to be handy with some basic tools, Karie Lynn keeps things fairly simple when it comes to constructing her backyard awning. Even if you're not a whizz at carpentry, you can still probably DIY your own backyard awning the same way that they did.
Materials needed to DIY your awning
To build a backyard awning as demonstrated in this video, you'll need metal roofing sheets, wood stain, a paint brush, screws, brackets, and a carbide masonry drill bit. In terms of wood, you'll need four 8 foot 4 by 4 inch planks, five 10 foot 2 by 4 inch planks, and four 10 foot long 2 by 6 inch planks. Karrie Lynn noted that the total cost of all of the materials added up to $374.58. However, keep in mind this price doesn't include the price of the drill itself. Additionally, the tools you might need will vary depending on what type of material you're building the awning on. In the video, they're drilling into concrete.
In addition to the cost of the materials themselves, you should also factor in your own time as labor. This is definitely a time intensive DIY, and your personal time has value! If you have multiple people to tackle this DIY with you, then that should cut down on the overall amount of time this project takes, but it's definitely a significant undertaking.
You should also factor in what materials you'll need to finish and decorate your awning. Patio curtains can give your outdoor space peaceful resort vibes, and also keep the awning nice and shady during all hours of the day. It's likely that you'll want some other decorative items to hang from the awning like plants and light fixtures. Lighting doesn't need to be too complicated though— some outdoor string lights will most likely suffice!
How to build a DIY backyard awning
Now let's get down to the nitty gritty — how to actually build your DIY backyard awning! First, it's a good idea to lay all the wood out before attaching anything to make sure the placement is exactly how you like it, and the measurements are correct. This particular awning is 10 feet by 10 feet, so you'll want to measure accordingly. After careful measurement, you'll need to drill and attach the brackets for the four posts of the awning vertically into the concrete or whatever material that is underneath your awning. Then, you can attach the 8 foot tall columns to the brackets. From there, you can attach the 10 foot long 2 by 6 inch beams to the tops of the posts with wood screws. Finally, use metal brackets to attach the five leftover 10 foot 2 by 4 inch rafters to the beams. Be sure to evenly space them out.
Once the rafters are secured, you can place the metal roofing on top and secure them with brackets. One thing to take note of in this video is that they run the rafters parallel underneath the roofing. If you live in snow country, you might need a little more support than this, and you should instead run the rafters perpendicular to the roofing panels to adjust for the extra weight. After everything is assembled, you can go ahead and add finishing touches like staining the wood, installing shade curtains, and adding lights. Once you've made all your finishing touches, you can get to the fun part — sitting back, relaxing, and enjoying your new DIY backyard awning.

