The DIY Corner Shelf That Adds A Unique Touch To Your Home Office
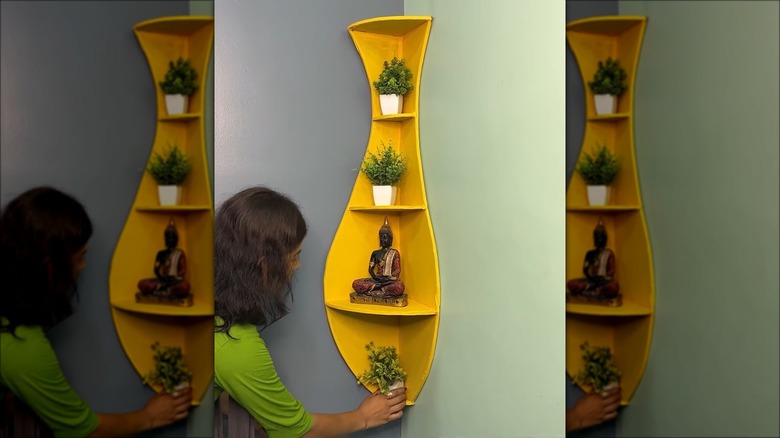
A simple way to make your home office more welcoming and give the space a stylish touch is with DIY decor. The handcrafted pieces add a personalized feel that might just motivate you to get some work done. And in a room such as the office, you want the pieces to be functional as well as stylish. We have the best of both worlds with a simple DIY wall-mounted corner shelf. The thick cardboard base is easy to work with and allows you to design the shelf to fit your style.
Along with two thick cardboard sheets, you'll need a marker, utility knife, hot glue, masking tape, measuring tape, paint, sealant, and wall hooks. While sturdy, this cardboard shelf is best for lightweight items like a stapler or faux mini plant. For a heavy-duty shelf that can support more weight, like books and employee of the month awards, swap out the cardboard for MDF board or wood sheets. If doing so, you'll need to upgrade the hot glue and utility knife to wood glue and a saw. Regardless of which route you take, this corner shelf is simple to put together. You can have it hanging in your office in just one afternoon. However, it's not just great for your home office, this DIY shelf turns any awkward corner space into a chic storage solution.
How to make a wall-mounted corner shelf
First, lay the cardboard flat and use a marker to trace your design — create a curly-vase-like edge for a unique look or keep it simple with a straight border. Then, draw a vertical line through the center of your design. This will create each mirrored side of the shelf and allow them to attach at a 90-degree angle so they are flushed with the wall corner. Cut out the two pieces and glue the straight-edge sides at a 90-degree angle.
Next, use the second cardboard sheet to create the five quarter-circle shelf inserts. You'll need two for either end of the floating case and three for the center. Mark the areas on the base where you want the shelves to sit. They can be equal distance apart or slightly skewed. You can also make more or fewer shelves to customize the design. Then, measure the length of the side panel. This measurement will determine how long the shelf insert needs to be. If the side panel is 7 inches, then draw a quarter-circle with 7-inch sides to create the shelf ledge. Once all the inserts are cut, glue them in place.
Now, it's time to decorate. Use masking tape to smooth out any connected edges before painting the shelf. After it's dry, seal your creation with a varnish. Instead of paint, you can also wrap the cardboard pieces with wallpaper or contact paper before assembling the shelf. Finally, pick the perfect corner and mount your shelf with wall hooks. This DIY is an easy way to decorate your home office with stylish yet functional decor.

