Add Seasonal Flair To Your Walls With A Dollar Tree Sink Mat Decor DIY
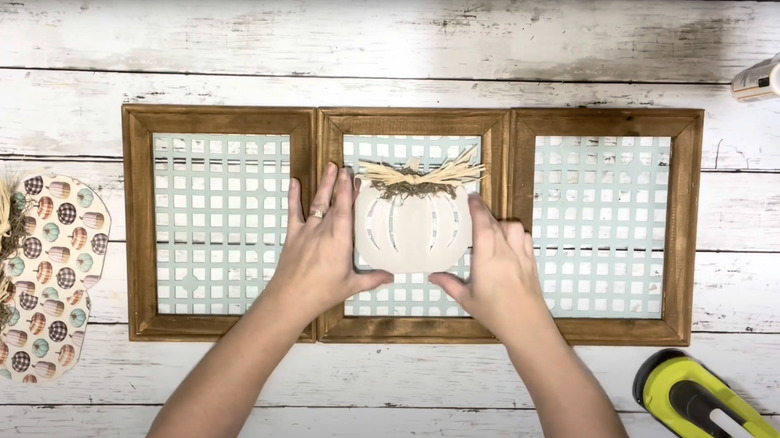
While wall art can really transform your space and help decorate for any season, it can sometimes be pricey. Thankfully, you can turn a Dollar Tree sink mat into decor that's perfect for the cozy fall season. Using a Dollar Tree sink mat to replace the back of a picture frame, you can create unique, seasonal wall decor with whatever design you like. The square matting background will give your project somewhat of a rustic look and can be further customized however you like. While clear sink mats may be easier for this project, you can use whatever your local Dollar Tree has in stock or whatever looks best to you. For example, if you don't like the square look, you might try using a bathmat instead. To get a larger piece off wall decor, glue several frames together, using a sink mat inside each.
For inside your frame, you might use a decorative sign from Dollar Tree. Alternatively, scrapbook paper often has cute, seasonal images that can be cut out and added to your project. While this isn't sold at the low cost retailer, you could use leftover fall-themed paper from another project, or try the Paper Studio trucks and pumpkin paper from Hobby Lobby for less than $1. With a bit of imagination, this adorable Dollar Tree DIY will get your home ready for fall.
DIYing seasonal decor with a sink mat
First, you'll want to decide on a color scheme for your project. If your scrapbook paper design is rather colorful, you might choose to paint your sink mat white, tan, gray, or another neutral color. Remember that your sink mat will act as the background for your design and should help it pop. You may also want to paint your picture frame to match the rest of your project, though it may look best if it's a slightly different color than your sink mat. For example, you might make a gray frame and a white mat or vice versa. 8 by 10 inch frames are best for this project, as you'll have more room to make your design in the center. Once the paint has dried, you'll need to attach your plastic mat onto your frame.
Ensure that all hardware has been removed from the frame, including the glass, backing, and any tiny metal pegs that hold photos in place. These pieces will not be needed for this DIY. Now, flip the frame over and lay your sink mat over it. Trim the plastic so that it is slightly larger than the opening in the frame and hot glue it into place. As you glue each side, stretch the sink mat so that there's no slack when you're finished and the plastic is taut. Now that your base is completed, use a Crafter's Square White Artist Canvas (three for $1.25) to add your paper design.
Personalizing your DIY fall wall decor
After your sink mat and frame have been prepped, you can either create a design on a blank canvas or add your signage onto the project. For those using scrapbook paper designs, you'll need Mod Podge to attach it to your canvas. If you'd like, you could paint the canvas first. Apply a layer of the Mod Podge onto the blank canvas, and then align your paper cutout how you wish. For a farmhouse style, add straight pencil lines across a white canvas to create a shiplap appearance. Once your design is perfectly placed, add more Mod Podge on top to seal it. Your canvas can now be hot glued onto the sink mat in the center of your frame to make your beautifully unique rustic home decor.
Alternatively, the wooden autumn signs from Dollar Tree would look great as the centerpiece of this project. You might take apart the Fall Harvest Plaid Pumpkin Wooden Tabletop Signs and glue one piece onto the sink mat. The Harvest-Themed Pumpkin Spice Latte Decor would also look amazing for your wall art. To give your project even more personality, consider gluing faux greenery, burlap leaves, or a ribbon bow to your sink mat frame. Once it's finished, hang it on your wall or prop it up on your mantel for the perfect seasonal touch.

