How To Add A Sliding Chain Link Fence Gate To Protect Your Home
There are plenty of reasons to add a sliding gate to your chain link fence. Maybe you've built a new DIY chain link fence and feel that a sliding gate is the most secure solution to protect your home (it is — it takes far more effort to force one's way through a sliding gate than through a swing equivalent). Or, perhaps you want to replace a swing gate with a sliding version and take advantage of its other benefits. After all, sliding gates have a serious edge over their swing cousins beyond security. Sliding gates require less clearance and are easier to operate, they don't have rust-prone hinges that demand regular replacement, and, well, they just look nicer.
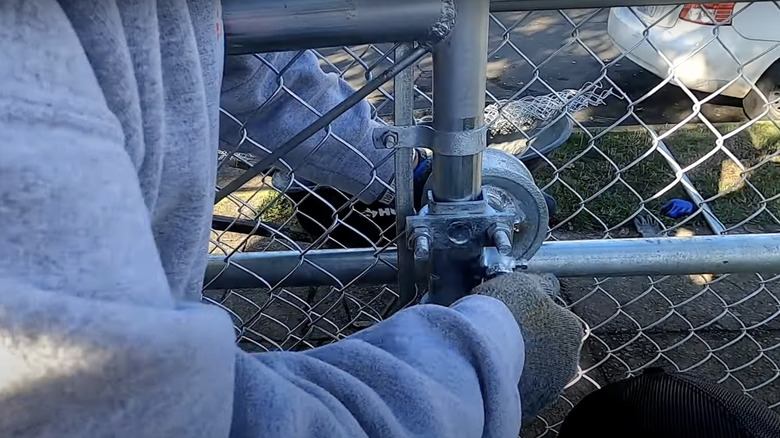
Fortunately, adding a sliding gate to a chain link fence is also a basic DIY home improvement project you can tackle with the help of a friend or two. To envision the installation steps, you need to understand how a sliding chain link gate works. It's surprisingly simple. Broadly speaking, sliding chain link gates comprise the gate itself and the track system that supports it and allows it to roll back and forth. The track system typically consists of two rails affixed to the fence by a series of track brackets. The gate itself is mounted on the tracks with wheels attached to the rear post. At the front post of the gate, there's a wheel carriage that rests on the ground. To recap: front wheel carriage, rear wheels, gate, rails, track brackets — those are all the components you'll need to put together to hang the gate. Below, we'll show you how.
Sliding gate installation steps
First things first, you'll need to measure and cut the rails to make the tracks. Start by hanging the first track bracket about a foot from the top of the fence on the post that's at the opening. The bracket should be hung upside down to keep the gate from sliding off. From this first track bracket, measure the distance to the next fence post. Now, you can use a portable band saw to cut the rails to this dimension (you'll need a total of four such rails for the track system).
With the rails cut, attach a track bracket to the second post, right side up, a foot beneath the top of the fence. Now fasten the first rail between the two post brackets. It's vital to check whether the rail is level and make adjustments by lifting or lowering one of the post brackets. Next, fasten the last track bracket to the top of the third fence post (also upside down) and connect the second rail — this step concludes the installation of the top track. All you have to do now is repeat the same process below, installing another two-rail track a foot above ground. With the tracks ready, mount the wheels to the gate. First, attach the front wheel carriage. Then, fasten both of the rear wheels to the gate's back post. Tighten the U-bolts only once you've confirmed that the gate is level.
During the procedure, make sure you don't accidentally tip the gate over before it's fastened. To minimize the risk of it falling during installation, secure it to the fence with a bungee cord. Also, keep your fingers from getting stuck in the chain link material between the gate and the fence as you slide the gate back or forth.
