Create The Trendy Tiered Planter Of Your Dreams With A Quick & Affordable IKEA Hack
We may receive a commission on purchases made from links.
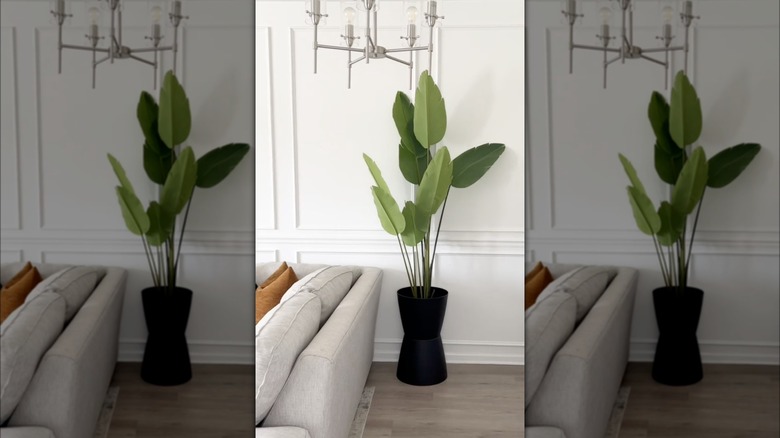
If you're trying to DIY a modern planter to take your decor to the next level, this IKEA hack is an affordable and easy way to complete your project. Interesting planters can sometimes be quite pricey, but IKEA is often touted as having gorgeous, decorative pots for very affordable prices. With just two plant pots from the iconic furniture store, you can make a tiered planter that will stand out in any room. Additionally, some of the store's smaller pots are priced as low as $2 or $3, making this planter hack as budget-friendly as it is stunning. One pot will act as the base of your planter, while the other will sit on top and hold your greenery, creating an elegant tiered design.
Not only is this a simple way to turn an IKEA find into a chic indoor planter, but it can also create an outdoor planter, depending on the pots you choose. Since this project is so straightforward, the easiest way to customize it is by choosing unique IKEA pots that compliment your space and your plants. With a little imagination and creativity, you won't even be able to tell that the tiered planter of your dreams is a simple IKEA DIY.
DIYing a tiered IKEA planter
To make your tiered planter, you'll need two IKEA planters, a strong adhesive like Gorilla ultimate liquid super glue, and spray paint, although this is optional. If you're planning to use the planter outside, make sure you use an indoor outdoor spray paint like Krylon COLORmaxx or apply a protective outdoor finish after painting. Quickly wash your IKEA pots before starting this DIY to ensure they're clean and ready for your plants.
First, decide which pot you'd like to use as the base. Place your base container upside down and apply a generous amount of glue around the edges and in the center. If your pots have drainage holes, avoid placing glue over this spot and try to line up the openings as you construct your planter. Once the glue is applied, quickly place your other pot on top of the base, creating your elevated planter. Ensure that the glue is totally dry before you start using it. Now, if your pots' colors don't match each other or your decor, you can paint them. After you've DIY'd a stylish plant stand with affordable IKEA items, set your planter in your home or on your patio and add your plants for a stunning upgrade to your greenery.
Ways to customize this DIY planter
While the DIY concept is really simple, there are tons of ways to make your IKEA planter unique. The plant pots you use for this DIY will ultimately determine the style and design of your planter. For example, you might choose to use different size pots to give your planter a more dynamic, stacked look. Using the larger pot as the base may provide more stability, but having the bigger one on top could provide a modern, trendy look. A great way to achieve this is with the STILREN plant pot ($8), which comes in a 4 3/4-inch diameter for just under $8 and a 6-inch diameter for just under $12. Alternatively, you might use the exact same planter for the base and pot to build a more symmetrical appearance.
The shape of the containers you choose will also change the final look. Using two pots of the same size with a wide opening can give an hourglass shape, and the flared edge of the VINTERFINT gold pot ($3) would look perfect for this style, making a stunning indoor planter that might not even need a coat of paint. For those with larger plants that require bigger pots, the SOJABÖNA plant pot for $15 is a great choice that will give a similar aesthetic, though it's a bit pricier. If the pots you choose don't have drainage holes and you're concerned about excess moisture, drill a few into the bottom of each before constructing your planter.

