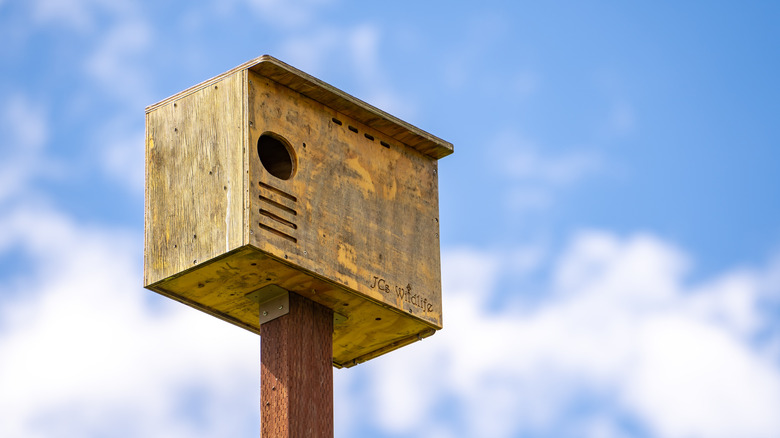
The Benefits Of Adding An Owl Nest Box To Your Garden (And How To Build One)
If you've ever lost a bed of tulips to a voracious vole or had a mouse destroy your peas, you may want to put an owl nest box at the top of your wishlist. Every gardener deserves an owl. These somewhat elusive raptors spend much of the overnight hours hunting for the exact kind of pests that scurry around the garden, consuming upwards of 2,000 rodents per year. An owl's typical diet consists of rats, mice, voles, chipmunks, and the like. Some species, like the Great Horned Owl, will even seek out rabbits and skunks. They are, in short, a gardener's best ally and first line of defense against hungry vermin.
Creating the right environment for an owl to take up home nearby is part of an integrated pest management system. Think of it as a science-based approach to regulating pests over the long term, with a particular emphasis on letting nature do what it was designed to do. "For the home gardener, a guiding principle of IPM is to understand why your landscape favors particular pests, and then enact changes which will make that environment less attractive to those pests," the University of California Master Gardeners of Butte County advises.
How to build a nesting box for barn owls
As barn owls are relatively small and very common, they're definitely a type of bird you want in your yard. While barn owls can build nests in the hollow of a tree, the rafters of an accessible barn, or another opportune place, erecting an owl box can be a great way to attract them.
Start with a 4-foot by 8-foot sheet of ¾-inch plywood and cut two rectangles for the front and back of the box, each measuring 22 inches by 15.5 inches. Next, cut the bottom board: a rectangle measuring 21.5 by 10.5 inches, then the top board measuring 22.5 by 13 inches. Cut two side boards — one measuring 10.5 by 15.5 inches and the other 11.5 by 15.5 inches. Make a cut 7 inches from the short side of the top board and attach two hinges, then repeat this on the right side board 4 inches from the bottom. Attach an eye-hook latch on each door, then drill three or four air holes on the front board and 10 drainage holes in the bottom board.
Next, you'll want to cut an oval-shaped opening in the front board that measures 4.5 inches wide by 3.75 inches high. (The shape of the hole is particularly noteworthy as it helps to banish raccoons, which prey on owlets but won't be able to make it through that hole.) Then cut a series of four grooves — these are talon grips — below the entry hole, each spaced about 1 inch apart and measuring 4.5 inches wide and ¼ inch deep.
Finally, assemble the bottom and sides of the box using nails and wood glue. Before attaching the roof, use wood glue to adhere a vertical scrap of wood inside the box and perpendicular to the opening on the right side, which will act as a level of protection for owlets. Attach the top board so that it overhangs slightly in the front to deflect the rain. Finally, allow all wood glue to cure before placing the box outside on a pole, with the opening at least 12 feet from the ground.

