DIY A Charming & Affordable Backyard Pathway Using Cobblestones
If you want to create an innovative walkway to spice up your backyard, you have multiple options, like stepping stones or pavers. When you want timeless charm in your pathway's design, cobblestones deliver this look, using what resembles a random layout of stones. However, the randomness of this type of path can also create a tripping hazard or can make it difficult to move a wheelbarrow. To remove the tripping hazard, TikTok creator Kenzieemac has the perfect plan for creating a cobblestone pathway, all for a reasonable cost. The key is to find cobblestones that are flattish and have a similar height while adding stabilized sand to the path that creates a nearly flat surface. If you perform this task correctly, you'll end up with a path where the stones are visible through the hardened stabilized sand, yet you won't have a significant tripping hazard.
Kenzieemac claimed to create an about 200 square foot path for $78. The materials you'll need include enough stones to cover the majority of the space for your path. Garden centers may have either round or more square cobblestones that you can purchase. Some people use old bricks in a random pattern for this layout instead. You'll also want plastic or metal edging for a lawn that can hold the stabilized sand in place until the materials harden. To create the stabilized sand, you'll mix one part quick concrete mix, one part sand, and one part water, which you could do in a wheelbarrow to make it easy to move around. Stabilized sand is extremely durable and can withstand extreme weather, making it ideal for creating this type of pathway.
Steps to create a cobblestone pathway
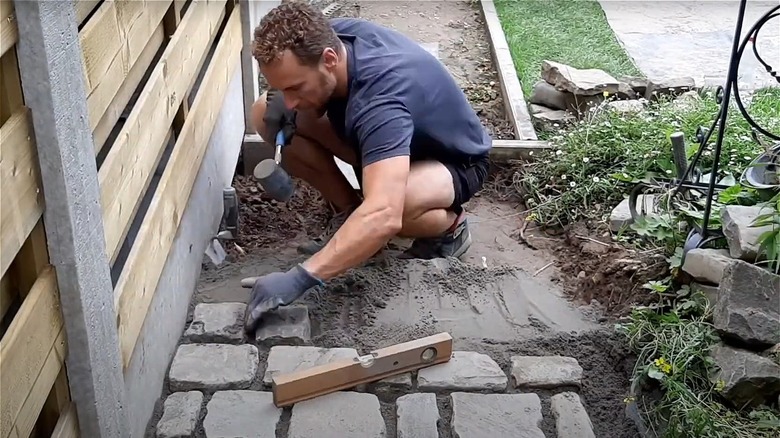
You'll start the process of creating a cobblestone path by digging out and removing any soil and turf from your future pathway. If you're struggling to decide where to put the pathway, you could use string to map out various options beforehand. Some people also lay out the cobblestones over the grass first to make sure they have enough materials. You should dig the pathway about 2 inches deeper than the average height of your cobblestones. If you're worried about drainage after rain, plan to create a slight slope in the path. After digging the path, you should add edging to the sides to match the shape that you want. Tamp down the soil on the path to create a firm base. Some people add gravel or sand to the base to aid in drainage, too.
Next, add stabilized sand to the base of the path. After you have a couple of inches of stabilized sand in place, add your stones in whatever random layout you prefer. Wiggle them into place, firmly embedding them in the stabilized sand. Try to make the height of the stones as even as possible, although the stones can be sticking out of the sand a little bit. Work in small sections of a few square feet at a time. Once you place all the stones, add more stabilized sand with a trowel between the stones to level the surface as much as possible. Finish by spreading dry mortar in a thin, level layer over the top. Spray the area with water to harden the mortar, and you'll have the perfect DIY garden path!
