The Cheapest DIYs To Finish Your Basement Ceiling While Keeping It Accessible
We may receive a commission on purchases made from links.
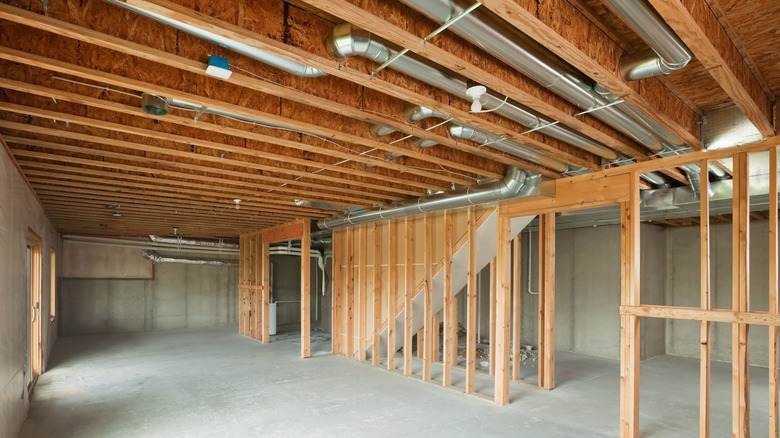
Unfinished basement ceilings have a few issues. They're not pretty to look at, with all of the heating and cooling ducts, plumbing pipes, and wires meandering through them. They can be dusty and dark, and they can leave your basement feeling incomplete. Your first thought might be to simply put up drywall. After all, the panels cost between 50 to 80 cents per square foot, and the screws, tape, and mud cost another 35 cents to $1.10 per square foot on top of that. Overall, pretty cost effective. However, if you want to make it easy to access the plumbing pipes and other mechanicals between the floor joists, there are tons of other options.
We've rounded up three experts to get their advice about the most inexpensive ways to finish a basement ceiling, but keep it accessible, and they gave us plenty of great ideas. The best news? You don't need a huge budget or a lot of time and tools to transform your outdated basement ceiling. From fabric to wood planks to easy tongue and groove paneling options, your basement ceiling will be finished before you know it, and without breaking the bank.
Install a drop ceiling for cover that allows access to ducts and pipes
When most people think of basement ceilings, they think of drop ceilings. There's a reason this style became popular: it covers everything, and fast. And it allows easy access to the ducts, pipes, and wires that snake their way between floor joists. In an exclusive interview with House Digest, Andriy Boyko, handyman and masonry expert at AO Handy Inc. Masonry Restoration and Repairs, recommends them as an inexpensive way to finish a basement ceiling.
You'll need a few supplies for this project. Boyko recommends gathering a level, drill, and measuring tape. As far as the ceiling components, you'll need the ceiling tiles and rails, wire or rod hangers, and screws. Material prices for a drop ceiling can vary significantly, so to keep it cost-effective, it's best to consider the cheapest option. On average, the materials cost between $1 to $7 per square foot. If you're looking to save, consider mineral fiberboard tiles, which cost between $1 to $4 per square foot. In comparison, regular fiberboard tiles cost between $4 to $7 a square foot, and plastic tiles cost between $5 to $9. If you want to get creative, you can also upgrade your basic drop ceiling with paint or other embellishments.
"First, measure the dimensions of your basement to determine how much grid and tile you'll need," Boyko advises. After that, use a measuring tape and level to mark the placement of the main runners of the grid and install them using wire or rod hangers attached to the joists. Add cross pieces to create a grid and drop in the ceiling tiles. "This method is great because it also allows easy access to pipes and wires if you need to make future adjustments," Boyko adds.
Go for a modern painted ceiling with exposed joists
If you're not concerned with covering everything up, Boyko also recommends painting your basement ceiling and leaving the joists exposed. Exposed basement ceilings can work for a variety of decor styles. Your main cost for this project will be the paint (Boyko recommends choosing a high-quality, durable paint) and the associated paint rollers, brushes, painter's tape, and drop cloths. "If your ceiling has bare wood or is otherwise unfinished, apply a coat of primer. This helps the paint adhere better and gives a more uniform finish," Boyko advises.
Prepare the area by covering floors and other spots you don't want to paint with drop cloths and securing them with painter's tape. You'll also want to carefully mask and cover any lighting fixtures. Prime (if necessary), then use a roller and brush to paint the ceiling. Boyko's tip: "Apply paint in even strokes, and make sure to cover any areas thoroughly." If one coat doesn't give you the look you want, apply a second coat. Let the paint dry completely before removing the tape and dropcloths.
If you have access to a paint sprayer, you can also paint the basement ceiling that way. You'll want to be extra careful about the prep, taping, and covering, though, to avoid getting paint spray where you don't want it. With a paint sprayer, you'll also be painting all of the wires, ducts, and pipes, which can give the ceiling a cleaner look.
Install beadboard panels on your basement ceiling for a cozy look
Another inexpensive method Boyko recommends for finishing a basement ceiling is to use beadboard panels. This can give your basement ceiling a cozy, almost cottage-like feel. For this project, Boyko recommends gathering either pre-finished or unfinished beadboard panels, panel adhesive, nails or screws, a measuring tape, and a saw for cutting the panels to size. If you haven't chosen pre-finished panels, you'll also need to buy the paint or stain of your choice and painting supplies.
The project starts by measuring the ceiling and cutting panels to fit. Boyko recommends spreading adhesive on the bottoms of the joists and then securing the panels with screws. However, if you need to get to any mechanicals such as pipes or wires, we'd recommend just using screws for easy access. To finish the job, Boyko advises, "Fill in any gaps with caulk or paintable trim to give it a clean look." The nice thing about this DIY is that at any point, you can re-paint your ceiling if desired.
If you already have the tools, the cost for this project will primarily be the beadboard paneling. Home Depot lists white prefinished beadboard panels that are 48 inches wide and 96 inches tall for $23.98, which comes out to about $1.33 per square foot. Of course, that's not counting the cost of screws, trim, and paint, so those will need to be taken into account when figuring out your budget.
Create an easy, lightweight fabric-draped ceiling
Ryan Tierney, founder of C.D, Roofing Ltd., also gave House Digest creative, inexpensive ideas for finishing basement ceilings. The first project idea he gave us was to install a draped fabric ceiling. We love this idea because it's light (no heavy panels or other materials to deal with), and you can customize it to your decor. Tierney adds that, "This method is not only budget-friendly but also adds a nice, soft touch to the room."
Tierney notes that you'll need curtain rods or tension rods, mounting hardware, and fabric. He recommends muslin or drop cloths. These are neutral, inexpensive fabric options. For example, if you choose muslin, it will typically cost you around 50 cents per square foot. However, if you have a little wiggle room in the budget, consider visiting a fabric store and looking for materials that fit the decor or overall color scheme of your basement.
To install, Tierney explains that you should install curtain rods or tension rods across your ceiling, drape the fabric over them, then secure with clips or ties. You can also get creative with how you install the fabric. For a no-nonsense look, you could simply staple the fabric to the bottoms of the joists with a staple gun. You could give the ceiling a fun, playful appearance by letting the fabric drape low in some spots and higher in others. You can even install LED lights on your ceiling before adding the fabric, which would give the ceiling a fun glow.
Add tongue and groove panels
Tierney also recommends using tongue and groove panels, which will give your basement a shiplap-style ceiling. All you need for this project is tongue and groove panels, adhesive, a nail gun or hammer, and a saw for cutting the panels. Tierney notes, "It's an easy way to give your basement a polished look without breaking the bank." Depending on which wood you buy, it can cost between $2 to $3.50 per square foot. It's also a timesaver, since the panels are faster to install than individual planks.
To install tongue and groove panels on your ceiling, Tierney advises that you apply adhesive to the joists and then attach the panels using nails or a nail gun. You'll need to cut the pieces to size and cut around any obstructions, of course. And, as noted with some of the other projects, if there are things you'll need to access such as plumbing pipes, it might be better to screw the panels to the ceiling and forego the adhesive. This will make access fast and easy when you need it, and you can just reinstall the panel with screws when you're done.
When you're finished installing your tongue and groove panels, you can also finish them in a way that fits your decor. Pre-finished wood or PVC panels won't necessarily need to be painted, but if you buy plain wood tongue and groove, you might want to paint or stain it. A helpful tip: paint your panels before you install them. It'll be faster and easier than working overhead, and once your ceiling is installed, you're done!
Use plywood panels for a quick, customizable ceiling
House Digest was also able to talk to Lanyon Heinemann, contractor and manager at JMK Contractor. Heinemann recommends plywood panels to finish a basement ceiling. "Plywood provides a stylish, cost-effective alternative to drywall," he notes. They're also fast and easy to install. A standard price for a 4'x8' sheet of plywood is $30, but it can go up to $90 depending on which wood species you choose. If you choose the typical $30 option, that averages out to about 94 cents per square foot.
For this project, you'll need plywood sheets, a saw (a table saw or circular saw works best here) screws or nails, wood filler, and paint or stain. Heidemann advises first cutting the plywood sheet to fit your ceiling dimensions, then attaching the plywood directly to the ceiling joists using screws or nails. This project is best done with a helper so you can have someone hold the panel up while another person screws it to the joists. To get a finished look, Heidemann advises, "Fill any gaps or holes with wood filler, then paint or stain the panels for a clean finish." You might need to sand the wood filler down before painting to have a clean, smooth surface.
The nice thing about this plywood option is that in addition to being cost-effective and quick to install, you can also customize it to your heart's content. Paint or stain are great options, but you could also consider self-stick wallpaper to really take your basement ceiling over the top. Not a wallpaper person? Consider one of these stunning DIY ceiling designs to elevate your space.
Install drywall between the joists for a beamed ceiling look
Ceiling beams are a timeless, classic look that you can easily get in a basement thanks to the exposed joists from the floor above. The part we don't really want to see is the wires and other mechanicals that often run between those joists. This solution provides the perfect mix of aesthetics and practicality: cut drywall to fit between the joists. Since the joists have a small lip on their bottom edges, the panels can sit securely on it. This stunning DIY ceiling design adds the perfect finishing touch and hides those messy-looking pipes and wires, as well. Since the drywall is cut into small panels and isn't screwed in, it still allows access to the ceiling. As for price, expect to pay less than $100. Since you don't need screws, tape, or mud, the price is significantly cheaper — and you can even use drywall scraps from a previous project or get them for free from Facebook Marketplace or local drywall companies.
You can really make this look fit your space by considering what you want the final product to look like. Do you want the look of exposed, unfinished wooden beams? Then leave the joists as they are. If you want a more unified, modern look, consider painting the joists and drywall the same color. Or you can go for contrast by painting the joists one color and the drywall another. For a full tutorial on how to DIY this, check out Collins Country's full YouTube tutorial. The great thing about this, and the rest of the projects on this list, is that it shows that you don't have to spend a ton of money to get a finished basement ceiling, and that you can use your creativity to make it a feature and not just an afterthought.