The Stunning Toilet Tank Idea Your Bathroom Needs For A Rustic, New Feel
We may receive a commission on purchases made from links.
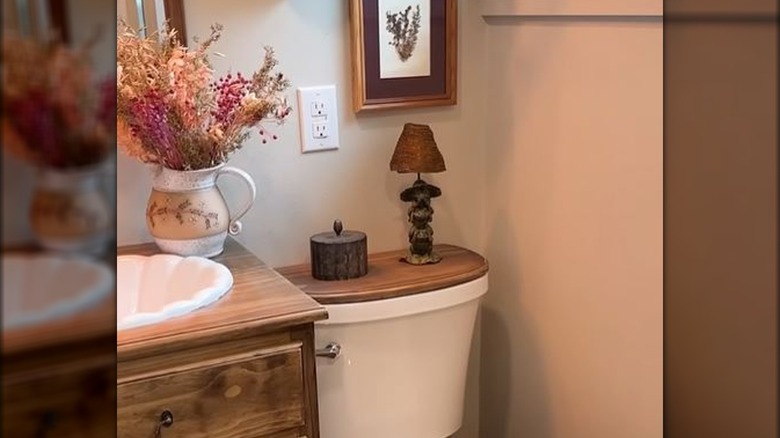
If someone asked you to think of ways to make your tired bathroom look more luxe, "the John" probably wouldn't come to mind (unless, of course, you're into those cloth toilet covers that were popular in the '70s). YouTuber @JohnDolechek shared an idea for a different kind of cover, one for the toilet tank, that will bring a rustic aesthetic to your bathroom. It involves cutting a piece of wood to the same dimensions as the toilet tank cover and then placing the wood atop the cover for use as a decorative shelf.
To make the wooden toilet tank lid topper yourself, you'll need a rectangular piece of unfinished wood about 1 inch thick. It should be a few inches longer and wider than the dimensions of the lid. Toilet tank covers vary in size, so be sure to measure yours before purchasing the wood piece. You'll also need a table saw, miter saw, jigsaw, and wood router, as well as wood pre-stain, stain, and clear protective finish, a paintbrush, and sandpaper.
You may not need all these materials if you choose not to pre-stain, stain, or finish your piece of wood, or if you choose not to add any detail to the edges. If you do decide to follow these steps, you'll need to allow the stain to dry overnight.
How to make your own wooden toilet tank lid topper
For the first step, place the wood on top of the toilet tank lid, ensuring that it's flush with the back wall. Use a pencil to trace the lid onto the wood, and then cut through the traced lines with a table saw, miter saw, and jigsaw. To add extra detail to the edges, use a wood router. The YouTuber also nailed a piece of wood to the bottom of the topper to prevent it from sliding, but this step is optional. As an alternative, you can cut pieces of rubber placemats and add them between the topper and tank cover to provide a layer of friction. You can find Waterproof Round Rubber Placemats at Amazon for $6.29.
Next, prep the wood for staining. Sand it until it's smooth, then apply a clear pre-stain treatment. Let it dry, apply the wood stain, and let that dry. The pre-stain and wood stain cans will tell you how long to wait for drying. For a distressed look, sand the edges before coating the wood with clear protective finish. Let it dry overnight, and that's it! The wood topper is now ready to place on your toilet tank cover.
This is a gorgeous way to bring natural wood into your bathroom, complementing wooden accents such as cabinets or floating shelves. Plus, since the wood is flat and porous, almost any item you put on top of it will stay put, whether it's a small vase, jars, toilet paper, or a potted plant.

