How To Safely Sharpen Your Pruning Saw For A Cleaner Cut (& Mistakes To Avoid)
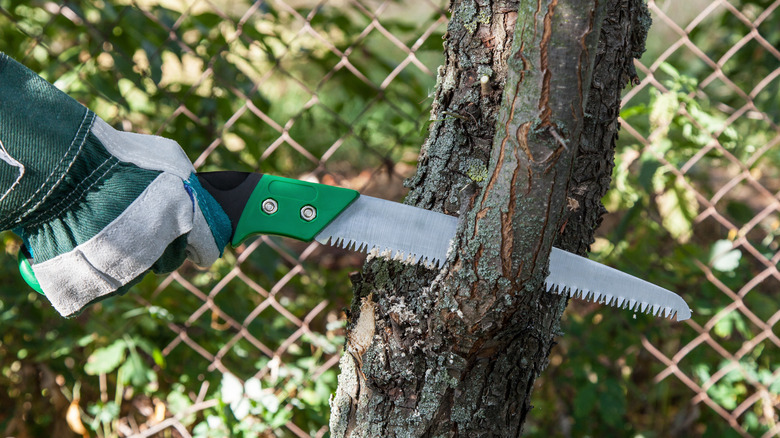
A pruning saw is a key tool for pruning your trees the right way yourself. This tool works well for trimming small branches that are greater than 1½ inches in diameter from a tree or larger shrub. However, it's important to have sharp teeth on the saw, so you can avoid one of the most common mistakes people make when pruning their plants. Sharp teeth make the work of pruning branches easier, saving you arm fatigue, while also creating a cleaner cut. A clean cut on your tree's branches helps the tree heal faster, while resisting damage from disease, insects, and other problems.
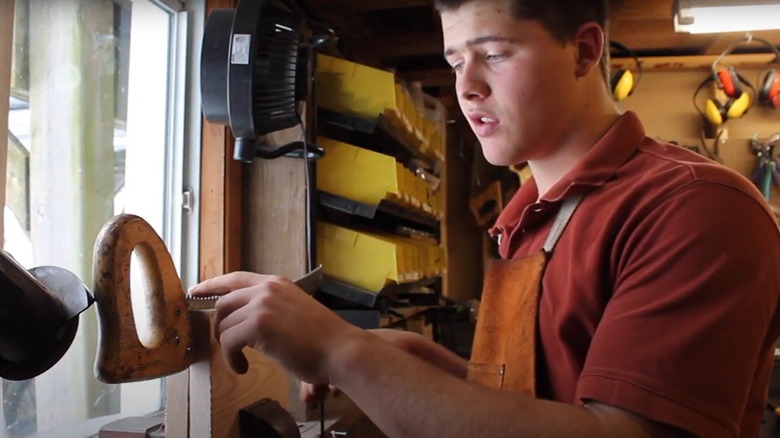
You can sharpen your pruning saw yourself to ensure the cleanest cuts. This sharpening process is similar to the best way to sharpen your hand saw, because you'll be moving a file across each of the teeth individually. However, the pruning saw's teeth typically are quite a bit different from the teeth in other types of saws, so you need a file that matches your saw's design.
If you notice uneven cuts on branches that seem to be tearing the wood instead of making a clean cut, it's time to sharpen the teeth. Expect to need 10 to 15 minutes to sharpen the entire saw. Learn more about the steps required to sharpen the teeth on your pruning saw blade, as well as some mistakes you should avoid when doing this DIY task.
Steps to sharpen a pruning saw blade
Before sharpening the teeth on the blade, it's a good idea to clean the metal. If it has some rust on it, you can place it in a bucket filled with vinegar and let it soak for up to a week. Check the progress of the metal daily. If most of the rust is gone, you can remove it from the vinegar. Use steel wool or a rag to remove any additional rust. If it doesn't have rust, use soapy water. Clean between each tooth on the metal to remove dust and debris.
When it's time to sharpen the teeth, place the pruning saw blade in a clamp. It's easier to work on the teeth when the blade is held tightly, rather than having the flexible metal blade bouncing around if you're trying to hold it by hand. Use a file that matches the design of pruning saw and its teeth. When filing, use one or two strokes on each tooth if you sharpen it regularly. For an extra dull saw, you could need up to 20 strokes with the file. Use the same number of strokes on each tooth. Only move the file forward along the tooth, not back and forth. Start with the teeth at the rear of the blade and work toward the other end. Work first on the side of the teeth that are pointing away from you, which should be every other one. Walk around to the other side and repeat the process on the teeth that are now pointing away from you in the other direction.
Common mistakes to avoid when sharpening the teeth on a pruning saw
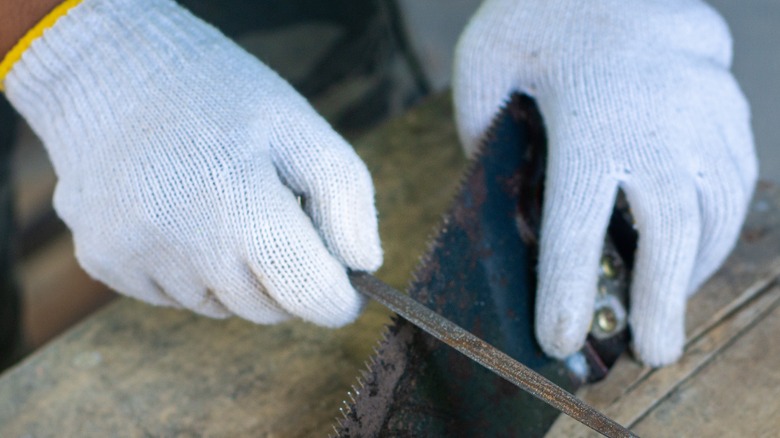
Even if you have a pruning saw blade with dull teeth, the metal can be sharp enough to cut your skin. It's a mistake to not wear heavy work gloves when handling the file and sharpening the saw. Make sure the gloves are long enough to cover your wrists, as you could slip when moving the file and cause your wrist to make contact with the saw's teeth.
When moving the file against the teeth, place the file at the same angle of the tooth as it extends from the blade. It's a common mistake to fail to match the angle of the bevel on the front edge of the tooth. Make sure you match both angles. When working, avoid the mistake of using the file on areas of the blade that are outside the clamped section, as working on a loose blade could cause the teeth to chip. Move the blade back and forth in the clamp as necessary.
A mistake most people make is sharpening their outdoor garden tools less often than they should, so it's all right to sharpen the pruning saw more frequently than you perhaps think you need to do. In fact, the more often you sharpen the teeth on the pruning saw blade, the fewer strokes required to sharpen them the next time. On a regularly sharpened blade, one or two strokes with the file may be enough.