DIY Beautiful Coconut Shell Flower Decor For A Unique Coffee Table Accent Piece
We may receive a commission on purchases made from links.
Decorate with flowers you don't have to pick, that will never fade, and that aren't made of silk or plastic. Are you intrigued yet? If so, you're going to love this DIY that turns coconut shells into a vase and flower for a striking and uncommon decor piece. The imaginative YouTuber Master Ideas pieced together a coconut flower display worthy of recreating. Here, we break down the steps to help you pull off a coconut flower of your own.
You'll need four coconuts in similar sizes and shapes, sandpaper, wood glue, a can of interior polyurethane, and a paintbrush. Also grab some painters' tape to hold the pieces in place as the glue dries. If you haven't already added a rotary tool in your collection of home improvement gadgets, this project is the perfect excuse to invest in one (such as this one from Handstar). While you can pull off this DIY with other tools, a rotary tool will make it much easier. Along with a rotary tool, you'll also need a circular wood cutting wheel, a wood carving bit, a drum sanding bit, and safety glasses.
About ¾ of one coconut becomes the vase. Glued atop a thick ring cut from the remainder of the coconut, it has a sturdy base to keep it standing tall. Quartered coconut shell halves become leaves, flower petals, and one flower center. Pieces of coconut shell rings become parts of the vertical stem. As you cut and shape the coconut pieces, save the sawdust in a container for later use. Mixed with a bit of wood glue, this becomes an easy DIY wood filler to help reinforce the joins for this project.
Make the cuts and start the stem
With your rotary tool and woodcutting wheel, cut away the top of one coconut to make your vase. Remove the meat and sand off the husk for each coconut you work with. From the small end you cut off, cut away a ring about 1½ inches wide. Next, cut three coconuts in half widthwise. Then, cut four rings from the widest sections of two coconut halves, about 1 inch wide. Cut each ring into quarters for the stem components.
The cutting doesn't stop there: Cut two coconut halves into quarters (16 pieces total) for leaves, petals, and the center of your flower. Cut the corners on the wide end of 12 of the pieces, and sand the edges into a curve. For the center of the flower, trace a bottle cap onto one of the pieces, cut out the shape, and sand the edges. Use the wood carving bit to make a center line down the middle of seven leaf pieces, and add three sets of veins reaching from the center line. For your five flower petals, carve a line from the pointed end of the petal about ⅓ of the length of each petal, then carve two diagonal lines radiating from the same point, one on each side of the center line.
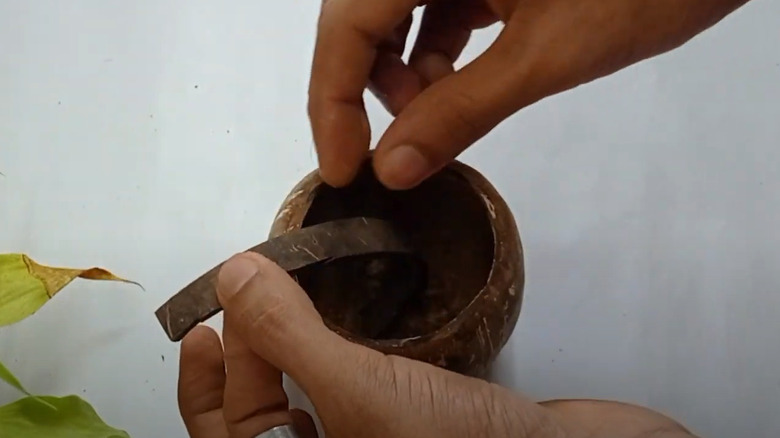
Gather seven of the pieces you cut from coconut rings to make your stem. Glue the end of one piece inside the bottom of the inside of the vase so that the piece also touches the lip of the vase. Add some glue to this spot, as well. On top of the glue, sprinkle some of the coconut sawdust you saved for a stronger bond.
Make your flower bloom
About half-way up the first stem piece, glue another piece curving away from the main stem. For each additional stem segment you add, give the glue time to dry before gluing the next. Familiarize yourself with how long wood glue typically takes to dry, and how to speed up the process. Glue on two more pieces so that they curve out on each side, away from the central stem. Be sure to add a bit of glue where these two pieces touch the lip of the vase. Where the four pieces meet, glue the end of another quarter ring, and attach four more pieces that radiate in four opposite directions. Top this with another vertical stem segment for the flower to sit atop. Glue the leaves onto each of the seven stem branches reaching out from the vertical stem.
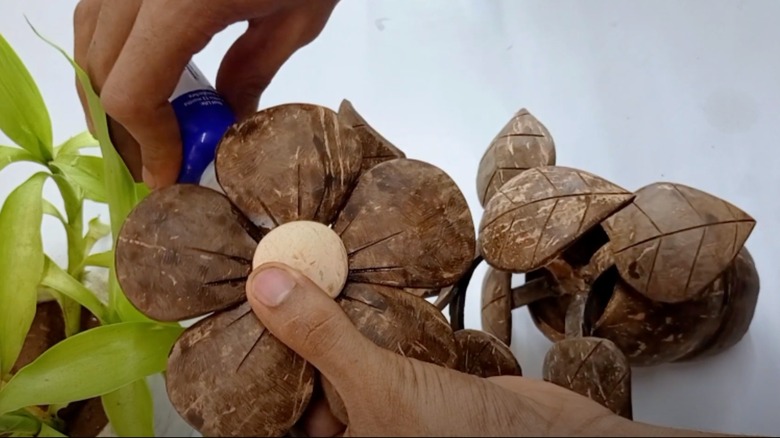
Place all five petals together in a circle with their pointed ends touching. Don't worry if there's a gap between the points of the petals. To create a strong bond, sprinkle the open spaces between the petals with sawdust at what will be the center of the flower. Apply a generous amount of wood glue to both the pile of sawdust and the petals, and set the circular piece that will be the flower's center over the glue. Give the glue ample time to dry. Turn the blossom over, and reinforce the underside with more glue. When the petals and center feel securely attached, glue the underside of the flower to the top of the central stem. Finish your creation with a few coats of polyurethane, such as this one from Minwax, and it's ready to be put on display!


