The Stunning IKEA Shelf Hack That Provides Extra Storage Where You Need It Most
We may receive a commission on purchases made from links.
While we certainly wish it could be, storage is not often created equal in every home. Or maybe you have some storage, but not in the room where you need it most. If you've been stumped on how to maximize storage space in your small home, or just need a storage solution for one especially tricky area, consider the power of several strategically placed floating shelves from IKEA. Installing shelves parallel to one another on a single wall may be just the thing you need to make up for a lack of built-in closets or cabinets.
In general, floating shelves are a wonderful home addition because of their clean, minimal look and ability to blend into various design styles. But specifically, the LACK shelves from IKEA are great because of their affordability compared to similar shelves on the market. IKEA also offers a few sizes and several finishes, allowing you to mix, match, and customize them to your space as necessary.
It is worth noting that this hack won't be the best solution if you're looking for closed storage that hides away its contents. To create an enclosed storage system, you could opt to turn an IKEA PAX into the ultimate organizer with both drawers and doors. But if you have an open wall and want to conserve floor space while adding storage, keep reading for tips on transforming a stack of LACK shelves into a storage unit for any room in your home.
How to install your LACK shelves
Before you purchase LACK shelves for this hack, you'll want to think about where you want to hang your new storage. Measure the dimensions of the ideal wall space and keep those numbers in mind before heading to IKEA. You'll also want to take inventory of the type of items you intend to store on these shelves. Are you creating a new home for clothes, shoes, and handbags? Or do you need to stack plates, bowls, and cookware to make room on your kitchen counter? Making these considerations prior to shopping will help you plan how much distance to place between each shelf to ensure your items fit.
Next, use a tape measure to mark out the position of each shelf on the wall, leaving an even amount of space between them. You can make these marks with a pencil, or use painter's tape (which is the Property-Brothers-approved trick for perfectly-hung floating shelves). This will save you the trouble of taking an eraser to your walls. Once you have the spacing worked out, you want to ensure that your shelves are installed straight and level. You can use a traditional level for this process, but investing in a laser level like the Huepar self-leveling laser will make the job a whole lot easier. You can use it to make sure the edge of your shelves are aligned. And not to mention, you can use it for all of your future DIY home improvement projects as well.
Customize your new storage wall
The great thing about this project is that you can make it entirely your own, depending on your storage needs and the specificities of your space. For example, adjust the space between shelves depending on whether you have taller or shorter items. You can also play around with shelf sizes and how many of each you install. The most popular version of the LACK is 43 ¼-inches long, but you could also utilize the 11 ¾-inch size or the extra-long 74 ¾-inches option. These are great if you want to create storage around permanent wall features like doors and windows.
If you don't mind getting more crafty, you could even cut the LACK shelves to size on your own. YouTube user Dedski demonstrates how you can cut one end of the LACK shelf off and repurpose the end cap to apply it to the newly cut edge. This project requires some more advanced DIY tools, like a circular saw and a miter saw, but it may be worth the hassle if you want to outfit a specific space with shelves — without paying a premium for custom-built shelving.
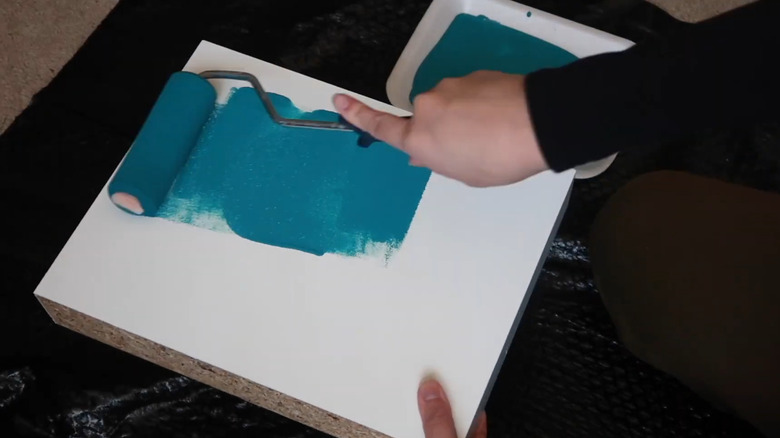
Another way to customize your LACK storage wall is to paint the shelves a different color. Pick a color that contrasts with your wall for a bold design, or paint them the same color for a seamless, built-in look. Either way, don't overlook the trick to painting IKEA furniture's difficult surfaces: a strong, shellac-based primer.

