Get In On The Adorable Mushroom Decor Trend With A Cheap And Easy DIY
If you can fold, draw a curved line, cut paper, and stripe on some glue, you can make a cute mushroom craft to accent any room. Mushrooms play a role in fall trends to embrace this year, and thankfully, Instagrammer Catharina Junge shared the steps to create a freestanding three-dimensional paper mushroom. This easy fold-trace-cut-glue project made from construction paper results in a honeycombed mushroom that looks lovely on a bookshelf, tabletop, or nestled among houseplants.
Junge used 16 pieces of light-brown construction paper for an extra earthy look, but you can recreate this craft in any color you choose. Alternatively, reusing thick paper from another source, like an old calendar or repurposed paper bags, makes the project nearly free and more eco-friendly. You could also repurpose old magazines for this DIY; since magazine pages are on the thinner side, you may want to double the number of sheets of paper to ensure that the mushroom comes out sturdy enough to stand.
In addition to a stack of thick paper, you'll also need a pencil, a pair of scissors, and a glue stick or craft glue. Some paper clips or binder clips can also come in handy for holding the paper pieces together as the glue dries. If you'd like to have a mushroom that you can unfold and pack away, you can use two paper clips to hold your final product together in a standing form rather than using glue.
Morph paper into mushroom
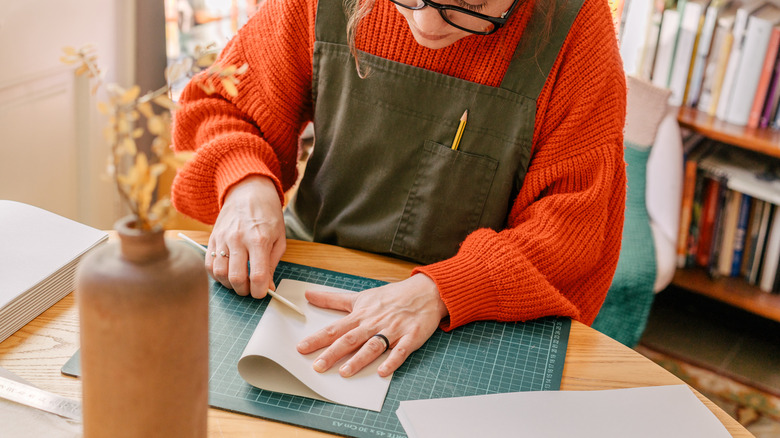
Start by folding each piece of paper in half. For a taller mushroom, fold your paper pieces widthwise; for a squatty one, fold the paper lengthwise. On one of the folded pieces, sketch the shape of a mushroom half, making sure that the design fills as much of the paper as possible; the wider the base of the stem, the better your final product will stand.
Cut out the shape along the line. Keeping the paper folded, use this shape as a template to trace and cut out the remaining 15 pieces of paper. Add one strip of glue to one-half of the mushroom on the inside fold, about halfway between the top and the bottom of the cap. Repeat this for each piece, and hold each fold together with paper clips until the glue dries.
On one face of a folded mushroom shape, apply a strip of glue along the very top of each mushroom cap and right where the stem meets the cap. Then, carefully place another half-mushroom on top of the piece sporting the glue, making sure all edges match up. Repeat with all of the remaining pieces. Hold all of the glued pieces together with binder clips. When the glue has dried, open the glued paper pieces like a book. Continue opening the shape until the two ends meet. Add two more strips of glue to the top of the cap and the base of the stem on one of the end pieces, and clip the pieces together until the glue dries. Finally, set your paper mushroom somewhere you can enjoy it.