5 Simple Ways To Clean & Sharpen Your Hedge Trimmers To Keep Them In Tip-Top Shape
We may receive a commission on purchases made from links.
The beauty of land ownership is that your yard work never seems to end; however, with some well-performing tools, maintenance is just a little bit easier for you. But, just like how you carefully maintain your yard, you should also carefully maintain your tools so that they last a good, long time. And one of the most important items in any good landscaper's arsenal is a pair of reliable hedge trimmers. Cleaning and sharpening your hedge trimmers is important to do, especially to prevent premature wear and tear and to keep them effective. Between regular wipe-downs, with the right materials, and some simple sharpening methods you can do at home, your hedge trimmers will last you for many yard work seasons to come.
A decent, gas-powered hedge trimmer can cost you upwards of $227, and with an investment like that in your powered toolbox, you'll want to maintain it in good working order, not to mention you want those trimmers to perform to its maximum potential. Professional landscapers note that a hedge trimmer's cutting force decreases after 50 hours of use, so keeping on top of its maintenance is key to getting the results out of it that you need and want. While there are some care tips, like cleaning, that you can execute regularly to increase your hedge trimmers' lifespan, there are also some bigger DIY sharpening maintenance tricks (so you can avoid thinking about the cost breakdown to have your hedge trimmers sharpened professionally) to keep your tools in peak shape.
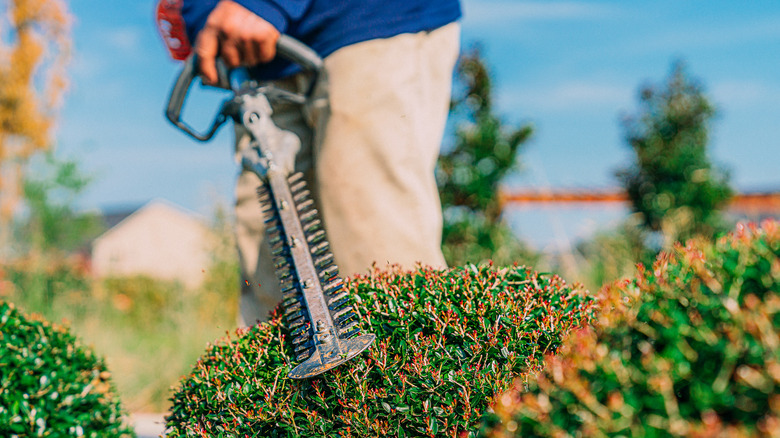
Use a soft material, like a cloth or a brush, to remove debris from your blades
The simplest way to maintain your hedge trimmers is by cleaning your blades after every use. Before you do any cleaning, of course, safety comes first, so be sure whatever power your hedge trimmers run on is disengaged. Once you've ensured that your batteries, spark plugs, or activation keys are safely removed or disconnected, gather a brush, a soft cloth, and gloves to give your hedge trimmers a good cleaning.
Using the brush, remove larger pieces of plant residue, like twigs, leaves, or larger branches, by lightly swiping and brushing the blades. After you've worked out any of the larger debris, wipe away any finer materials off the blade, like dirt, dust, or even grease, with a soft, dry cloth. Be sure that you're using only dry brushes and cloths when cleaning your trimmers this way; avoid using water to clean your tools, as any additional consistent moisture on your blades can cause it to rust and corrode prematurely. If you're using an electric-powered trimmer, using water to clean may also run the risk of electrical shortages as well. A simple, dry cleaning after every use is the easiest and best way to keep your trimmers in decent shape.
Spray a resin solvent to clean any sticky residue
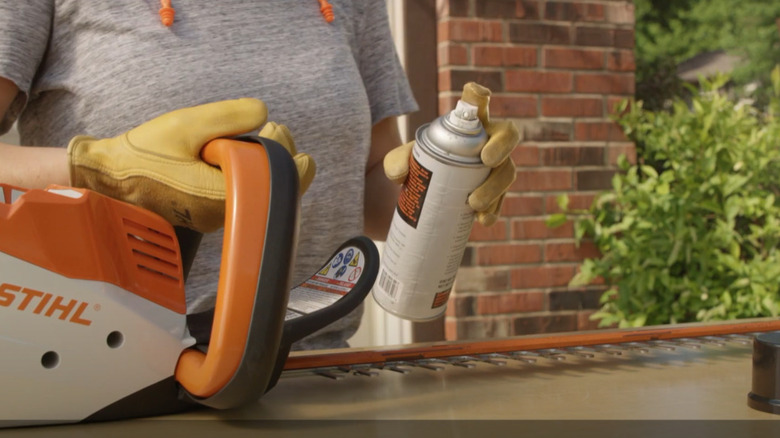
Depending on what you're using your hedge trimmers on, simply wiping down your blades isn't enough to keep them clean all the time. Cutting trees, bushes, or other plants that have sticky residue, like sap, is challenging to remove with just a cloth or brush, so you'll be in need of something stronger to keep your hedge trimmers in tip-top shape. And that's when a resin solvent comes in handy. Some gardeners prefer to use mineral oil or rubbing alcohol when things get sticky. They reach for these impromptu solvents and give their trimmers a spray before wiping it down like normal. Others, however, prefer to use specialized, industry resin solvents specifically meant for blade cleaning like CMT Formula Blade and Bit Cleaner from Amazon for $16. For an added level of maintenance, you can also use a blade lubricant, like the STA-BIL Blade Guard from Amazon for $14.53, which will also protect your blades from rust and outdoor corrosion.
Particularly in the case of the specialized blade cleaners and lubricants, many are also formulated not to affect other plant matter it comes in contact with, so, hypothetically, your lawn, bushes, and trees should not be subject to chemical browning. Whichever solvent method you choose, after you've wiped away any sticky substances from your blades, re-engage your power source and run the motor for a short while to make sure the solvent and/or lubricant is evenly distributed across the blade.
Easily sharpen your blades with a flat file
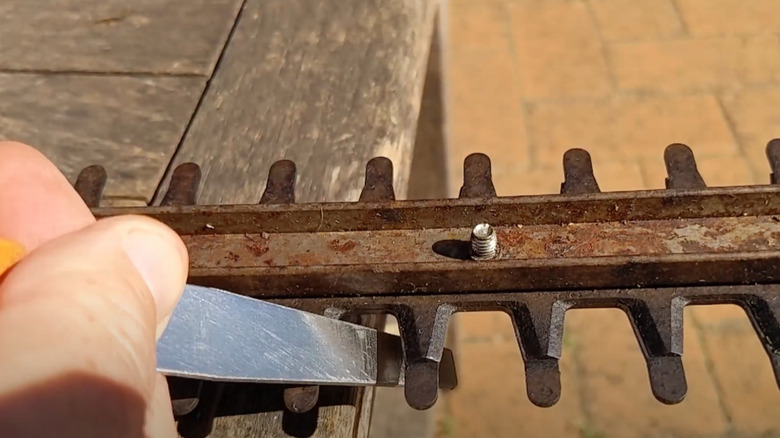
Once you get to the point where cleaning isn't cutting it (pardon the pun), you'll need to sharpen your trimmers to maintain their effectiveness, and one of the best methods for sharpening your hedge trimmers to do so is with a flat file. After putting on safety goggles and heavy-duty, cut-resistant gloves, you can sharpen your trimmers with a flat file in the safety and convenience of your own yard. Like with cleaning your blades, ensure your batteries or other power sources are removed, then remove the blade. Secure the blade down with clamps on a work surface, and clean it as you would regularly.
After cleaning, file the blade at a 45-degree angle in the cutting edge's direction, and be sure to only move in that direction as well. It will take about 20 movements with the file to get a section properly sharpened. Be sure you aren't applying too much pressure to the blade, either, and only take about 5 millimeters off in total so you don't compromise the integrity of the blade. Once you feel the entire blade is back to its cutting self, proceed with the resin solvent or lubricant step to maintain its longevity.
Use a drill or rotary tool to save time sharpening
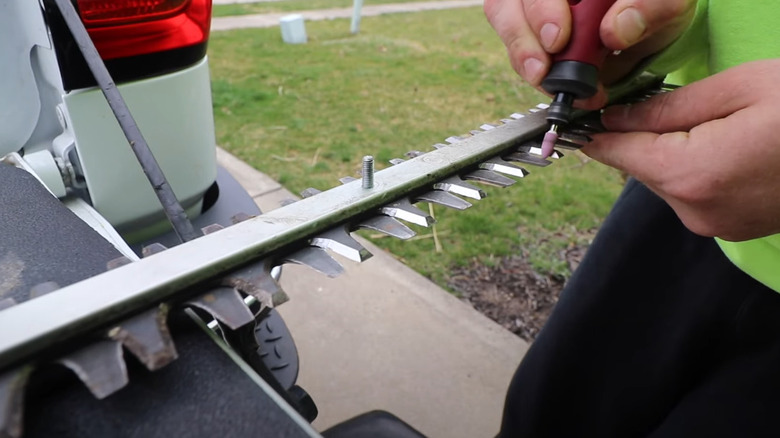
If using a flat-file seems too mechanically intensive and laborious, you can speed up the process and simplify it using a drill or rotary tool. The key here is to get a good grinding tip, like this Dremel Grinding Stone from Amazon for $4.47, that can work around the teeth of your blades in a uniform way. Again, in the cutting edge direction (the bevel), move the grinding stone, powered by your drill or rotary tool, along the teeth, up and down about five times. No need to apply pressure when using a motorized tool since the drill or rotary does that for you.
Repeat these movements all along the blade on every tooth, and flip the blade over to sharpen the other side, again along the bevels or cutting edge. Overall, this process is much more powerful than sharpening your trimmers with a flat file and speeds up the routine considerably, but remember to take extra caution since you're using a powered tool. Still, wear your cut-resistant gloves and goggles as safety precautions, especially since metal grinding dust is more likely to get kicked up with this method.
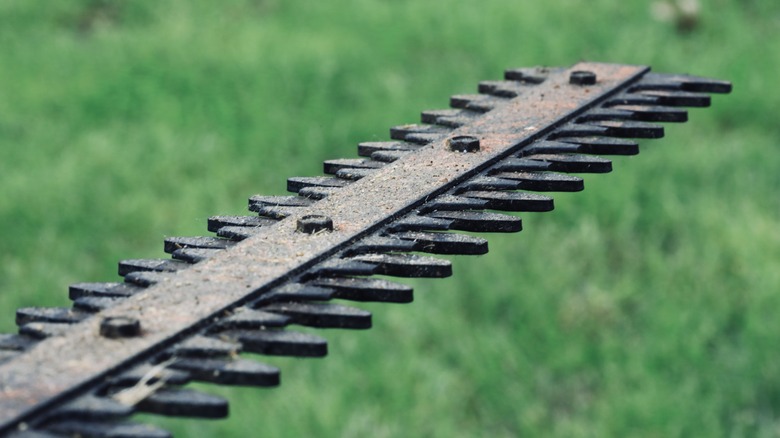
Clean any stubborn burrs using a whetstone or sandpaper
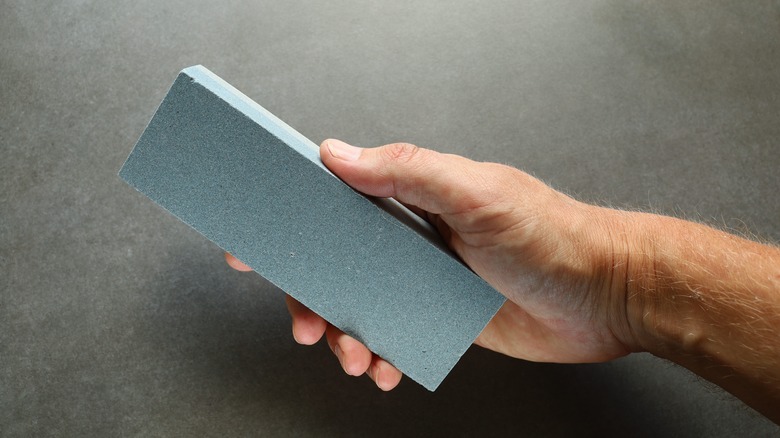
After you've successfully sharpened the sides of your blades, you may notice that the undersides of the teeth also have some metal build-up or small notches on them. These are referred to as burrs — not to be confused with the burrs of a plant variety — and they actually will dull your blades at a more rapid pace, so it's important to remove them when you're sharpening your trimmers. Flipping the blade on its back, start carefully filing down the burrs with a whetstone. Ever-so-lightly moisten the whetstone with water as you move over the burrs, but remember to make sure the water doesn't remain on the blade for too long. If you don't have a whetstone handy, you can also use 300 grit sandpaper to achieve similar results.
Once you've successfully removed the burrs from your hedge trimmer blades, you've completed the best routine to keep your tools clean, sharp, and in the best shape to last for a while to come. While sharpening your blades or burr removal doesn't need to happen with every use, it's a great idea to maintain these practices when you're approaching that 50-hour use threshold. In the meantime, use these simple wiping and cleaning tricks after every yard day to keep your trimmers in tip-top shape. Remember, your tools will take care of almost any problem in your yard, so take care of them, accordingly!