5 Cool Ways To Repurpose Large Egg Trays For A Stylish & Functional Living Room
We may receive a commission on purchases made from links.
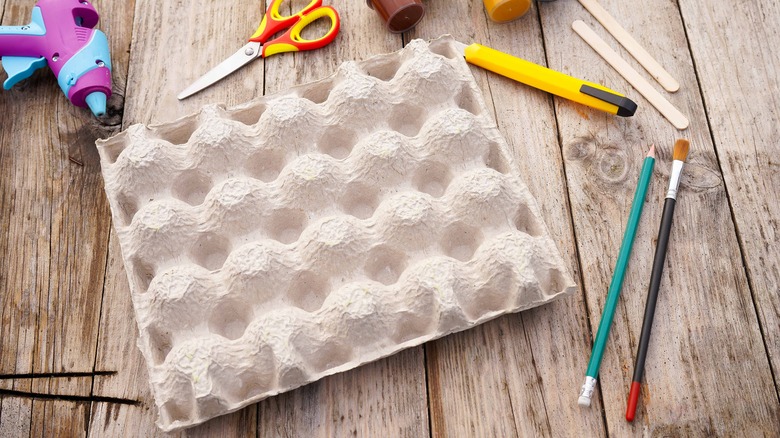
Cardboard egg trays are designed to hold and protect one of nature's most fragile creations. Something so well engineered is bound to have uses far beyond holding future breakfasts. So, when it's done holding your eggs, don't toss that ingenious packaging into the recycling or compost bin. Instead, harness the unique qualities of the large trays for some living room DIYs. Connect a trio of them for a lightweight trash can, shape and trim one into a textured lampshade, or pile them up for a durable chair. Snip, paint, and stack individual cups into accent flowers to frame a mirror, or even borrow the trays' peak-and-valley shape to form a cement planter.
There's no shortage of crafts converting egg cartons into stylish decor. However, online creatives have come up with projects that go way beyond egg carton flowers, not to dismiss how cute those can be. None of these crafts requires much in the way of supplies or tools. Grab some zip ties, a utility knife, a paintbrush, paint or some food coloring, and a few other materials depending on your project of choice. Also, if these large-tray crafts are calling your name, you can help local eateries reduce waste. Check in with your favorite brunch spot; they may be happy to set aside their trays for you.
Lampshade
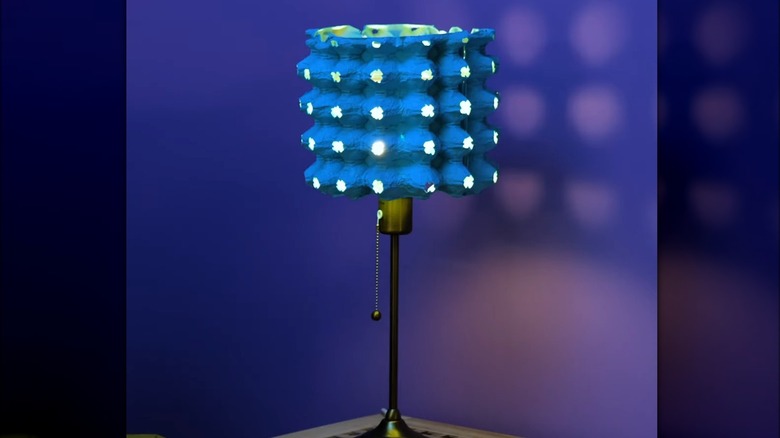
To create this unique lampshade design, start by dampening a 30-egg tray with a bit of water before curving it into a cylinder around a lampshade frame, with the underside of the egg cups facing outward. If you don't have a cylindrical lamp shade frame, you can use a large plastic or glass container as a form to bend the dampened tray around for an even, circular shape. Make holes with a utility knife at the bottom of each egg cup to allow light through, connect the edges with zip ties, and trim the excess. Once the carton dries, it should hold its shape.
Attach the shade to the frame in a way that hides the zip ties. For the frameless version, you can set the freestanding shade over a simple tabletop shadeless lamp like the Helunsi Industrial Table Lamp from Amazon for $18. You can dye the carton in your favorite color by adding food coloring to the water you use to moisten and form it. If you want your shade to have a richer color, give it a coat of acrylic paint, and make sure to also paint the zip ties for a seamless look.
Mini trash can
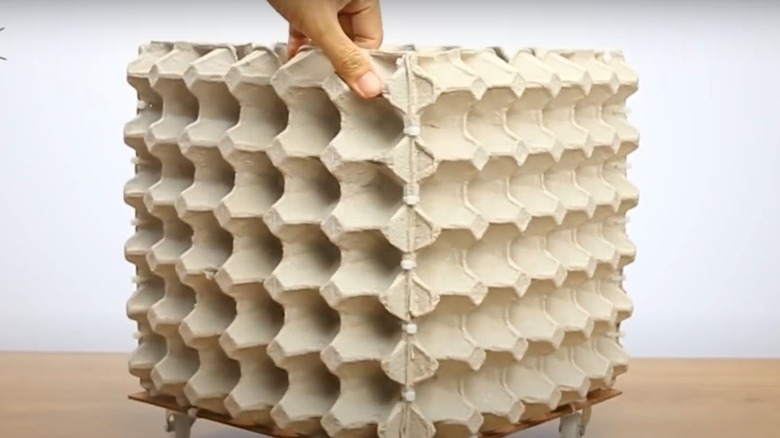
With just a few zip ties, egg trays of any size, and a piece of cardboard for a base, you can whip up an easy trash can in minutes. You can use three large trays of the same size for a triangular design. Alternatively, you can make a more capacious square one with four large trays, or try a tiny one with a grouping of four to six one-dozen trays with the lids cut off.
Poke holes at two points, one near the top and one near the bottom, of each egg tray, making sure that they align with each other. Link each side with two zip ties, and trim the ends. Cut a cardboard base that matches the shape of the trash can's opening, and glue it on securely. If you like, paint your new trash can in a pleasing color. Flip the container over, and line it with a trash bag or reused shopping bag.
Small chair or ottoman
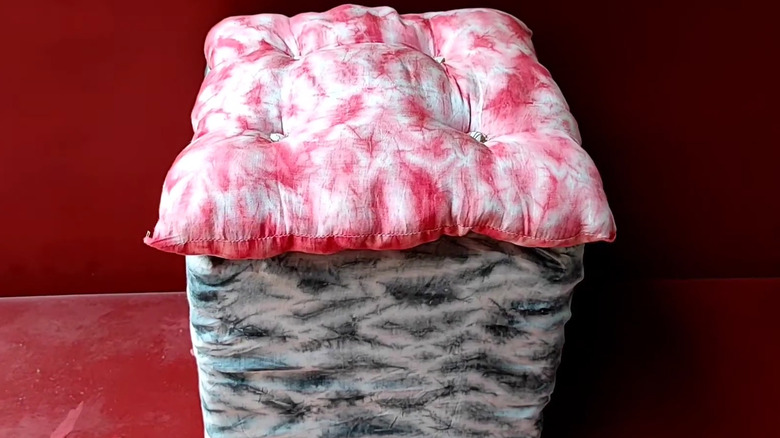
Painted and stacked egg trays topped with a cushion can become a place to set your feet or your seat. For this hack, you'll simply stack the trays one on top of the other, fitting the egg cups inside each other, and top it with a square pillow for a seat. Give the tower of large egg trays a spray with food coloring-infused water, either in one unifying color, or several complementary colors You can also disguise the frame's origins by covering the egg trays with fabric, like YouTuber Dipa's Craft and Creation (via YouTube).
Make this project easier to move without falling to pieces with a little glue. Dab a bit of craft glue inside the cups on the four outside corners of each tray before you top it with another tray. Stack the trays as high as you'd like, but keep in mind that it will sink down a bit when someone sits on it. Continue the upcycling theme with a custom cushion to top your new chair/ottoman. Instead of tossing them, clean and disinfect some plastic bags, and use them as stuffing for an eco-friendly cushion that matches the shape of your new furniture piece perfectly.
Artificial bricks
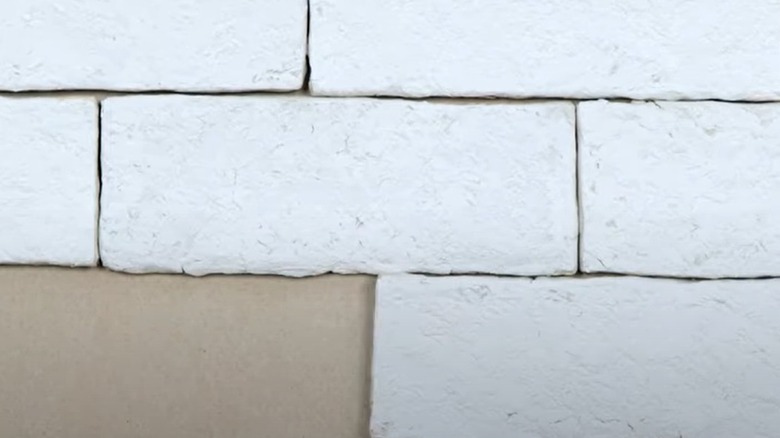
Chances are you never thought that paper egg cartons could be used to make artificial bricks. Decorative brick faces glued to a wall in a pattern that replicates real masonry is a great way to use up any type of paper egg cartons, including the lids you cut off for other crafts. Tear up egg cartons into 1-inch pieces and add them to a mixing bowl. Cover the pieces with water, and let the paper pieces absorb enough liquid to be fully saturated. Then, knead together the ingredients until you have a rough pulp.
Squeeze out any excess water, and pack a rectangular mold tightly with the mixture. You can earn extra green points by making a mold from a soy milk container. You can do the same by cutting away one vertical face of a rectangular milk carton, leaving about a 1-inch-high lip around the edge to hold the pulp. Once the bricks have dried, you can paint them or leave them as-is. Attach them to your walls with glue, or lightweight Command Strips from Amazon for $11 if you want to avoid damaging your walls.
Cement planter
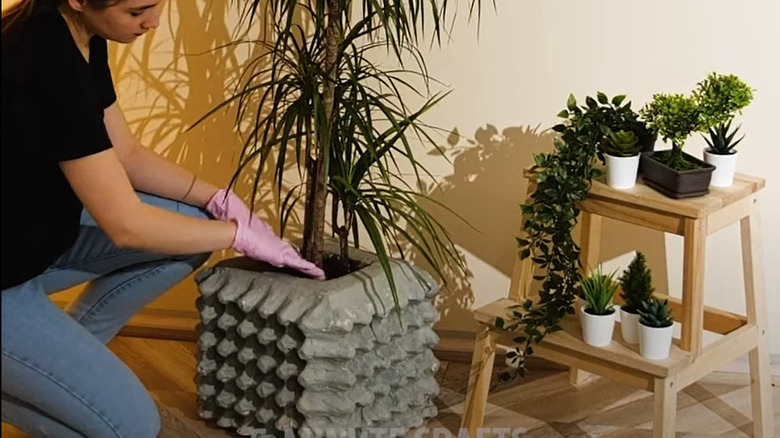
This is definitely the most ambitious of our five craft ideas, but the results are long-lasting. Make a cement planter by pouring cement into a mold made of two cardboard boxes lined with egg trays for a distinctive texture. Since you'll be using them as a mold rather than as part of the structure, you can transform the egg trays into stylish DIY home decor once you're finished making the planter. You'll need a bag of quick-setting cement, and four large egg trays (at least large enough to hold 24 eggs). You'll also need two tall cardboard boxes that will act as a mold; one needs to fit inside the other with about a 4 to 6 inch gap between the two boxes. Trim the egg trays so that they match the sides of the large box.
Pour a few inches of wet cement mixture into the bottom of the larger box, and place the egg trays vertically into the mixture, flush with the sides of the large box. However, to ensure that the cement sides will be thick enough along the entire face on the four sides, check that there's at least a 1.5-inch gap between any part of the egg tray and the inner box. Slide the smaller box inside the larger box, resting it on the wet cement base. Making sure the egg trays stay close to the sides of the large box, fill the space between the egg tray surface and the smaller box. Let your planter dry, cut away the mold, and make it a home for a happy plant.
