We Used Dollar Tree Foliage To Create A Cozy Fall Planter, But Was It Worth The Effort?
Fall has to be my favorite time of the year. Sweaters come out of the closet, store shelves get stacked with spooky paraphernalia, and the whole world changes color. This year, I wanted to decorate with something other than my usual potted mums and harvest wreath. I turned to the online world for inspiration and wasn't disappointed. YouTuber, Garden Answer, made an adorable DIY seasonal tree planter using branches and some Dollar Tree foliage. Instantly, I could tell this was the perfect recipe for fall decor on a budget.
One of the reasons Garden Answer chose to make her decor was the price. A quick search shows Pottery Barn's faux potted maple sells for $299 and Home Depot's artificial birch is $93.54. Amazon has an affordable option for $43.99, but it isn't potted. Always up for a challenge and seeing the allure of discount supplies, I set out to handcraft a twinkling maple of my own. Check out how I made my festive porch planter, and whether it was worth the effort.
Prepping dollar store materials
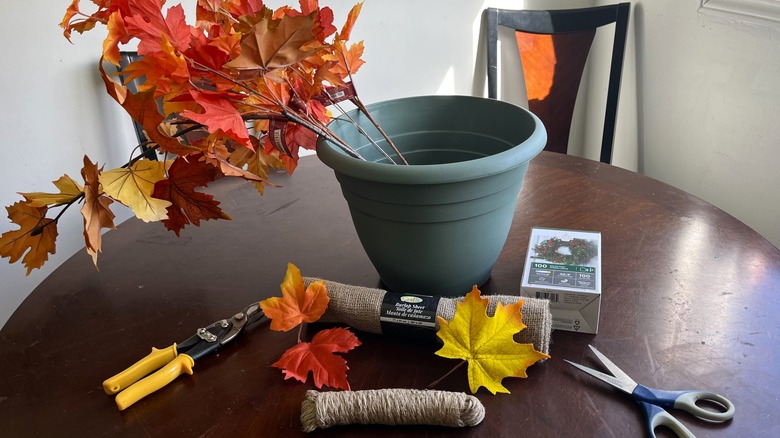
To prepare for this craft, I recruited my husband for a woodland trail walk to find the perfect branch. Next, I headed to the shops for faux foliage. Dollar Tree sells bunches for $1.25. If you don't have a planter at home, Dollar Tree also sells these for $1.25. I recommend picking up some floral tape for $1.25 while you're there. I also bought 10 feet of solar micro-lights for $10.00 from Giant Tiger. If you don't have this store where you live, Amazon sells two-packs for $9.99. Finally, you'll need a hot glue gun, glue sticks, scissors, and tin snips. With the materials purchased, I started to prepare for the big project.
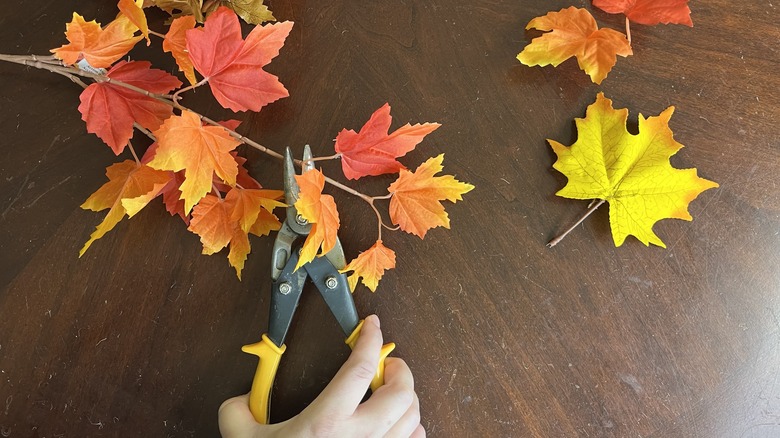
To make leaf placement more natural, I wanted the tree bough upright for application. The planter I chose was plain green plastic and I wasn't a fan. Using hot glue, I decided to create a large custom planter by covering the exterior in burlap and wrapping the rim in sisal rope. Happy with the look, I filled the pot with rocks to add some weight and positioned the branch inside. Next, I used tin snips to separate leaves from the bundles, alternating between long and short twigs. Now, I was ready to assemble.
Assembling my fall planter
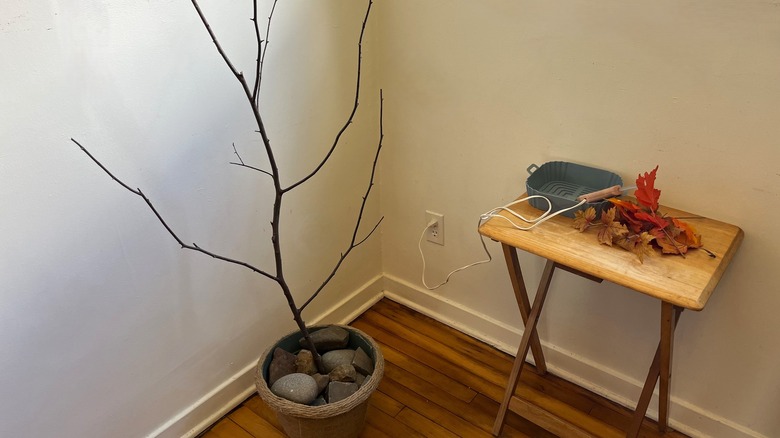
As I started, I set everything up in the corner of my dining room, using a silicone pan as a hot glue rest. I quickly realized that transforming a simple branch into a festive potted tree wasn't as easy as I thought. I began by gluing the first leaf directly to a protruding twig. It promptly slid off the wood and stuck itself to my floor. Changing tactics, I started applying leaves by wrapping floral tape around both the natural bough and faux foliage. I then secured each piece of tape with a dollop of hot glue. While tricky at first you'll be glad you have a hot glue gun when you get going. I continued this process until all the leaves were used. Next, I applied the lights.
Micro LEDs are dainty, ethereal, and understated — they're also a pain in the butt. The thin wire holding these lights together is extremely delicate, and while I wound it around the tree from base to tip, I found it bending, tangling, and getting caught in the leaves. This was extra frustrating, because of how tall I'd made my planter. At roughly 5 and a half feet, I found myself crouching from a squat to reaching my arms above my head to try and cover the entire thing in fairy lights. Fortunately, the strand was the perfect length for this project and I only needed one. When I finished, it looked amazing, but it wasn't without its flaws.
A job well done, but would I do it again?
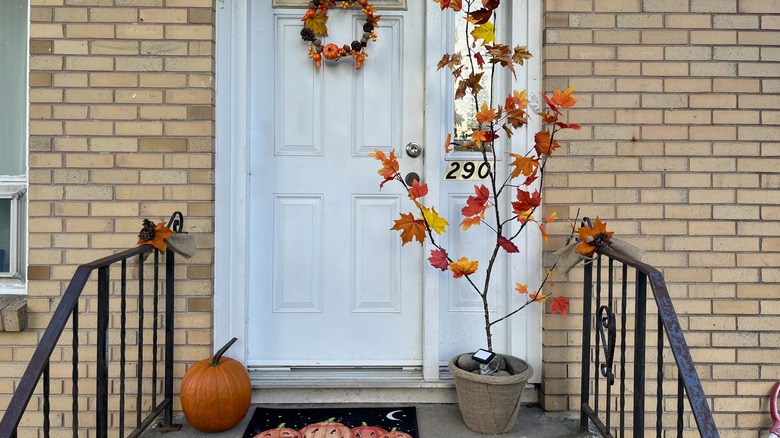
This fall DIY ended up being a huge success. I love the way it looks on my front porch, and the mix of hot glue and floral tape made for a secure application process. Would I do it again though? Maybe, but I'd change a few things. When I prepped my leaves I cut some short and kept some with the bendable metallic twigs attached. I should have left them all on the long side. The metal-infused sticks let you easily wind floral tape around the branch and mold the foliage into a natural shape. The short ones were tedious to work with. Speaking of tedious, this is a time-consuming project.
This festive planter took me about three and a half hours to assemble — not including shopping and preparation. Some of this was failing and learning new ways to attach things, and some of it was fighting with the twinkle lights. With a final cost of about $29.00 and the time I spent shopping, cutting, gluing, and wrapping, it might be worth your time to buy one instead of make one. Still, I had fun with it, and if you want something custom-made to fit your porch, or match your current home aesthetic, there's no better way than to do it yourself. If you're looking for outdoor Halloween decor ideas that will transform your porch this year, give this Dollar Tree fall planter a try, but learn from my mistakes.