DIY A Wooden Shed From Pallets For Endless Possibilities
If you're looking for a project that will spark your creativity and result in a functional structure, definitely consider DIYing a wooden shed. This project can be done relatively quickly and for almost no money if you use upcycled wood pallets for the walls. To do this, you'll create the foundation, build the frame out of wooden planks, attach the pallets, and add the roof.
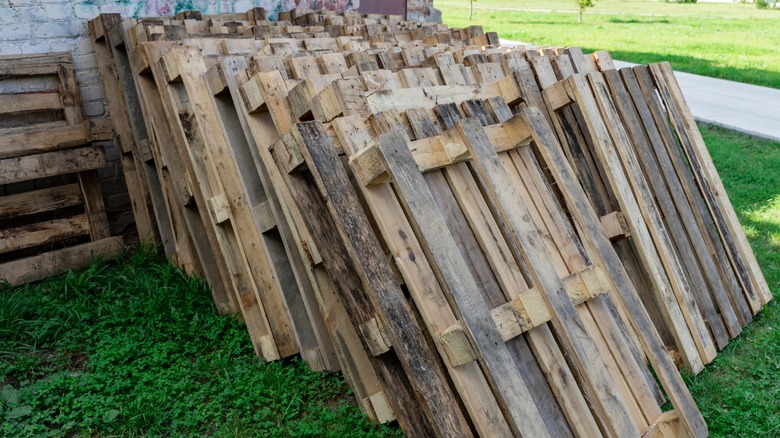
Pallets are extremely durable and very cost-effective, making them a great material to work with. Their stackable nature makes them great for DIYers of any skill level. You can usually find them for free on websites like Facebook Marketplace or Craigslist. Checking in with your local grocery store is another great option, as they might have some pallets left over from deliveries.
To get started, think about how big you want the shed to be and where it's going to go. The size of the shed will determine how many pallets you need. Also decide if you need a foundation for your storage shed. If not, ground contact wood or cement blocks will be needed to elevate the floor to prevent any damage. In addition to the pallets, you'll need 2x6 wood planks for the framing and roof, a handsaw, a drill gun, screws, and sheet wood or the roofing material of your choice. This project will give you a perfect base structure for customization, whether it be more firewood storage, a home for your garden tools, or an outdoor bar to spice up your backyard.
Building out your shed
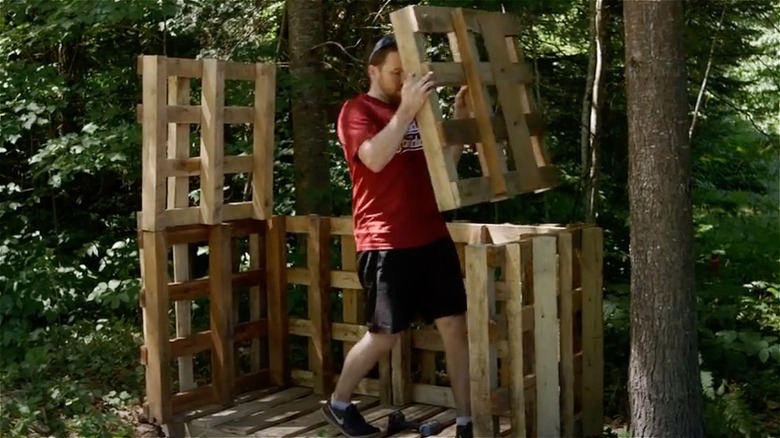
You'll start the project by creating the foundation for your shed. You'll need to clear out the area and add concrete or another material, then build a wooden base. If you're going to use your shed for something like storing firewood, pallets could be used for the floor. Then, use the 2x6 planks to create the frame of the shed, drilling them into the base. From there, you will build out the walls by stacking the pallet wood and screwing them into the base and frame so they're sturdy. If you need to alter the size of the pallets to fit your structure, you can do so simply by using a handsaw. Depending on the type of shed you're building, you'll need either three walls (for something like wood storage) or four walls and a door. To cover the gaps in the pallets, you may want to cover the walls with 4x8 wooden boards or sheets, too.
After the walls of your shed are built, use the 2x6 wood planks to construct framing for your roof. Separate from your structure, build two trusses and connect them to create a triangular framing. Connect the frame to the walls. Finish off the roofing with sheet wood or your material of choice. Struggling to decide which material to use? Check out the long-lasting shed roof material that's worth the price (and one that isn't). If you want to paint or stain your shed, you'll probably have to sand down the wood and prime it, especially if it is upcycled. However, this is not necessary — leaving the wood natural can give your shed a rustic charm.
Take advantage of your shed's endless potential

Once you've built your woodshed, think of it as a blank canvas for you to transform into anything you desire. While it could be used as a typical shed that stores yard supplies and tools, there are plenty of other possibilities as well. If you want to create the perfect gardening station, add a potting table (a DIY wood pallet project that'll keep your gardening station organized), shelves for your gardening tools, and seedlings. Or, turn your wood shed into an art studio (a lá Jackson Pollock) by outfitting the space with an art table, canvases, an easel, and art supplies. You can convert your outdoor shed into a backyard bar pretty easily by cutting a window in the side of your front wall, adding a swing-down countertop, and including shelving inside the shed.
Another option is to create a firewood shed out of leftover wooden pallets. In this instance, you don't need a door or a wall on the front; just build three walls and a roof, then stack your firewood inside. And for our wellness gurus, you can actually convert your wood shed into an at home sauna! This option may be a bit more costly since you'll need to cover the interior walls with humidity a friendly-wood such as cedar, install insulation, purchase a sauna heater, and build proper ventilation. However, it can be a rewarding endeavor, as you'll have a spa just a few steps away from your home.