A DIY Door Number Sign For Less Than $20 Using Dollar Tree Supplies? We Had To Try It
Turning a house into a home involves all kinds of updates and personal touches. While the interior is a priority, the exterior also plays a role in the overall aesthetic of a property. For me, a sore point has always been my door number sign. It consists of three generic metallic numbers fixed to the brick siding, and it's not very pretty. While I've thought about changing it in the past, there always feels like a hundred other things to do inside or out in the garden. This week I finally decided to make a change.
I love tackling decor projects myself. It makes me feel more connected to my home. Before starting, I scoured the internet for ways to creatively display house numbers and I found inspiration. TikTok user @Lexi.DIY completed this project with a Cricut machine and Dollar Tree materials to make a beautiful flower box with custom-cut numbers (via TikTok). This idea speaks to the gardener in me, even if it uses plastic plant life. While I do have a vinyl cutter at home, I took on the challenge of sourcing most of my materials from the local discount store. Check out how I DIY'd this floral placard on a budget.
Prepping supplies for easy assembly
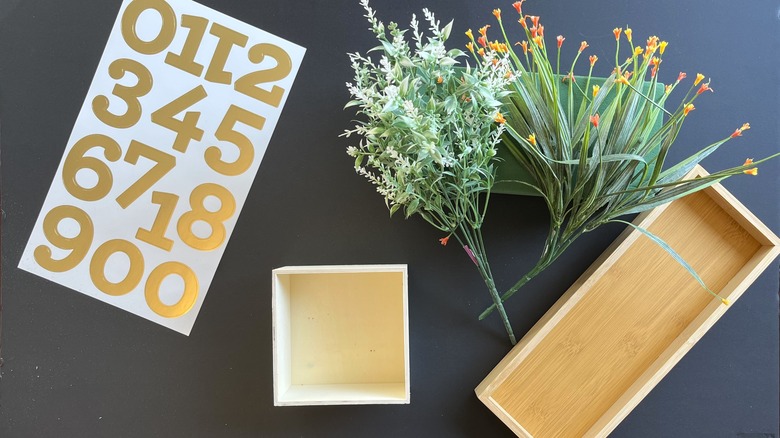
If you want to upgrade your home and garden on a budget, the dollar store is the place to shop. I set out to do just this, gathering a long narrow wooden tray, a small wooden box to fit the tray, gold number stickers, acrylic paint and brush, floral foam, and faux flowers. Assorted crafter's boxes can be found on Dollar Tree, along with foam floral blocks, die-cut foil numbers, and synthetic greenery, all for $1.25 per piece. If they don't have the tray at your local store, the Dollar Tree wood plank hanger works in its place. You'll also need a box cutter, a pair of tin snips or wire cutters, hot glue, and Mod Podge Outdoor, which you can get at Michaels for $12.18. In total, I spent $18.69 on materials.
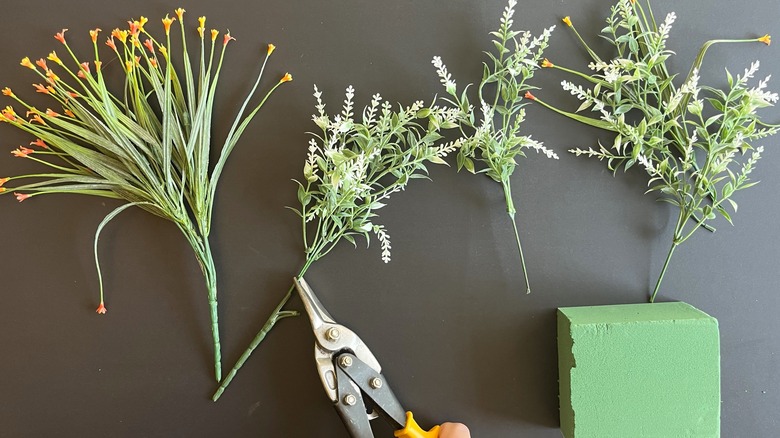
To make assembly easier, I prepped the supplies ahead of time. There are some things you shouldn't do after painting, like cutting floral foam. It's extremely crumbly and could mark the paint. I measured it against the box I chose and used the box cutter to trim it to fit. Remember to leave room for the wooden placard to slide in behind it. Next, I separated my flowers. These had metal wires inside, so I carefully cut them with tin snips. I wanted the stems relatively short so the numbers were visible over them. Finally, I was ready to assemble.
Getting the Dollar Tree DIY party started
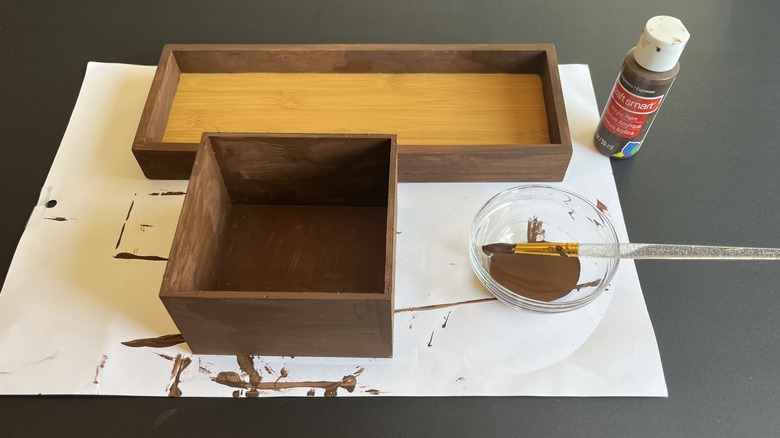
The first thing for this DIY was paint the wooden box and tray an espresso brown. I left the interior its natural color because I liked the contrast. If you're using the wood plank hanger in place of a tray, you can use one solid color, or experiment with painters tape to create a trim. You can find painters tap at Dollar Tree for $1.25 a roll. Once everything was dry, I stuck my metallic number stickers to the front of the sign and used hot glue to secure it inside the box. To seal everything in watertight, I coated the whole thing in Mod Podge Outdoor. Finally, it was time to plant my faux garden.
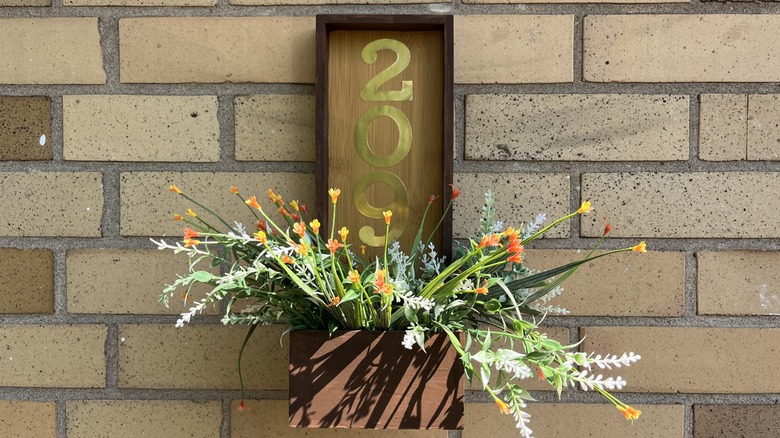
Floral foam makes flower placement a breeze, but I'll admit, inserting it was tricky. I had to cut off a little extra to accommodate the tray lip. The wired flower stems slid into this base beautifully until I hit another snag. Although I cut my stems short, the tiny blossoms still poked up over the gold numbers. I grabbed a chopstick from the cutlery drawer and used the narrow tip to push everything in deeper. This worked like a charm. It looked like a real planter, and everything was visible. All that was left to do was hang the sign outside.
A successful DIY complete
This Dollar Tree DIY floral sign turned out better than I expected. It's one thing to see it done on TikTok and another to try it yourself. Looking at the before and after photos, I'm still floored that all of this started as a pile of material from the discount store. Overall, this was an easy craft, and one I would recommend for any DIY experience level. Of course, it wasn't without some flaws.
One thing I would change if I tried this again is the sign's height. The box I chose was 2 inches tall and the tray was 12 inches tall. This left minimal space for numbers and was part of the problem I encountered with greenery getting in the way. Despite minor hiccups in this project, I'd say it was a shining success and a major improvement on the generic sign I had. If you're looking for ways to stand out on a budget, add gorgeous detail to your home's exterior with a Dollar Tree door number sign of your own.


