These DIY Gold Leaf Marble Epoxy Resin Countertops Are Simply Stunning
It's a classic homeowner struggle: You find a new kitchen look you want by scrolling Pinterest, but don't have the time or money to completely renovate your house to make it happen. And, while painting kitchen cabinets can bring on some great changes, the countertops are a major part of a kitchen's look and feel, and they are far harder to swap out. Luckily, these epoxy marble countertops add to your kitchen aesthetic without requiring a complete renovation and upheaval of your kitchen use.
The average kitchen renovation costs upwards of $25,000, and can mean you lose access to your kitchen for days, weeks, or even months at a time. If you're DIYing it, there's also the cost of physical labor of removing heavy countertops, demolishing cabinets, and keeping the rest of your house clean throughout the process. Epoxy countertops cut down the time and cost significantly. You can get an epoxy finishing kit for $100 to $350 to do the project yourself. And it's not just a quick, short-term solution; done correctly, and kept clean and in good condition, epoxy countertops can last for 10 years in your kitchen, making it one of the best options for updating your counters on a budget.
Preparing your counters for epoxy
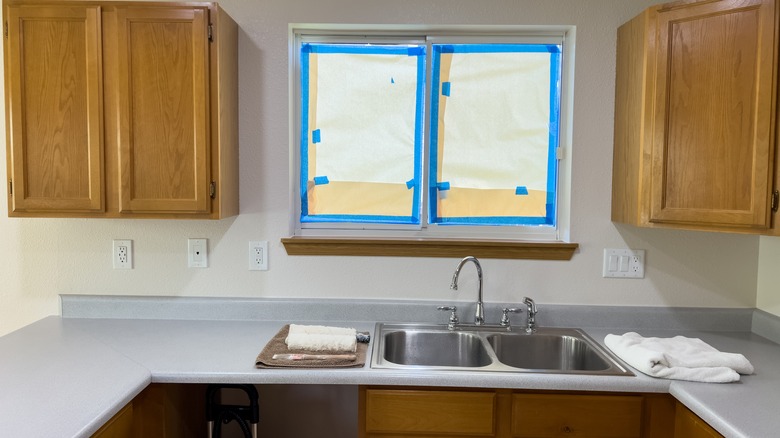
In order to use epoxy on your kitchen countertops, you will need to make sure that the surface is ready for the resin. You should thoroughly clean your counters and remove imperfections in the surface by sanding them down and filling gaps with a sealant. You should also effectively remove old caulk from your surfaces so that nothing gets in the way of pouring the epoxy.
Once everything is sanded and clean, protect your windows, sink, backsplash, walls, and cabinets by using painter's tape and transparent tarps to seal them off. This will ensure that all of the paint and resin you use stays only on your countertops instead of spreading to the rest of the kitchen. From there, apply a layer of bonding primer and sand the layer down so that it's completely flat. You'll then want to apply two coats of a paint that has primer in it; choose a color that you want for your countertops, like white or light gray, since this paint will be seen through the clear epoxy resin.
How to DIY gold leaf marble epoxy resin countertops
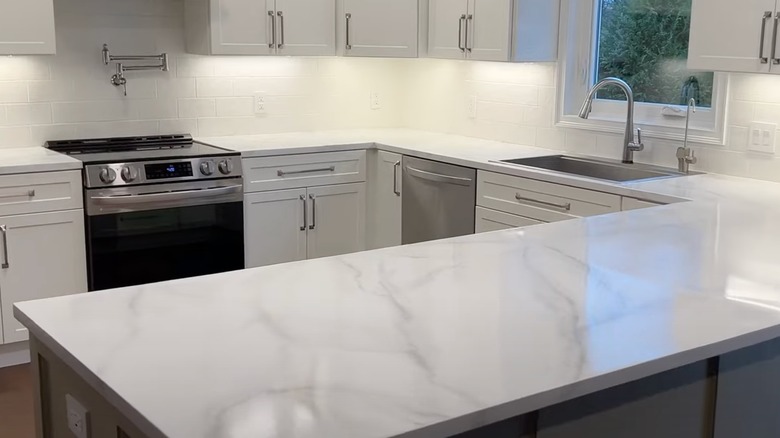
TikTok user @DistractedDenise added her own unique twist to the process of epoxy countertops by painting in gold leaf and other marbling patterns, and you can do it, too. Simply use tacky glue and a paint brush to form a line of glue that mimics natural marbling, and then press some gold leaf into the glue and wait for it to dry. You can also use other colors, like dark gray and black, to add lines around the gold leaf: this will help you get the look of marble countertops on a budget.
If you don't want to paint gold lines, you can also mix gold leaf into the epoxy itself before pouring it over your counters. There are even some kits that offer epoxy with pigment add-ons that come in gold or other metallic hues. Regardless of what you choose to put under or inside of your epoxy resin, the next step in the project is to mix the epoxy using a drill attachment so that it's thoroughly combined, then pour the resin mixture over the primed countertops and use a torch to remove any bubbles. You can then add a layer of pigment, or more gold leaf on top of the first layer of epoxy, to give the countertops more depth. Seal the project with a plain layer of epoxy resin, again using a torch to extract bubbles and imperfections.