DIY An Under Deck Drainage Ceiling To Get The Most Out Of Your Backyard Space

If you have a deck off of the upper level of your home, you've probably eyed its underside and fantasized about adding a ceiling. That extra layer of protection would drastically increase the potential for that space. You might have gone as far as getting a professional quote for the job, and the daunting price put your plans on the shelf. Deck drainage ceilings are a relatively quick way to give a water-tight roof to the underside of a raised deck. According to Riverview Decks, DIYing this can save 25% over professional installation. Keep in mind, this is an undertaking best for people with a decent amount of building experience and plenty of confidence with troubleshooting.
Add metal panels, gutters and slip joint connectors, screws, and treated 2 by 4 foot wood studs to your supply list. You can also use polycarbonate panels or metal sheets. As for tools, set aside a drill with a screwdriver bit, a tape measure, and a table saw. If you don't own one, there are ways to cut large pieces of wood without a table saw. Saving a few bucks might not be a top priority, though. If so, you can simplify the process by purchasing an under-the-deck drainage system that you can install yourself. These systems can work wonders to make a dry space beneath your raised deck, but they typically cost between $6 and $15 per square foot. For a fraction of the price, YouTuber Southern Ginger Workshop pieced together a deck drainage ceiling with their own materials and custom plans for under $300 (via YouTube).
Kicking off your build
For this project, you'll need enough corrugated panels to cover the area of your deck's underside that you want waterproofed. When calculating the amount you'll need, be sure to plan for the grooves in the panels to be perpendicular to your exterior wall for the most effective drainage. You'll be using the 2 by 4 foot wood studs as purlins between the joists and the panels; depending on the depth of your deck, you may need as few as two or possibly four or more purlins to hold the ceiling panels.
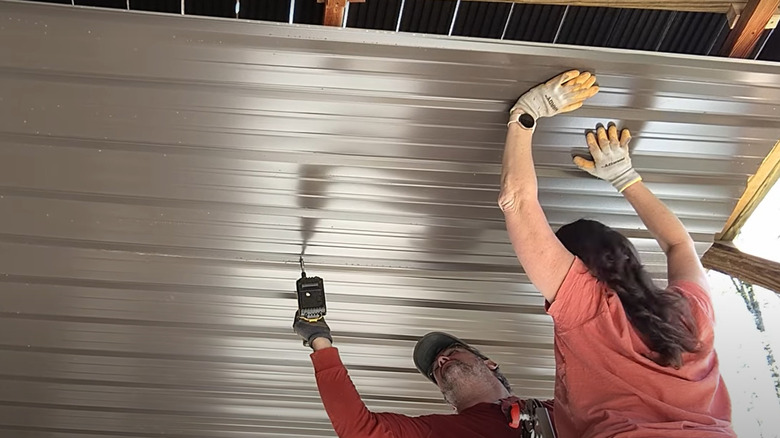
To the water runs reliably toward the gutters, it's important to angle your panels downward away from your house. It's best to create a slope of 1 inch for every 4 feet, accomplished by trimming the width from the 2 by 4 foot purlins. Install the purlins from narrowest to widest, from the house outward; this creates this slope you'll see when you attach the ceiling panels to them. To help you screw the panels to the ceiling, you can tack together a T-shaped brace out of a couple of 2 by 4 foot pieces. The vertical piece can be long enough for a helper to hold or to support on a table, and the horizontal piece will hold the loose end of the panel in place while you secure the other end.
Add the finishing touches
Once your panels are in place, the next step is installing the gutters at the outside edges of the ceiling as well as where the panels meet the side of the house. Attach the brackets for the gutters along the joists beneath where the edges of the ceiling panels meet. Slide the gutter trays into the brackets, and connect separate pieces of gutter tray with slip joint connectors. A quick spray with a hose on the upper deck floor will let you know if rain will flow off efficiently. If not, this is the time to make adjustments.
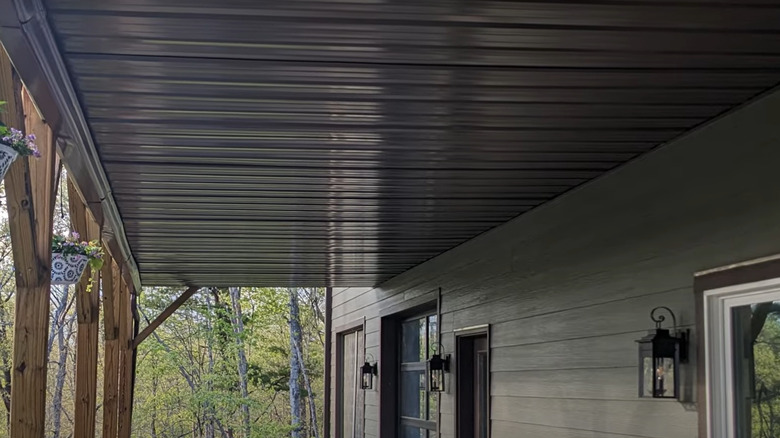
If your gutters are open on each end, downspouts aren't absolutely necessary. However, rather than letting valuable rainwater wash out of the sides of the gutter, you can add downspouts at each end and collect the water in a DIY rain barrel. Instead of a downspout, a rain chain may be better for your home, depending on the volume of rain your area receives. Once you've tested your newly-covered outdoor space for water tightness, it's ready for whatever use you've envisioned.