The DIY For Creating A Safer, More Secure Pathway On A Sloped Backyard

Does the yard on your property come with a slope? Although the vertical dimension offers some visual interest to the landscape — not to mention the many amazing ways there are to design a sloped yard — the slant can be dangerous when slippery. If ice forms on the ground, any slope above 2% may present a serious slipping hazard. The good news is that you can build a safe, secure pathway for going up and down the slope by putting in simple, DIY steps.
There are several materials you can use to build the stairs. Wood is a common choice, but adding a sturdy and safe wooden staircase to a slope can take some effort and planning. The lumber, timber, or logs you're using will generally not last very long unless you're diligent with maintenance. Also, the wood can become slippery when exposed to moisture, which defeats the purpose of constructing the steps. A more lasting choice is to use the same concrete blocks you'd turn to for building a retaining wall in a sloped backyard. The installation does require a good deal of precision, but it's nothing you can't handle on your own. To start, you'll need the retaining wall blocks and caps (which cost a few dollars each at Lowe's), landscape adhesive, a shovel, a tamper, some gravel, and some sand. Obviously, the excavation and block-setting requires a bit of muscle power, too. Below, we'll walk you through the easiest way to DIY steps to your sloped yard using concrete blocks.
How to build DIY concrete block steps on your sloped yard
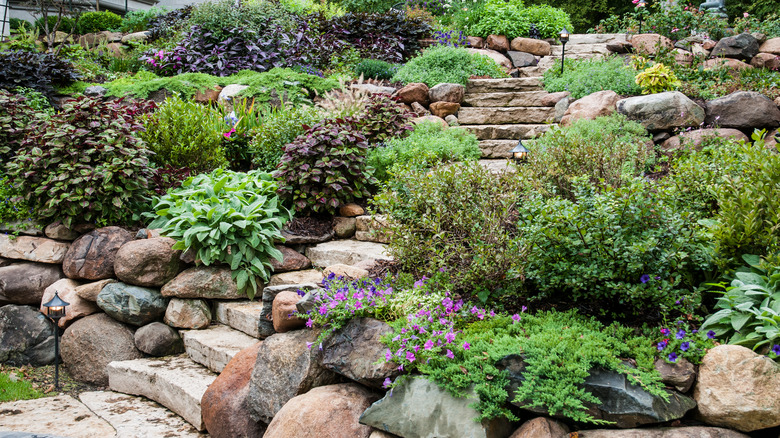
Start by measuring the height of the blocks you're using — this dimension will inform the excavation depth. Next, dig a shallow trench where the first step at the bottom (and the first course of blocks) will go. The trench should extend a bit past the total width of the blocks you want to fit into a single tread. The depth of the trench should accommodate layers of sand and gravel, and allow at least 3 inches of the brick to sit beneath the grade. Next, compact the soil using a tamper tool, then add ¾-inch gravel to the bottom of the trench and compact it again. Now, add a layer of sand on top of the gravel, and compact it with the tamper once again before screeding the surface with a scrap plank of wood to make it smooth.
The next step is to set the blocks. It's best to not slide them around after setting, so to make sure they're all aligned, begin by drawing a line indicating the front edge of the blocks. Then, set the blocks gently along this line, so the sides come in contact with each other — you don't want gaps between them. Once the blocks are all in line, place a level on top and adjust as needed to ensure they're perfectly level and aligned with each other.
Finally, apply some landscape adhesive to the tops of the blocks and set the caps on top. Follow the manufacturer's instructions and give the adhesive enough time to bond properly. Now that the first course is in place, you can continue upward and repeat the steps above until you hit the top of the slope.