Genius Hacks That Make Spray Painting Cabinets So Much Easier
We may receive a commission on purchases made from links.
Replacing cabinets can quickly become a bit of a nightmare, rather than an exciting home project. The cost can be hefty and the process can pose unforeseen difficulties. The solution? Spray paint and a bit of determination. And if it's your first time working with spray paint, no need to be intimidated. With a few handy hacks to help you nail every stage, you can make the process easier. The average cost of replacing kitchen cabinets lands around the $6,000 mark, and painting your cabinets (whether with a spray gun or even rattle cans) is a way to bypass expensive renovations and still breathe new life into your kitchen. Although the project may feel daunting, with these simple, inexpensive tips and tricks, you can master the process like a professional.
Home décor trends seem to swing in and out of style as fast as fashion these days. With the growing use of social media, and the rise of working remotely, our homes are scrutinized more closely and loving our space, overall, has become more important. Whether the color of the cabinets has become outdated – millennial gray, the viral color that divided the internet, we're looking at you — or if you simply want to revamp the old and make it new again, spray painting your cabinets is a DIY that you can and should take on. Consider these simple hacks, such as replacing a rattle can sprayer with an old WD-40 nozzle or using caulk in addition to painter's tape, so you can avoid extra work and costly mistakes such as a scuffed finish or dripping paint.
Prep the cabinets with Krud Kutter, Dawn dish soap, or liquid sandpaper
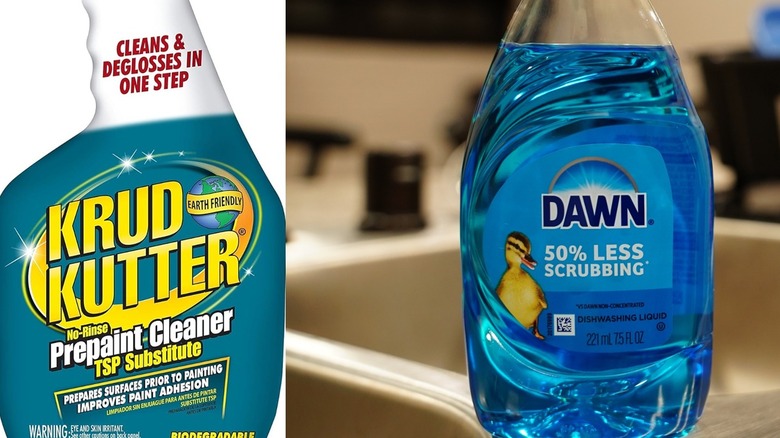
DIY paint projects allow you to get creative and save money, but to achieve a professional look, you must be somewhat meticulous with your prep. Scouring your cabinets, inside and out, front and back with Krud Kutter and Dawn dish soap will remove dirt, dust, grease (especially in the kitchen), and anything else that could get caught in the paint and create imperfections. Because let's be honest, are you really cleaning your kitchen cabinets often enough? Greasy, hard-to-budge grime can build up quickly, and to tackle it you need a powerful product like Krud Kutter or TSP.
With a few drops of Dawn dish soap, remove any obvious debris and follow that with a few passes using Krud Kutter Prepaint-Cleaner (available on Amazon for $12.79), this combination will prep the surface of your cabinets by cutting through grime and slightly de-glossing finishes. You can also use a slightly more corrosive option than Krud Kutter and spray on a true liquid sandpaper like Klean Strip ($8.98 at Lowe's) to really get the paint to stick and avoid strenuous sanding. Be aware that you may first need to apply TSP, and that this method is best-suited to smooth surfaces. If your cabinet doors are in rough shape, sanding may be a better option.
When preparing the cabinets, be sure to use a clean cloth that doesn't shed. Avoid using too much water, especially on the inside of your cabinets to prevent damage to the wood or oversaturating it. Finally, when applying Krud Kutter Prepaint-Cleaner or liquid sandpaper, use a circular motion, to really work the liquid over the surface. Remove any dust or excess liquid and you're ready to apply primer.
Hang your cabinet doors with coat hangers
Believe it or not, but the doors can often be one of the most challenging parts of painting cabinets. Although they are a flat surface, successfully reaching the edges and covering both sides can be difficult if they are lying down or if you're flipping them back and forth between layers of paint and primer. This increases the chances of smudging the paint, scratching the surface, or developing runs at the edges. A solution is this genius clothes hanger hack to paint your cabinets with ease. Using an old coat hanger will allow you to freely move around all sides of the door while painting. Forget flipping the doors back and forth and risking a mistake that will send you back to step one.
One method is to take advantage of the holes that are already in place for the hardware. Using the hooked end, place it through the predrilled hole and then thread a piece of rope or a tension rod through the coat hanger to suspend it. Another method is to purchase metal hooks that you can screw into the side of the cabinet door. Be sure to get small cup hooks that won't damage the cabinets too much or split the wood, and you might want to screw them into the bottom edge so the holes will be less visible. Alternatively, you can also get hinge hooks, specifically designed to suspend cabinet doors for spray painting. Amazon sells these 360-degree hooks for $69.99 for a 12-pack, as well as these more basic FastCap EFC clips for $7.38 a piece. Once the hooks are securely in place, you can easily suspend the doors on your coat hangers.
Use pool noodles to separate cabinet doors while painting
We've already determined that hanging your cabinet doors is the simplest method. If they're lying flat, even on a drop cloth or a plastic sheet, the chances of smudging the paint increases significantly when it comes to flipping them and getting to the other side. Handling the edges of the doors, however carefully, could spell trouble for your professional-looking finish. Take the hanging-door-trick to another level by using a pool noodle hack to separate the doors and make spray painting your cabinets a breeze. This prevents them from sliding and bumping into each other, which ups the risk of more smudges.
For this hack, use a tension rod, a clothing rack, or hang a makeshift clothesline either inside or outside, where you will be painting. Using a utility knife, carefully cut a pool noodle into pieces that can be used as spacers. Slide the foam pieces onto the clothesline or rack to space out the doors and keep them securely in place. If you can't slide the noodles onto the end, you can always make a single long cut down the length of the noodle to meet the center hole. This will allow you to slip the noodle pieces in place over the line or rack.
Warm up your cans of spray paint
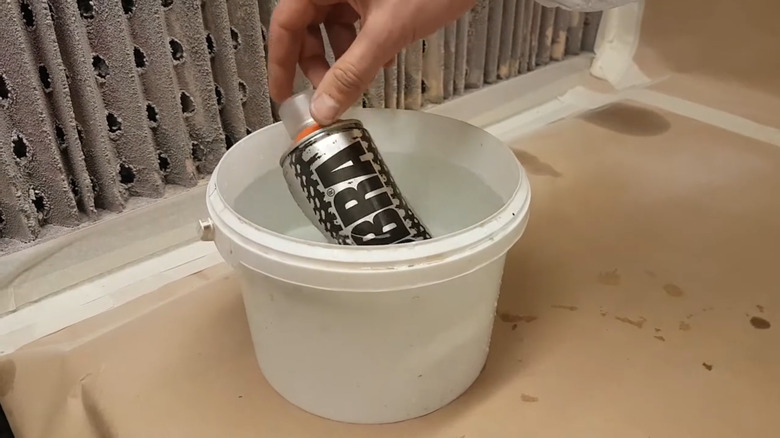
Are you going to be using spray paint cans (here's the difference between spray paint and a paint sprayer) for your project? If so, consider placing your unopened spray paint cans in warm water to increase the coverage. If you've ever taken on a spray paint project, you're probably familiar with the clink and clank of the metal mixing ball that bounces around inside. This small detail is important because you can't crack the can open and stir it up with a paint mixer, and well-mixed paint is the secret to a smooth, even finish. Paint is composed of various elements and if it's left to sit, the ingredients will eventually start to separate. Thoroughly mixing the paint can prevent this, but just shaking your can around doesn't always do the trick, especially if it's cold. Slightly warming the paint can make the consistency smoother which allows you to spray it on more evenly.
Begin by filling a bucket, sink, or basin with warm water (but not hot or boiling). Select something tall enough that you can stand the cans of paint in. A large bowl may work with some shifting, but you want to be able to warm the whole can from top to bottom and also avoid laying them down. Don't open the cans before this step as water could seep in and alter the texture of your paint. You should also shake the cans thoroughly before placing them in the water. Allow them to soak up the warmth for 10-15 minutes and shake again. You'll notice that the metal bar probably bounces a little more and this means you're ready to start spraying.
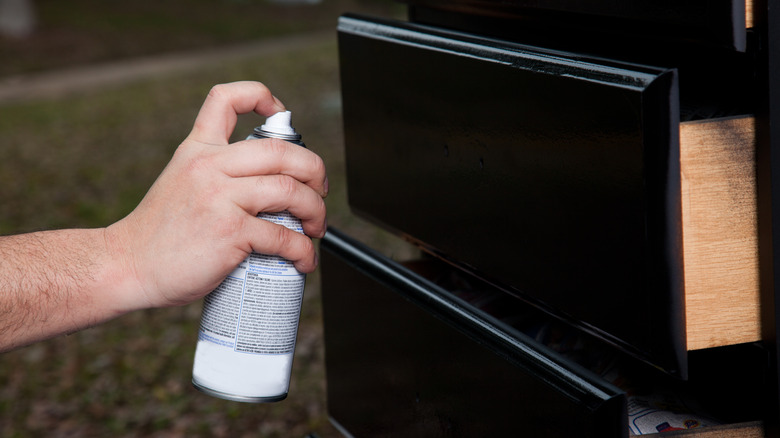
Use a WD-40 sprayer to make spraying that much smoother
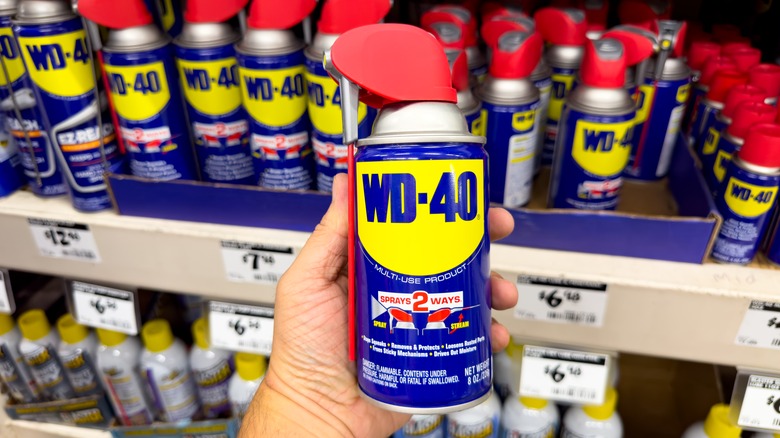
Two advantages of spray painting over using a roller is that the clean-up is far easier, and it's less strenuous to get into those nooks and crannies. However, it can take some practice to execute a professional look. One trick to try is the WD-40 hack to make spray painting easier. To save money and achieve finer lines, detach the sprayer top from a can of WD-40 that has the Smart Sprayer (a sprayer top which can swivel up and down). This hack will keep your hands clean and give you extra control in tight areas.
On your can of spray paint, twist the button that you press down to spray with in a counter-clockwise direction and detach it. Next, remove the sprayer from your WD-40 can. Be sure to rinse the attachment with soapy water to remove any excess oil. Once it's clean and dry, place it on the paint can. The attachments on top of both cans are standard and can be interchanged. Keeping the end of the nozzle about 12 inches away from the surface, move the can with control and always spray past the edge of the surface to avoid dripping paint. Remember that the extra length of the red tubes means you'll need to keep the can further away. Getting too close to the surface runs the risk of paint pooling and dripping. Also be sure to check the back of the can for brand-specific instructions. For instance, Rust-Oleum advises a distance of 10 to 16 inches for some of their enamel spray paints.
Use caulk along with painter's tape for clean lines
The effortless peeling away of painter's tape that you've probably seen on social media and TV is enough to convince anyone to DIY. However, if you've ever actually used this product, you likely know that it's not always that seamless. If the tape is not applied properly those clean lines can often turn into a smudged, jagged mess. The trouble is that the wet paint can seep under the edge of the tape and if that happens you can say goodbye to your clean lines. Sealing your painter's tape is a viral hack that combines a simple swipe of caulk with painter's tape and the result is a crisp clean line every single time.
Apply your painter's tape or masking tape as normal, along the edges of your project where the desire is a super straight, clean line. Next, purchase a tube of All Purpose Acrylic Latex Caulk (available on Amazon for $7.99), or at any home improvement store. Wear a rubber glove to protect your hands and apply a thin line of caulk along the edge of the tape. Using the pad of your finger, smooth the caulk out to seal the edge of the tape. Wipe away any spots of excess caulk and allow it to dry for about 20 minutes before applying your paint over top of the caulk and tape. When the paint is dry, peel away the tape and be amazed.
Use liquid masking tape when spray painting cabinets with glass doors
Painter's tape with caulk is a no-brainer when it comes to clean lines on walls and cabinets, but for doors with glass, liquid masking tape is another excellent option. Panels of glass usually involve smaller wood details and lots of nooks and crannies, which can be a pain to navigate with a brush and still be precise. Spray painting these details makes the job go infinitely faster; however, as you probably expect there can be a ton of overspray. Taping off all these corners and edges can be a time-consuming form of torture, which is why using a liquid masking tape is the ultimate hack for painting glass cabinets.
Mask and peel products are applied directly to the glass, painted over, and then effortlessly peeled away. The trick is to apply a generous coat to the surface, don't use a light hand in this case. A product such as Liquid Mask & Peel (available at The Home Depot for $29.97) can be applied with a paintbrush. Cover the whole surface, right up to the edges, and allow it to thoroughly dry. Apply your spray paint to the cabinets without worrying about overspray. Once the paint is dry, carefully use a utility knife or razor blade to cut along the edges. Carefully lift the corner of the mask and peel away. You should be left with a clean glass surface and perfectly painted cabinets.
Place screws and cabinet pulls in cardboard to paint easily paint them
If you're a detail-oriented person, you may want to spray paint the screws and pulls that are a part of your cabinet hardware to ensure they match. However, placing them on any flat surface and spraying them can result in flying hardware that you'll have to chase. If the screws and handles are rolling away, it's almost guaranteed that your hands are getting covered in paint and you won't achieve a smooth finish. Instead, stick the screws and pulls through a piece of cardboard to keep them firmly in place and make the whole painting process easier.
Begin with an old sheet of cardboard and lay it on a flat surface. "Mount" your hardware onto the cardboard with the screws. Cover the exposed heads of any screws and your handles with a layer of paint and allow them to dry. This method is an extra step but small details such as this are what separates an amateur finish from a truly professional look that will impress even the most critical eyes. For the hardware, make sure you are using spray paint that is meant to adhere to metal, or a universal product, such as the Rust-Oleum Painter's Touch Ultra Cover ($6.19 on Amazon). You might also want to apply an initial coat of spray primer, especially if the paint you choose does not have an inbuilt primer. This will help prevent the top coat from peeling or chipping off of the metal hardware and screws.
Pay attention to the dot on the top of rattle cans to use every drop of paint
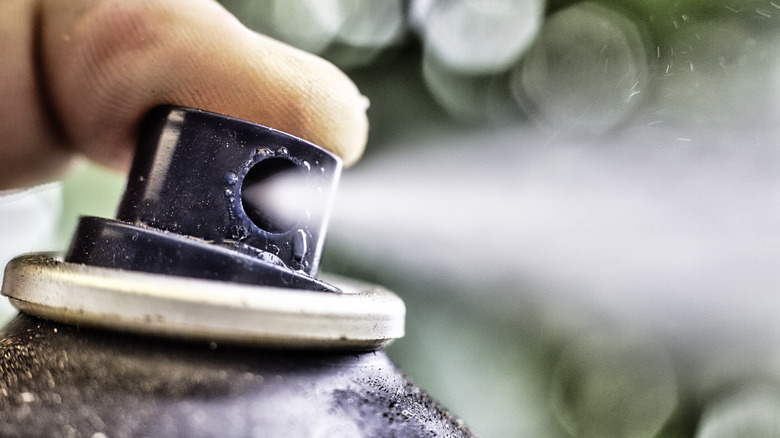
A professional job costs a lot, but DIY projects can also add up, especially if you don't do a little research or make a plan in the beginning. One hack you don't want to skip is making sure you get every last drop of paint from your cans. There's no point in tossing perfectly good paint because you can't get to it, which is why this hack can save you money and reduce some DIY frustration. Thankfully, spray paint cans are specifically designed with a safeguard in place for this exact problem.
The next time you're painting and you notice not much paint is spraying, double check the top of the can. Near the nozzle, a small white or black dot is there to indicate where the dip tube is located in the can. Spin the button or nozzle that you press on for paint and align it with the dot. This will ensure that the dip tub is lined up with the sprayer and you'll be able to get every last drop. Waste not, want not!
Use paper cups to keep your doors off the floor
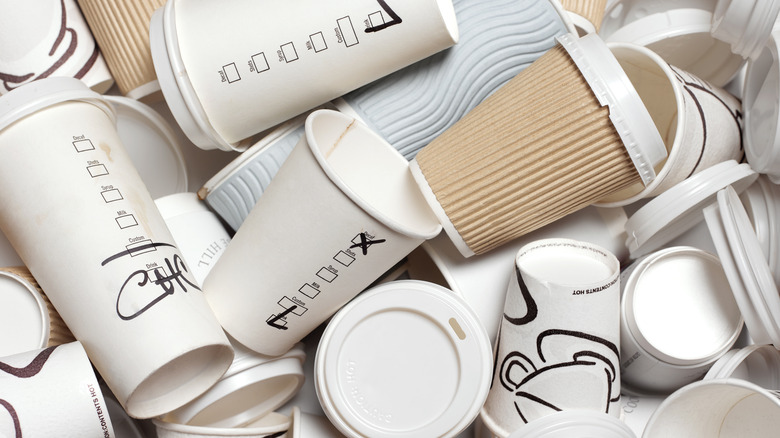
If suspending your cabinet doors with coat hangers feels a little extra to you, there is always the paper cup option. As a self-identifying DIY master, I cannot stress enough how important it is to find a suitable surface for painting your cabinet doors. In the past, I have tried a drop cloth, a plastic sheet, a dining room table, and even an old carpet that I knew we were going to toss and it's crucial to get some kind of lift under the doors. A stable surface with extra space around and underneath will make accessing the edges simple and straightforward. Keeping the doors off the ground will also prevent dirt and dust and even the fabric or plastic from sticking in the wet paint and creating imperfections.
In this situation, don't skimp on flimsy or even plastic options. Purchase or repurpose paper cups that you'd want to drink a piping hot chocolate from. On a flat surface, flip the cups upside down, so the wider end is on the bottom. Place at least three cups in a triangle formation and lay the cabinet door on top of the cups. The door should be stable and have no chance of falling or flipping over. Use a fourth cup if the doors are larger and need extra stabilization. Apply your paint and then when the surface is completely dry and not tacky, flip the door and paint the other side.