11 Seeds You Should Be Harvesting From Your Garden And Replanting
When you come across good genes, it's only natural to want to pass them along to the upcoming progeny — at least in the plant world. By saving the seeds from your favorite garden plants, you can enjoy the same flowers over and over again. Doing so has plenty of benefits. Not only does it lower your carbon footprint by making use of what's already readily available to you in your backyard, but it also cuts back on the supplies that make gardening an expensive endeavor. Rather than buying seeds or potted plants from the store, you can just harvest your own. So, to weave new from the old, we've rounded up a list of plant seeds that you can harvest from your garden without any qualms and grow just as easily, such as marigolds, cleomes, nasturtiums, and more. The following list runs the gamut of self-sowers, coneheads, beaks, and shakers that persist long enough on the plant and can be easily extracted when the wind hasn't been as kind.
However, these clouds of blossoms rest heavily on a few caveats. You must limit your seed picking to healthy plants. Unless you're prepared for experimentation, avoid hybrid cultivars since they can either produce sterile seeds or result in blooms that are less hardy and more stunted versions of the plant you harvested from. That's because since they're a hybrid, the seeds aren't as predictable and you won't be certain what kind of plant you'll get. Finally, don't forget to label and date the harvested seeds to avoid any confusion during planting.
Save arrow-shaped seeds from zinnia flowerheads
Coming in all imaginable shapes, shades, and sizes, zinnias offer gardeners a colorful, ornamental world they can never tire of. Nor, as it turns out, can the bevy of butterflies, hummingbirds, and other pollinators that thrive on their nectar. Zinnias are a major contender for seed saving because they bloom profusely, are deer resistant, and require easy upkeep. However, you must be game for a bit of effort. The best way to harvest zinnia seeds is to allow the flowers to transform into their mummified versions, aka, fried and brown to the last petal. Once they look like that, pull the heads apart, as the seeds are mostly concentrated at the base. Only keep plump, arrow-shaped seeds that are gray or black. Toss out any thin, spear-like seeds, as these likely won't grow into robust flowers. Since only about 10% of produced zinnia seeds are viable, it's best to be cautious and save extra.
Store them in paper bags and pack them away until next year in a dry place to prevent mold. Since zinnias are quick to flower, they should be seeded directly into the first ¼ inch of topsoil. This should be done as soon as the soil is over 70 degrees Fahrenheit. But if you want to kickstart the season early, sow them indoors and move the seedlings when it's approximating 60 degrees Fahrenheit.
Easily harvest marigold seeds
If you love to blanket your garden in copper and gold colors, then chances are you have been buying out your local nursery of marigold plants (Tagetes spp.) But rather than drop significant cash next year, simply harvest their seeds and plant new batches come spring! Thankfully, it's a breeze to do, too. As their growth season comes to a close, quit deadheading and allow the flowers to wither until the stalks appear shriveled and brown. Snip the heads, pinch off the dry petals, and pull out the matchstick-like seeds in the flower's base (calyx). Sift through them to remove any green or crooked seeds, as they're unlikely to germinate.
Set aside the best seeds to dry (no direct sun exposure) for two weeks and store them in a paper envelope or an airtight jar to avoid moisture. Growing marigolds is easy if you avoid common mistakes, such as sowing seeds harvested from hybrid varieties or transplanting the seedlings late into the soil (if started indoors). Instead, bury the seeds ¼ inch deep in spring when the moist soil is around 65 degrees Fahrenheit. Alternatively, start them in a potting mix around eight to 10 weeks before the last frost date and transplant them afterward.
Pick nasturtium seeds off the ground
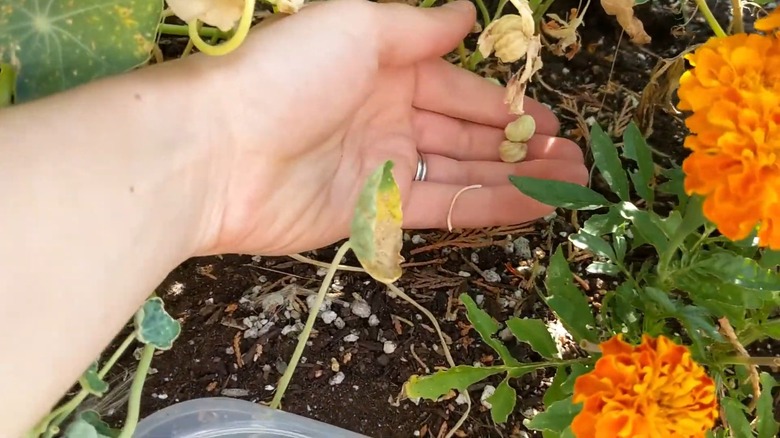
Take it from Monet — nasturtiums (Tropaeolum) are stunning ornamentals that paint your gardens in yellows and reds. But they're more than just pretty flowers. They fit right in as natural edges, groundcovers, or even edible additions to your garden. Additionally, nasturtiums are great companion plants, particularly for cucumbers, as they act as decoys for troublesome pests. Given such benefits, it's almost a no-brainer to save their seeds. Fortunately, they make it all too easy to do so by liberally dropping them on the dirt when you aren't around to pluck them in time.
To have full control over which seeds make the cut, wait until the flowers brown at the end of summer, revealing pea-sized seed pods. Skip any green pods and instead focus on collecting the brown ones, as they're ready to be harvested. Discard seeds smaller than ¼ inch (or moldy), as they're unlikely to sprout. Air dry the rest before storing them in a dry, cool place. Having soaked the nasturtium seeds overnight, sow them around 1 inch deep as spring ends or cusps into summer. Or, grow them in peat pots about six weeks before the last frost and move them to the garden later.
Pluck seeds from four o'clock flowers
Four o'clock flowers (Mirabilis jalapa) got their charming name because they open their buds every day around four o'clock and keep them open until the next morning. Not only are they a beautiful addition to your landscaping, but they ensure your yard is constantly filled with butterflies, hummers, and nocturnal pollinators who flutter around their buds. To retain the feel of a "nighttime garden," consider saving seeds, especially up north where the four o'clocks behave as annuals (and are usually winter-killed).
Fortunately, collecting the seeds entails no rocket science. Simply tug the seeds out of the tubular flowers when they begin to fade and turn brown. However, you want to be on the lookout and grab them before they fall to the ground. These round, black seeds will be hard to distinguish against healthy soil. Not to mention, if they fall, they may take on the onus of establishing themselves, especially in warmer, southern states.
Per usual, store the seeds in a cool, dry place till you're ready to sow in the spring. However, don't forget to give them a deep overnight soak right before planting so they don't have trouble sprouting. You can plop the seeds ¼ inch deep in the soil after it warms (match their timing to tomatoes if you grow them). Or start them eight weeks ahead of the last frost date.
Collect columbine seeds from split beaks
Drawing ruby-throated hummingbirds, bumblebees, and moths to the yard with their gorgeous flowers, eastern red columbine (Aquilegia canadensis) is a classic flower to grow in your garden if you want to encourage pollination. Given such benefits, it makes sense to save your columbine seeds rather than pour over new seed catalogs every year. You can harvest them between June and August; all you need to do is wait for the petals to fall, revealing the long "beaks" in the flowers. These tubular structures are what typically hold the nectar and seeds. While the beaks will drop polished black seeds on the soil of their own accord, such self-sowing isn't always helpful. A heavy summer rain can prompt them to germinate early, but they won't likely survive the heat. That's why it's best to pinch the beaks off the columbine plant and lightly squeeze them to extricate the seeds into your hand.
If you live in a windy area, and extracting the seeds outside can pose a problem, remove the flower stalks and bring them indoors. Do so only if they no longer feel sticky to the touch and make a rattling noise. Place them in a bag until they dry and split open, dropping the seeds. Before directly seedling in the fall or spring, cold stratify the seeds for three days.
Shake black-eyed Susan flowers for seeds
Ease of maintenance, a sunny display of blooms all summer, and deer resistance make black-eyed Susans (rudbeckia hirta) feel like a gardening jackpot, especially if you snagged them in a last-minute deal from the garden center. They're a boon for pollinators, attracting bees and butterflies. In addition, these cheerful blooms attract beneficial insects like hoverflies and pirate bugs, which eat garden pests like aphids and thrips. Their self-seeding nature usually means you don't have to worry about harvesting seeds, but watch out. Birds usually love these seeds and may eat them before they can scatter. In fact, black-eyed Susans are one of the best perennial plants to add to your yard to attract birds year-round.
To ensure they return next year, harvest some seeds before the finches consume them all. Look for dried coneheads with crisp, brown stems early in the fall and snip them off. If you only harvested a few, place the heads in a jar and shake to separate the seeds from the spines. Cold-stratify the seeds by refrigerating them at 40 degrees Fahrenheit for three months. In the early spring, plant the seeds ½ inch deep in moist soil. Alternatively, you can plant them in containers right after harvesting, ideally by mid-fall.
Crush coneflowers to release seeds
Native to central and eastern U.S. regions, coneflowers (Echinacea purpurea) are known for attracting hummingbirds, bees, and butterflies — although gardeners are just as enamored by their lavender dome flowers. Although coneflowers produce a generous amount of seeds, they're eagerly picked off by goldfinches, making it essential to save some seeds for replanting next year. Note that double-flowered cultivars produce fewer seeds vis-à-vis single-flowered cultivars, as their extra ring of petals often replaces some of the reproductive parts of the flower, such as the stamen. Coneflower seeds are harvested after their petals drop, the flowerheads shrink, and the attached stems turn brown anytime between late summer and mid-fall. To harvest them, clip their heads, throw them into a jar, and give them a hardy shake.
Another option is to crush the spent blooms in your hands (don't forget your gloves!) and later isolate the fleshier-looking tan or beige seeds from the chaff. Green seeds can be sun-dried to stimulate ripening. To ensure the saved seeds sprout successfully, scatter them in tiny pots (about ¼ inch deep) and leave them outside anytime during the fall to cold scarify them. Once the seedlings leaf out, transplant them into the garden beds come spring or when soil temperatures hit 65 degrees Fahrenheit. Remember that coneflowers take two years to begin flowering.
Crumble wild bergamot's pods for seeds
Native plant enthusiasts in the eastern U.S. are often drawn toward wild bergamot (Monarda fistulosa) for its ability to attract a wide range of pollinators, including monarch butterflies, bumblebees, and hummingbirds. However, bee balms, as they are also known, can become invasive under ideal conditions unless they are planted alongside equally aggressive plants, like downy sunflowers or yellow coneflowers. Because of this, to restrain their growth it's best to harvest their seeds.
Pick the ripe seedheads from summer to early fall,when the flowers die back and turn a crunchy brown. Crush the pods to release the small tan seeds and leave them to dry for a week or so. Place the seeds in Ziploc-sealed bags with peat moss or moist sand. They can be refrigerated (ideally 40 degrees Fahrenheit) for around 90 days to prepare them for spring germination. However, most seed companies insist that wild bergamot seeds can do without stratification. That being said, it likes to be planted into flats in January and cultivated for 6 weeks before being transferred into small starter pots. Fast forward two months and they can be moved to their permanent, weed-free garden site.
Collect cleome seed pods
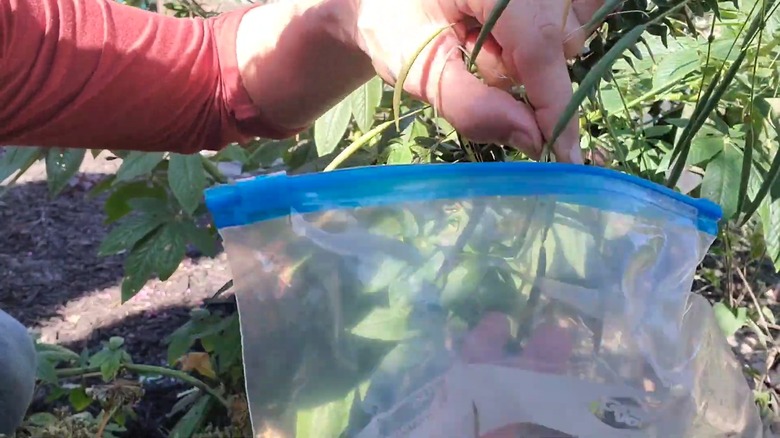
No cottage garden is truly complete without the pink cleome (Cleome hassleriana) sitting next to a white picket fence. Adding to the charm, it will attract droves of butterflies, bees, moths, and hummingbirds, who come for its nectar. Aside from its pollinator affability, the cleome is prized for maintaining summer interest when other plants are fading under the intense heat. Although it is an annual, cleome behaves like a perennial thanks to its prolific seeding — often over 14,000 seeds at a time, which can quickly become problematic if left unchecked. So, for better control (and free plants), the ornamentals must be harvested before their pods explode.
To do so, look for pea-shaped, green pods that line the stalk. When they begin yellowing, nip them off the plants and release the seeds in a plastic bag. Remember, certain varieties like the 'Queen' may require five days of refrigeration; others won't. Plant the seeds ¼ inch deep in the garden when soil temperatures hit 70 degrees Fahrenheit, or start the flats eight weeks ahead of frost and transplant. Don't forget to thin the beds!
Wriggle out seeds from calendula's dry flowers
Calendula, or pot marigolds (Calendula officinalis), are another easy-to-harvest, seed-bearing plant worth adding to your garden.Despite they're name, they're not related to true marigolds, but calendulas are edible flowers that'll attract bees and pollinators to your garden. They're quite attractive, too, with their dark-eyed, burgundy or orange flowers that feel right at home both in floral arrangements and in culinary creations. To keep their benefits coming, save the seeds as they mature during the fall season. Remember, calendulas produce copious amounts of seeds, so you might want to deadhead some and spare only a few stalks for the next season. This is especially important as their seeds have a limited shelf life, necessitating fresh use. So, as the flowers fade out into green, and later, brusque brown seed corrals, pinch them off. The peculiar worm-like or C-shaped bits are your seeds.
Leave the seeds out to dry for a week and seal them in airtight containers or a paper sack. When the ground is ready for work in spring, sow the saved calendula seeds around ¼ inch deep since you don't want sun exposure to play spoilsport during germination. Space the emergent plants to around 1 foot apart to prevent overcrowding and straggly growth. Another option is to grow them indoors around eight weeks before the forecasted last seasonal frost and transplant the seedlings later.
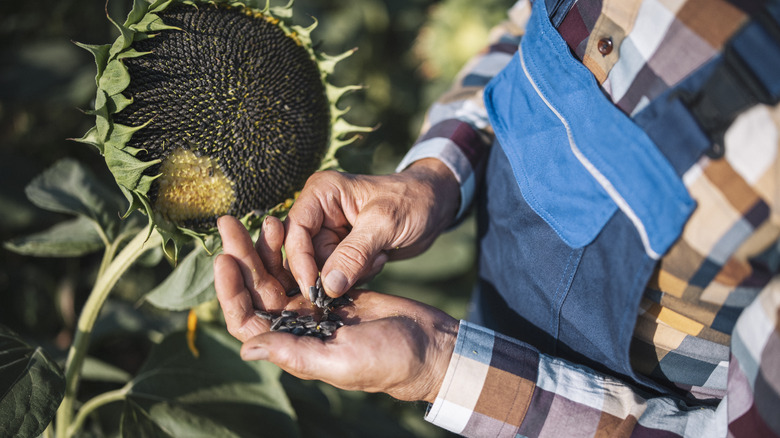
Remove sunflower seeds from their drooping heads
If you're aiming to make your own birdseed, attract a myriad of pollinators, and enjoy a prolonged summer flower display, sunflowers (Helianthus annuus) top the list. Their annual varieties are easy to grow again each year, as long as you can gather the seeds before the birds do. Fortunately, sunflowers have a high germination rate and are quite hardy, so you only need a few seeds to get started.
To know when your sunflower seeds are ready to harvest, look for droopy heads and a yellowing back-of-the-head. The seeds themselves will also turn black and develop white stripes. This usually happens in the middle of September or the beginning of October. At this stage, you can either wrap the heads with cheesecloth or paper bags to prevent birds from acting smart, or cut off the heads with a 1-foot-long stem and hang them upside down to dry. But remember, keeping the humidity at bay is crucial to prevent the seeds from becoming moldy.
Let the flowerheads dry for three weeks. Then, you can either pick the seeds off by hand or rub two flower heads together to release the seeds. Store the seeds in a Ziploc bag and refrigerate them. Around spring (or summer), disseminate the seeds in a biodegradable pot and plant them in the garden after frost and hardening off. You may also plant them directly into the soil, around 1 inch deep. Keep in mind this method will only work if your sunflowers are open pollinated (OP) varieties and not hybrids. Hybrids, which are the dominant seed cultivars on the market, often do not produce seeds that grow true to the parent plants, and can oftentimes be sterile. If your sunflowers are all uniformly 6 feet tall and don't vary in appearance or color, they're likely hybrids. If that's the case, it's best to just buy new seeds.