DIY A Stunning Outdoor Water Feature With A Repurposed Bowling Ball
We may receive a commission on purchases made from links.
Though it may seem tough, making your own garden water feature doesn't have to be difficult, and this DIY combines the aesthetic of a gazing ball with the tranquility of a fountain. With an old bowling ball, a plant pot, a fountain pump, some tubing, and a few other basic items, you can create a gorgeous water feature for your backyard. This is a great project for repurposing old planters and bowling balls, but if you don't have one or both of these items on-hand already, you might try checking your local thrift stores. To complete your DIY fountain, you'll also need a drill with a bit that is long enough to go all the way through the ball and wide enough for your tubing.
You can find a mini submersible fountain pump on Amazon for about $9, and 10 feet of vinyl fountain tubing is just under $4 at Home Depot, making this project rather budget-friendly. To make your water feature even more beautiful, consider decorating your bowling ball first to make it look more like a gazing ball if you don't already like the color. Additionally, decorative pebbles or glass accent gems ($1.25 at Dollar Tree) can be placed around your bowling ball to cover up the inside of your fountain and make it even more gorgeous. With this DIY, you can turn an old bowling ball into a stunning yard decor addition.
Prepping your bowling ball for your water feature
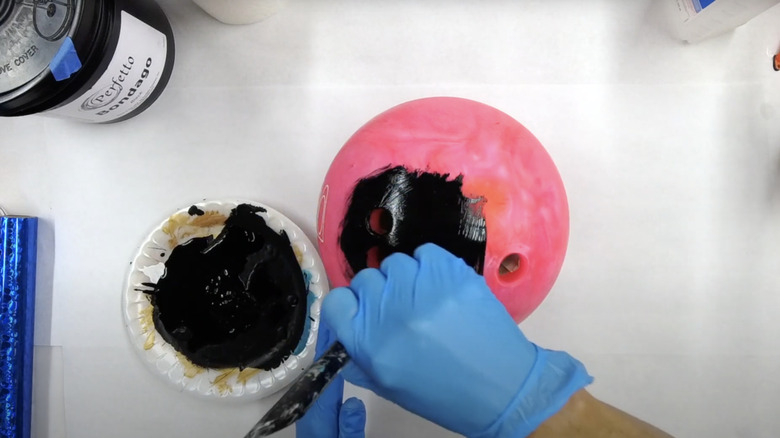
Before you start to build your fountain, you'll want to ensure that your bowling ball is exactly how you'll want it to look in the end. Since it's easier to drill your tubing hole through one of the finger openings on the ball, they can sit on the bottom. Therefore, you won't need to fill them in. Start by thoroughly cleaning the ball with rubbing alcohol to remove any grease or dirt. If you like your ball the way it is, simply coat it in a clear sealant. Otherwise, you might lightly sand the ball, which will allow paint to stick to it better, and apply a weatherproof paint before sealing it.
Once your sealant is dry and your ball is decorated how you'd like, drill through either one of the finger holes or the thumb hole in your bowling ball, going all the way through to the other side. It's crucial that this opening is wide enough so that your fountain tubing fits snugly. Test this by stringing the tube through the opening to make sure it fits and is long enough. If it's too long, you can cut off some excess but leave a little extra tubing to ensure the water flows correctly when your fountain is finished. You can always trim off more of the tubing if necessary.
DIYing a fountain with a repurposed bowling ball
Next, start constructing your fountain. Choose a pretty plant pot that's large enough for the ball to look nice in the center, and apply a silicone sealant over any drainage holes in the bottom. This will prevent your fountain water from seeping out of the pot. Set the pump into the bottom of the planter and place bricks around it to support the ball's weight. You might also remove the center of a bell drain ($15 at Home Depot) to cradle the bottom of your ball in the pot, though you'll still need to place something sturdy around it so it doesn't shift. Make sure that the electrical cord for the pump can reach out of the top of the pot and come out the back to be plugged in.
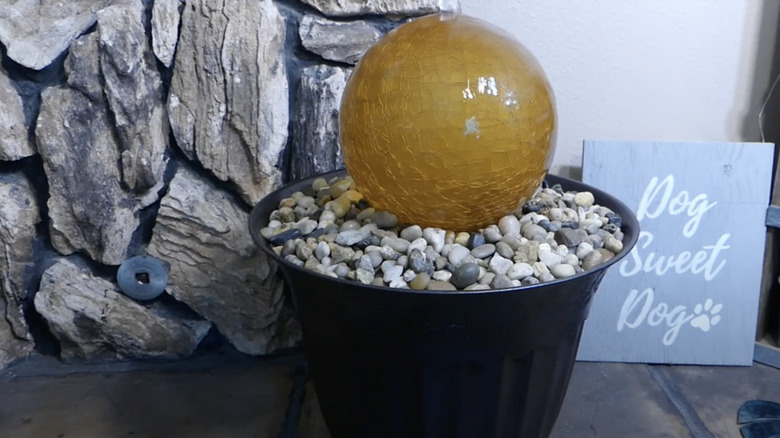
To make a support for your decorative stones, place a round metal grate on top of the bricks, then set your bowling ball on this. You could also skip the grate and place a drip tray covered in holes on the bricks instead, allowing it to hold your pebbles and the ball to sit higher up in the planter. Attach the tubing to the pump, add water to the bottom of your planter covering the pump, and then arrange your stones around the ball. Turn on your fountain to check that it works properly, trim excess tubing, and decorate around your water fountain to finish off this backyard feature.


