Give Your Oven A Fresh New Look On A Budget With This Smart Design Trick
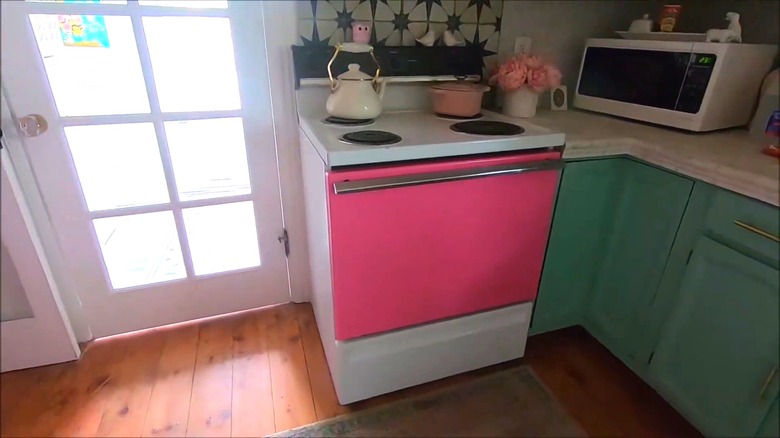
Be honest, is your oven eye-catching? Is it deserving of the front cover of the imaginary magazine Gorgeous Appliances? If not, it can be. A new trendy oven can cost thousands of dollars, but a fresh look is only a few hundred bucks away. You can snag the latest trends in appliances and give your oven a revamp on a budget thanks to vinyl wrap. There are ample patterns, colors, and textures to choose from. Make your old white oven appear like a brand new stainless steel unit or give your modern range a vibrant pop to incorporate colorful appliances into your decor.
The vinyl wrap not only looks fun, but can actually protect your appliance. Think of it as a chic shield from scratches and daily wear. In the long run, your oven can keep its new shiny look for longer. Further, it's not just the oven that benefits but feel free to decorate other appliances from the fridge to the washing machine. It will add a unique touch to your home. Best of all, when you want something new, you can easily remove the vinyl without damaging your oven.
How to wrap your oven with vinyl
To breathe new life into your kitchen with this creative peel-and-stick DIY, you'll need a hairdryer, utility knife, squeegee, and heat-resistant or automotive vinyl wrap. First, make sure your oven is off and cool. Then, remove the oven door handle and knobs. The door needs to be cleaned before the wrap can go on. If you try to apply the vinyl to a dusty or grime-covered oven door, it may not adhere evenly or smoothly. (If you're due for a deep clean, you might as well get the inside of the oven too.) Once the exterior is clean and dry, it's ready to be dressed up.
Next, measure the vinyl wrap a few inches wider than the door and cut the sheet. Remove a corner of the backing and attach the wrap to the oven door, starting at one corner. Heat the attached vinyl with the hairdryer on the highest setting to make it more pliable and continue removing the backing and sticking the wrap on. Once the entire front is covered, use the utility knife to cut out the window for the oven glass and screw openings for the handles. Then, use a squeegee to remove any air bubbles. Repeat this process for the bottom broiler or any other visible sides of the oven. After everything is wrapped and there are no air bubbles left, reattach the oven door handle and knobs. Now, the appliance is a magazine-worthy art piece.
Precautions and tips for vinyl-wrapping an oven
It might be tempting to wrap the stove top in vinyl to match the oven, but it is not a good idea. While the wrap is heat-resistant, you don't want the vinyl near open flames as it can possibly melt. Burning plastic fumes is not the goal of this DIY. You also don't want to wrap any interior parts of the oven; for safety reasons, the vinyl is only suitable for the appliance's exterior. Also, ensure you don't cover any vents, windows, and screws with the vinyl wrap. However, you can decorate the knobs to enhance your oven's style even more and update your kitchen.
To keep your appliance pristine after its makeover, avoid using an abrasive scrubber on the vinyl covering. That can damage the surface and you'll need to re-wrap the oven for it to look brand new again. You can use a soft sponge, microfiber cloth, and mild soap to clean the surface. For common oil and grease stains, spot treat the area with baking soda and water. Let the paste sit for at least 15 minutes before wiping it off with a damp cloth. Then, you can keep enjoying the fresh look of your vinyl-wrapped oven.